Using Collections
Collections in augg.io CMS
Collections allow you to manage dynamic content within your augg.io applications. This guide will walk you through creating and managing collections, defining schemas, and working with collection items.
Creating a Collection
To create a new collection:
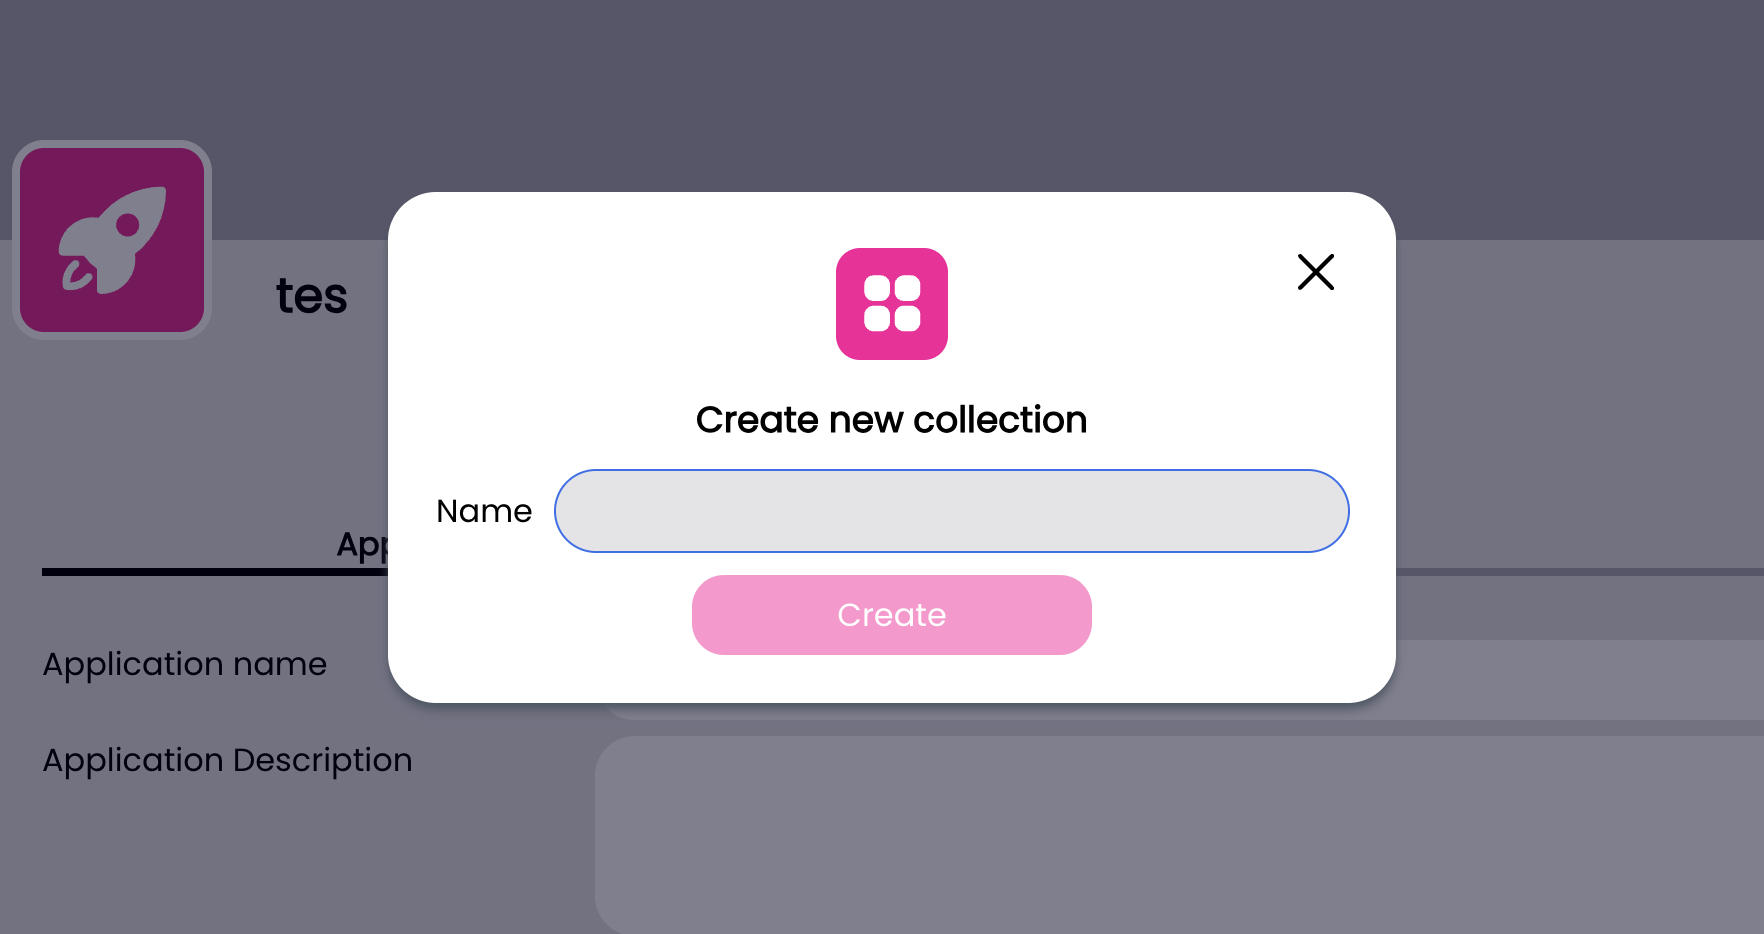
- Navigate to your application in the CMS
- Click the plus button and select “New Collection”
- Enter a name for your collection
Managing Collection Schema
The schema defines the structure of your collection items. To set up a schema:
- Select your collection from the list
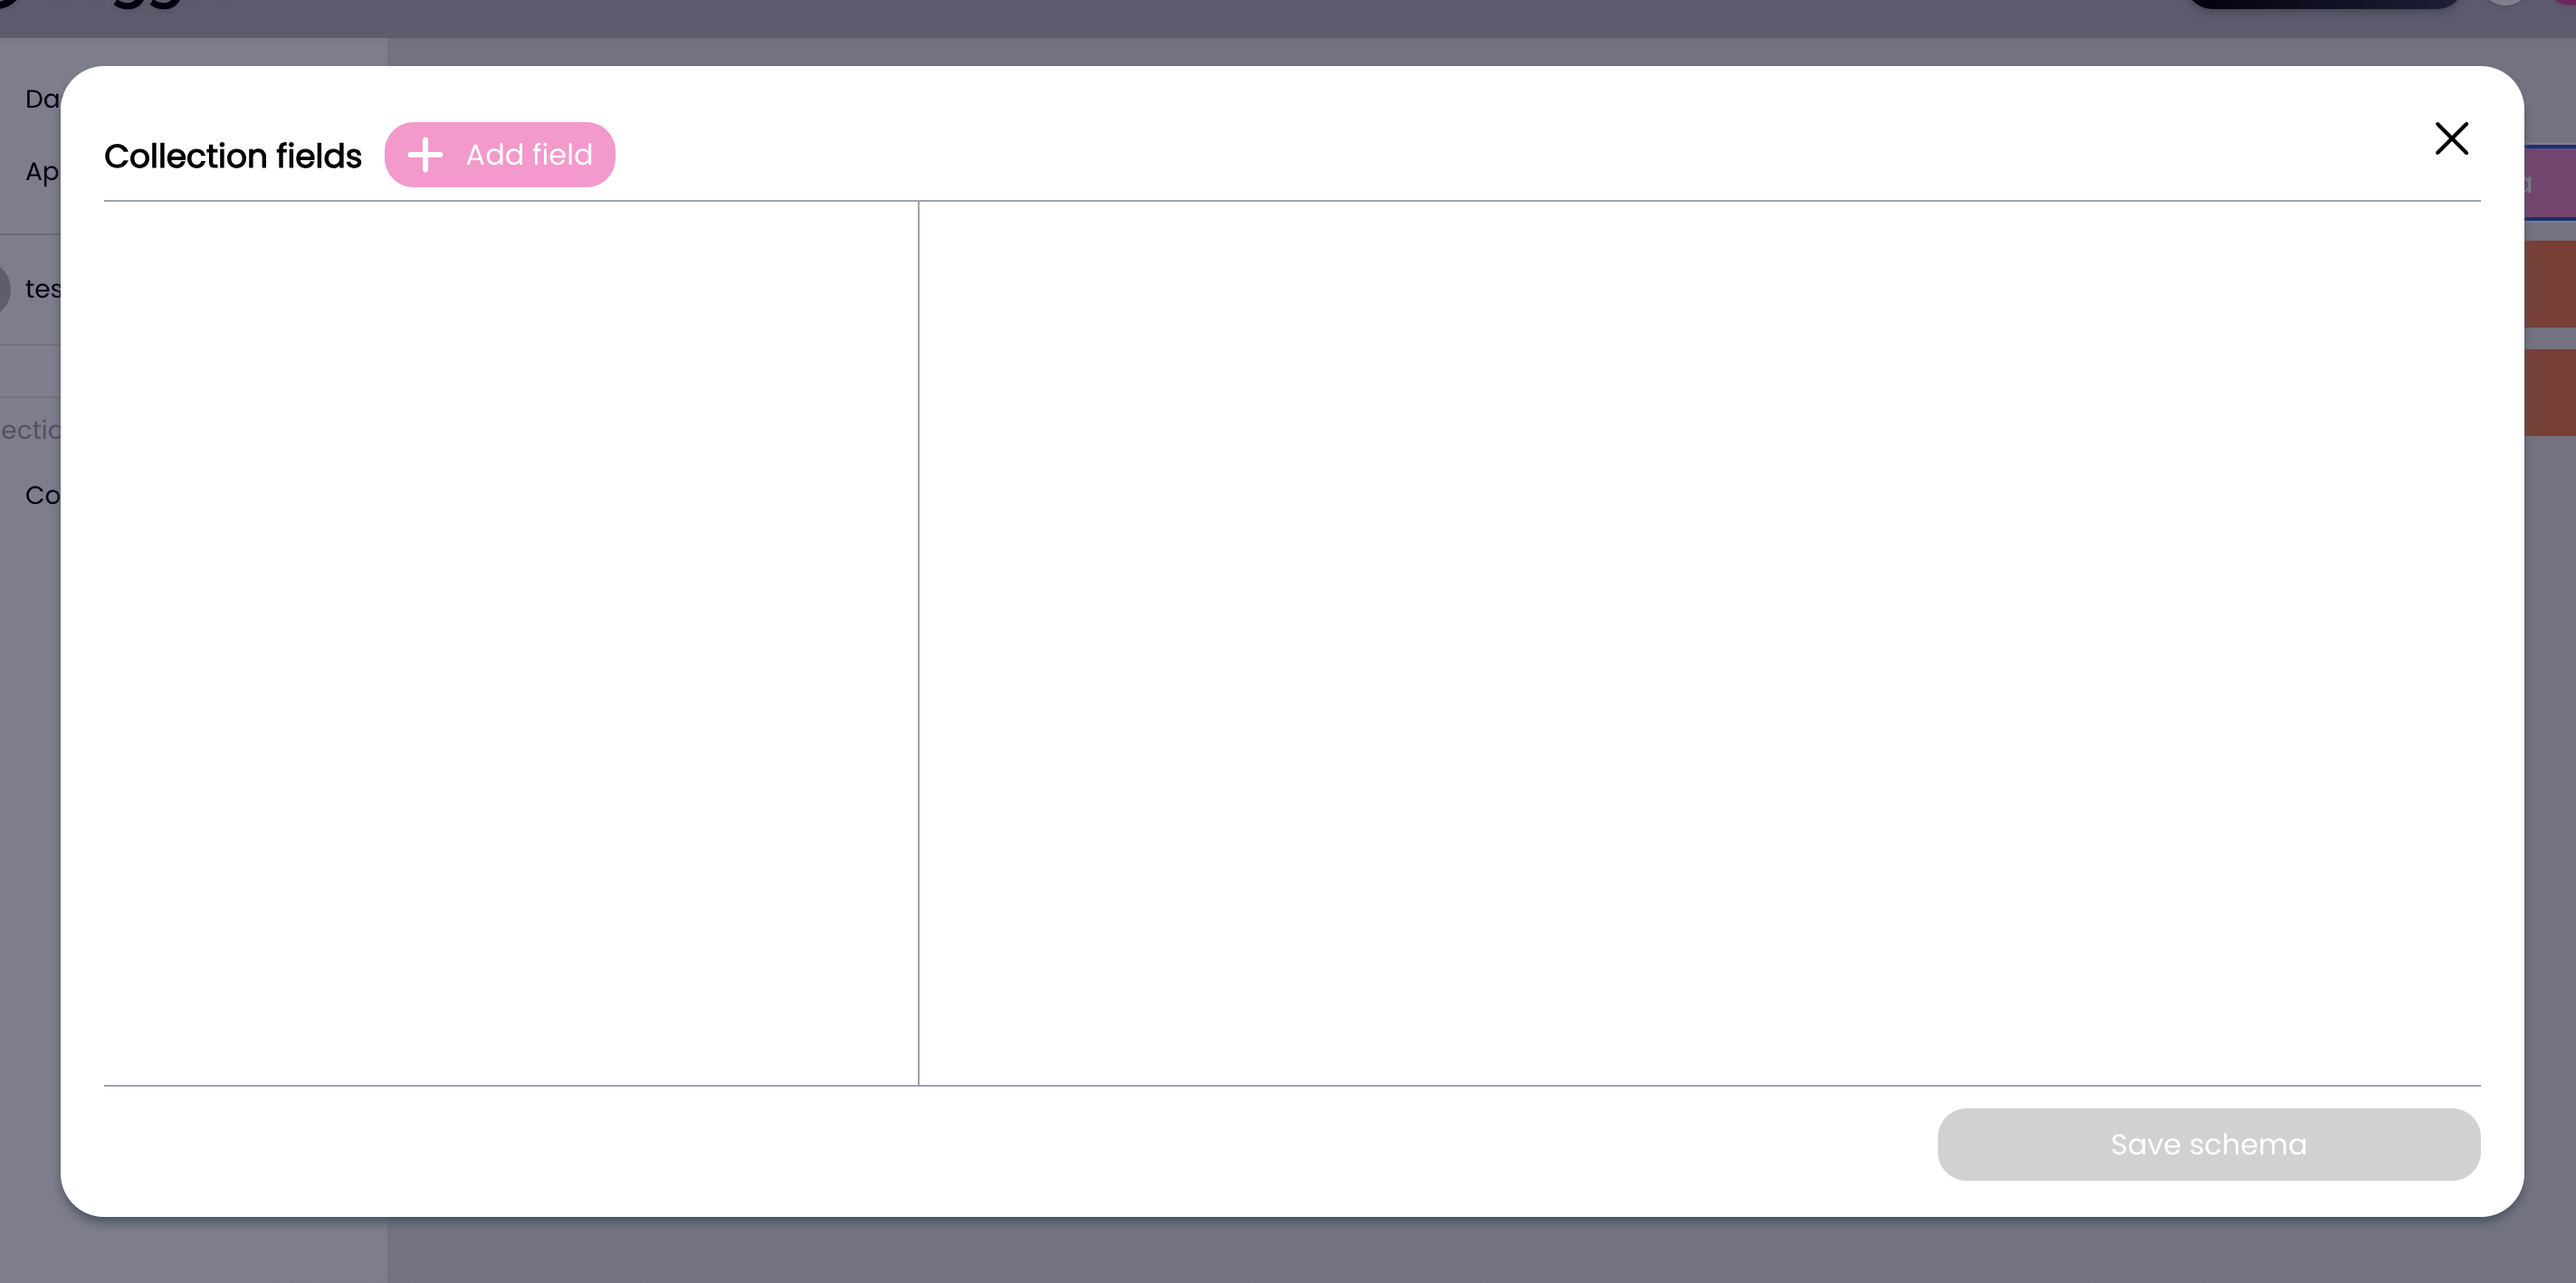
- Click “Edit Schema” to open the schema editor
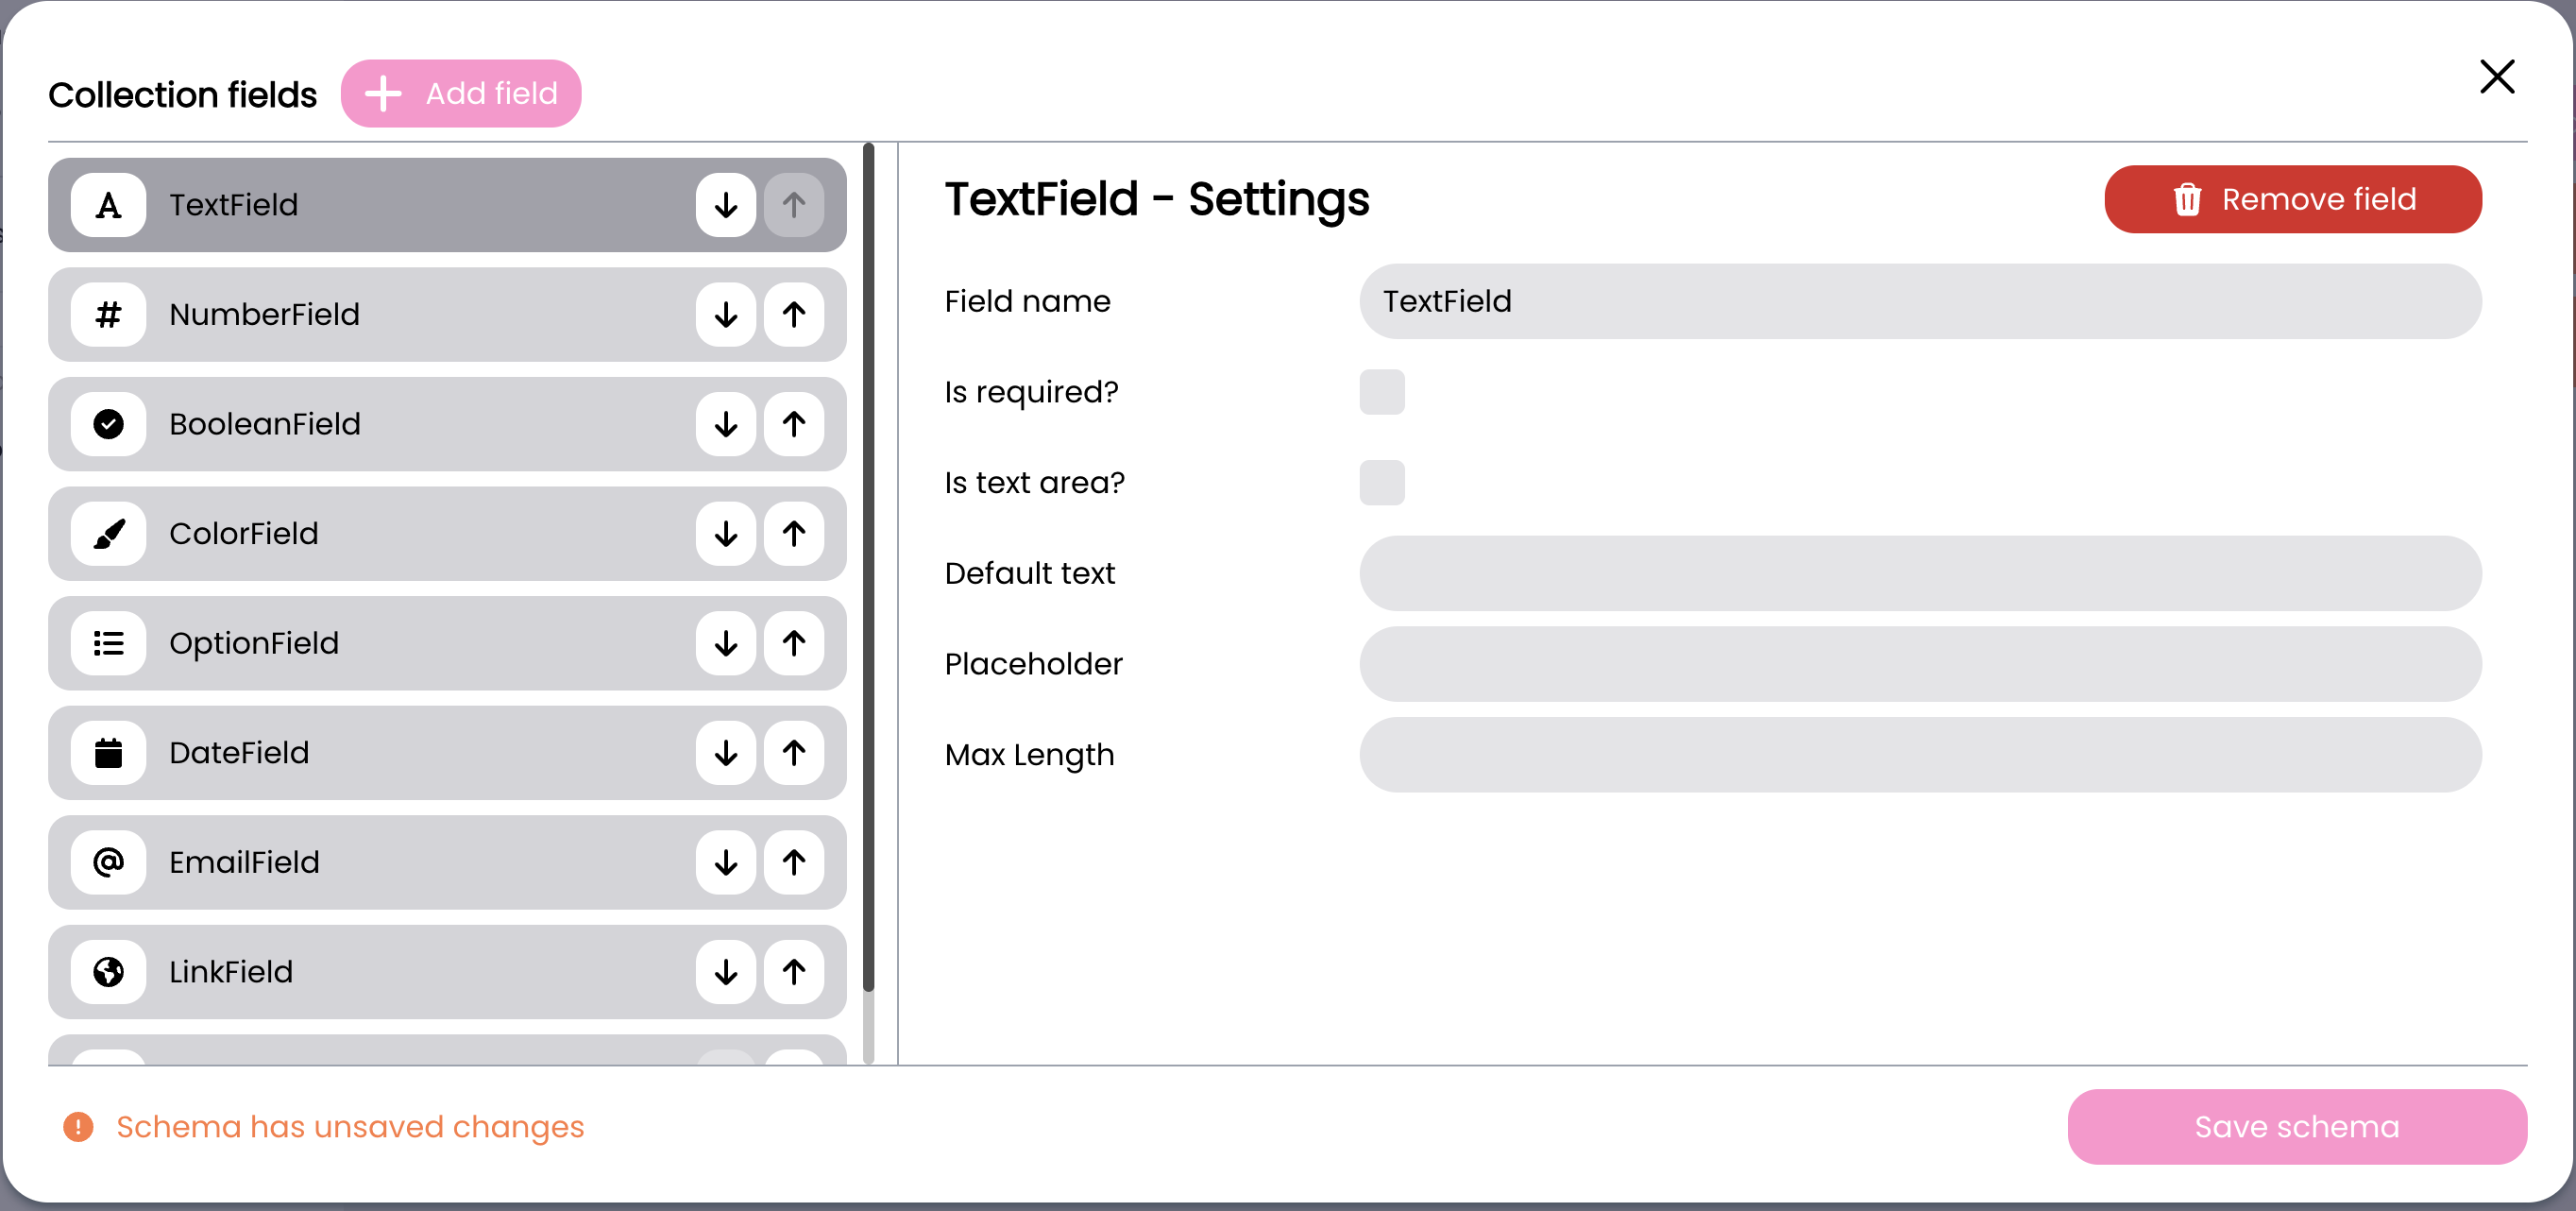
- You’ll see the schema editor interface with a “Collection fields” heading
- Click the “Add field” button to start adding fields to your schema
Adding Fields to Schema
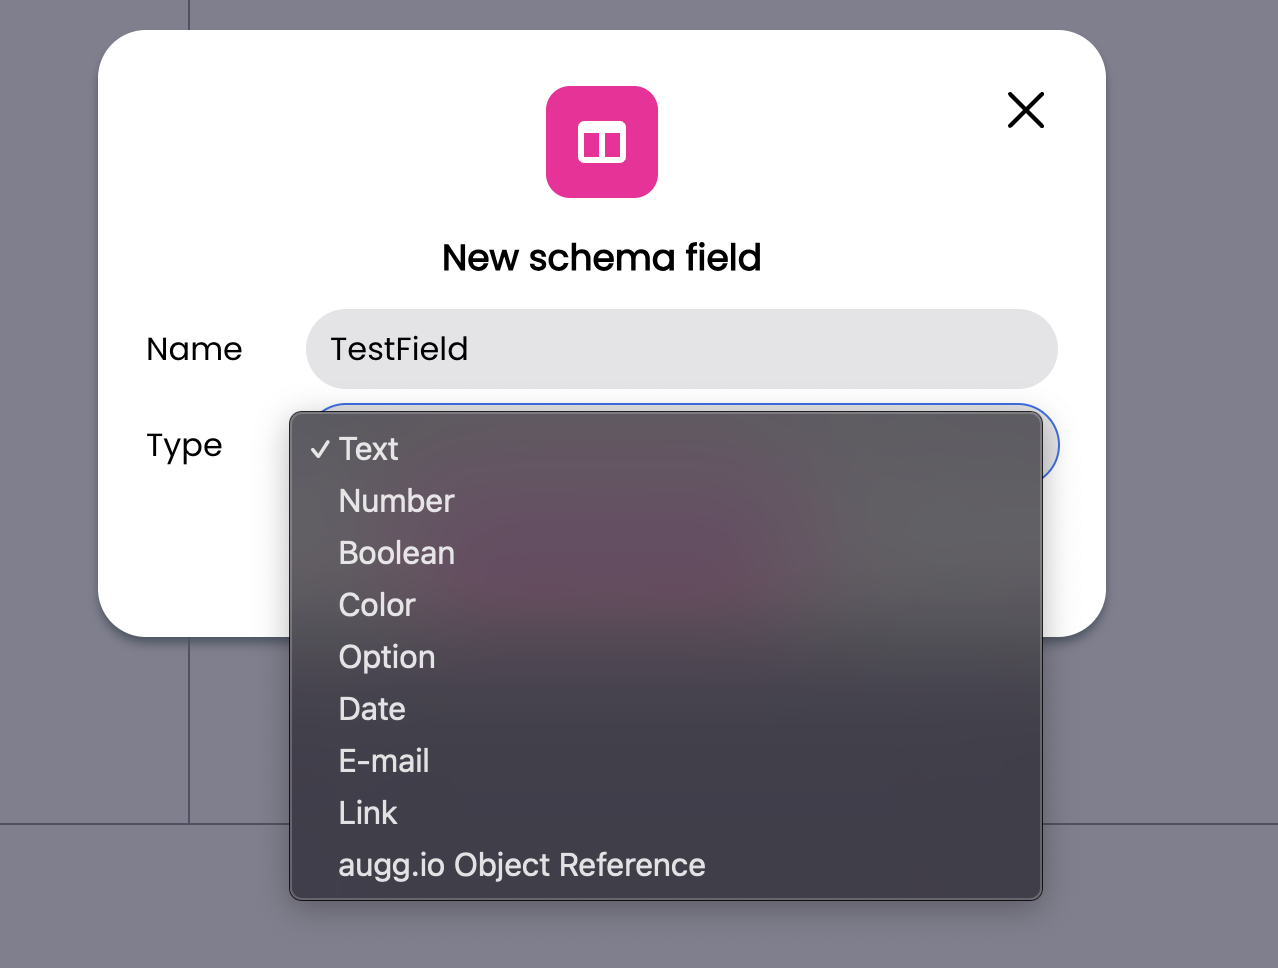
When you click the “Add field” button, a new dialog opens where you can configure your field:
- Enter a name for your field
- Select the field type from the following options:
- Text: For storing text content
- Number: For numeric values
- Boolean: For true/false values
- Color: For color selection
- Option: For predefined choices
- Date: For date values
- E-mail: For email addresses
- Link: For URL storage
- augg.io Object Reference: For linking collection row data to specific augg.io object
Field Type Details
Text Field
The Text field type provides the following configuration options:
- Field name: The identifier for your field
- Is required?: Toggle to make the field mandatory
- Is text area?: Toggle to enable multi-line text input
- Default text: Set a default value for the field
- Placeholder: Add helper text that appears when the field is empty
- Max Length: Set a character limit for the field
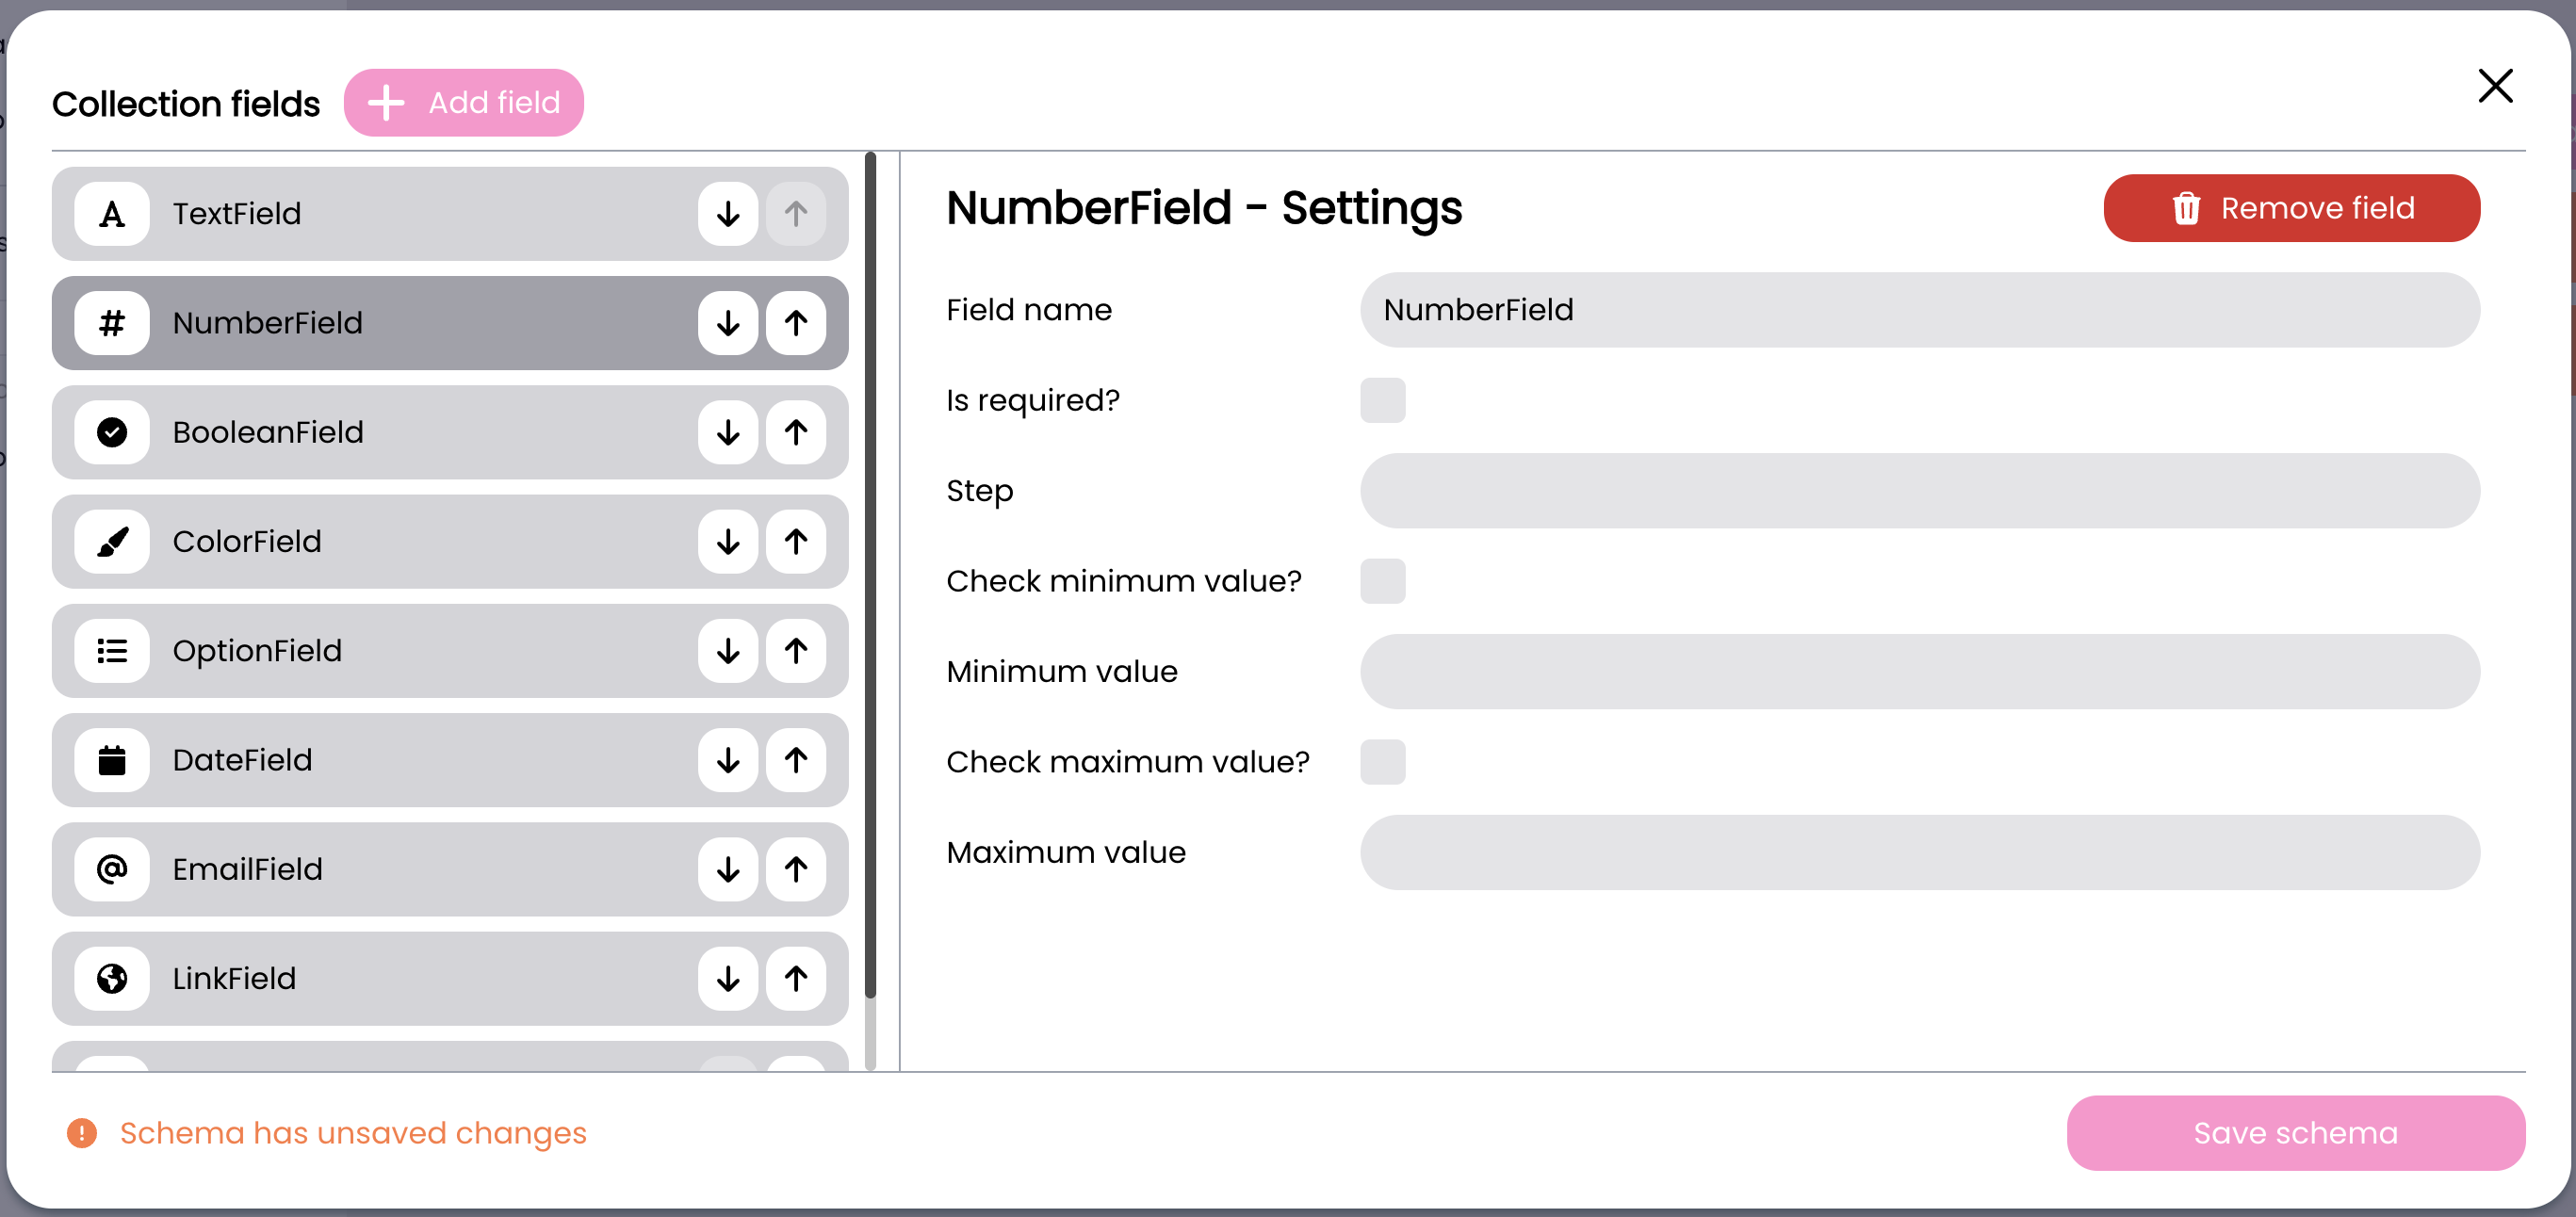
Number Field
The Number field type provides the following configuration options:
- Field name: The identifier for your field
- Is required?: Toggle to make the field mandatory
- Step: Define the increment/decrement step size
- Check minimum value?: Toggle to enable minimum value validation
- Minimum value: Set the lowest allowed value (when minimum value check is enabled)
- Check maximum value?: Toggle to enable maximum value validation
- Maximum value: Set the highest allowed value (when maximum value check is enabled)
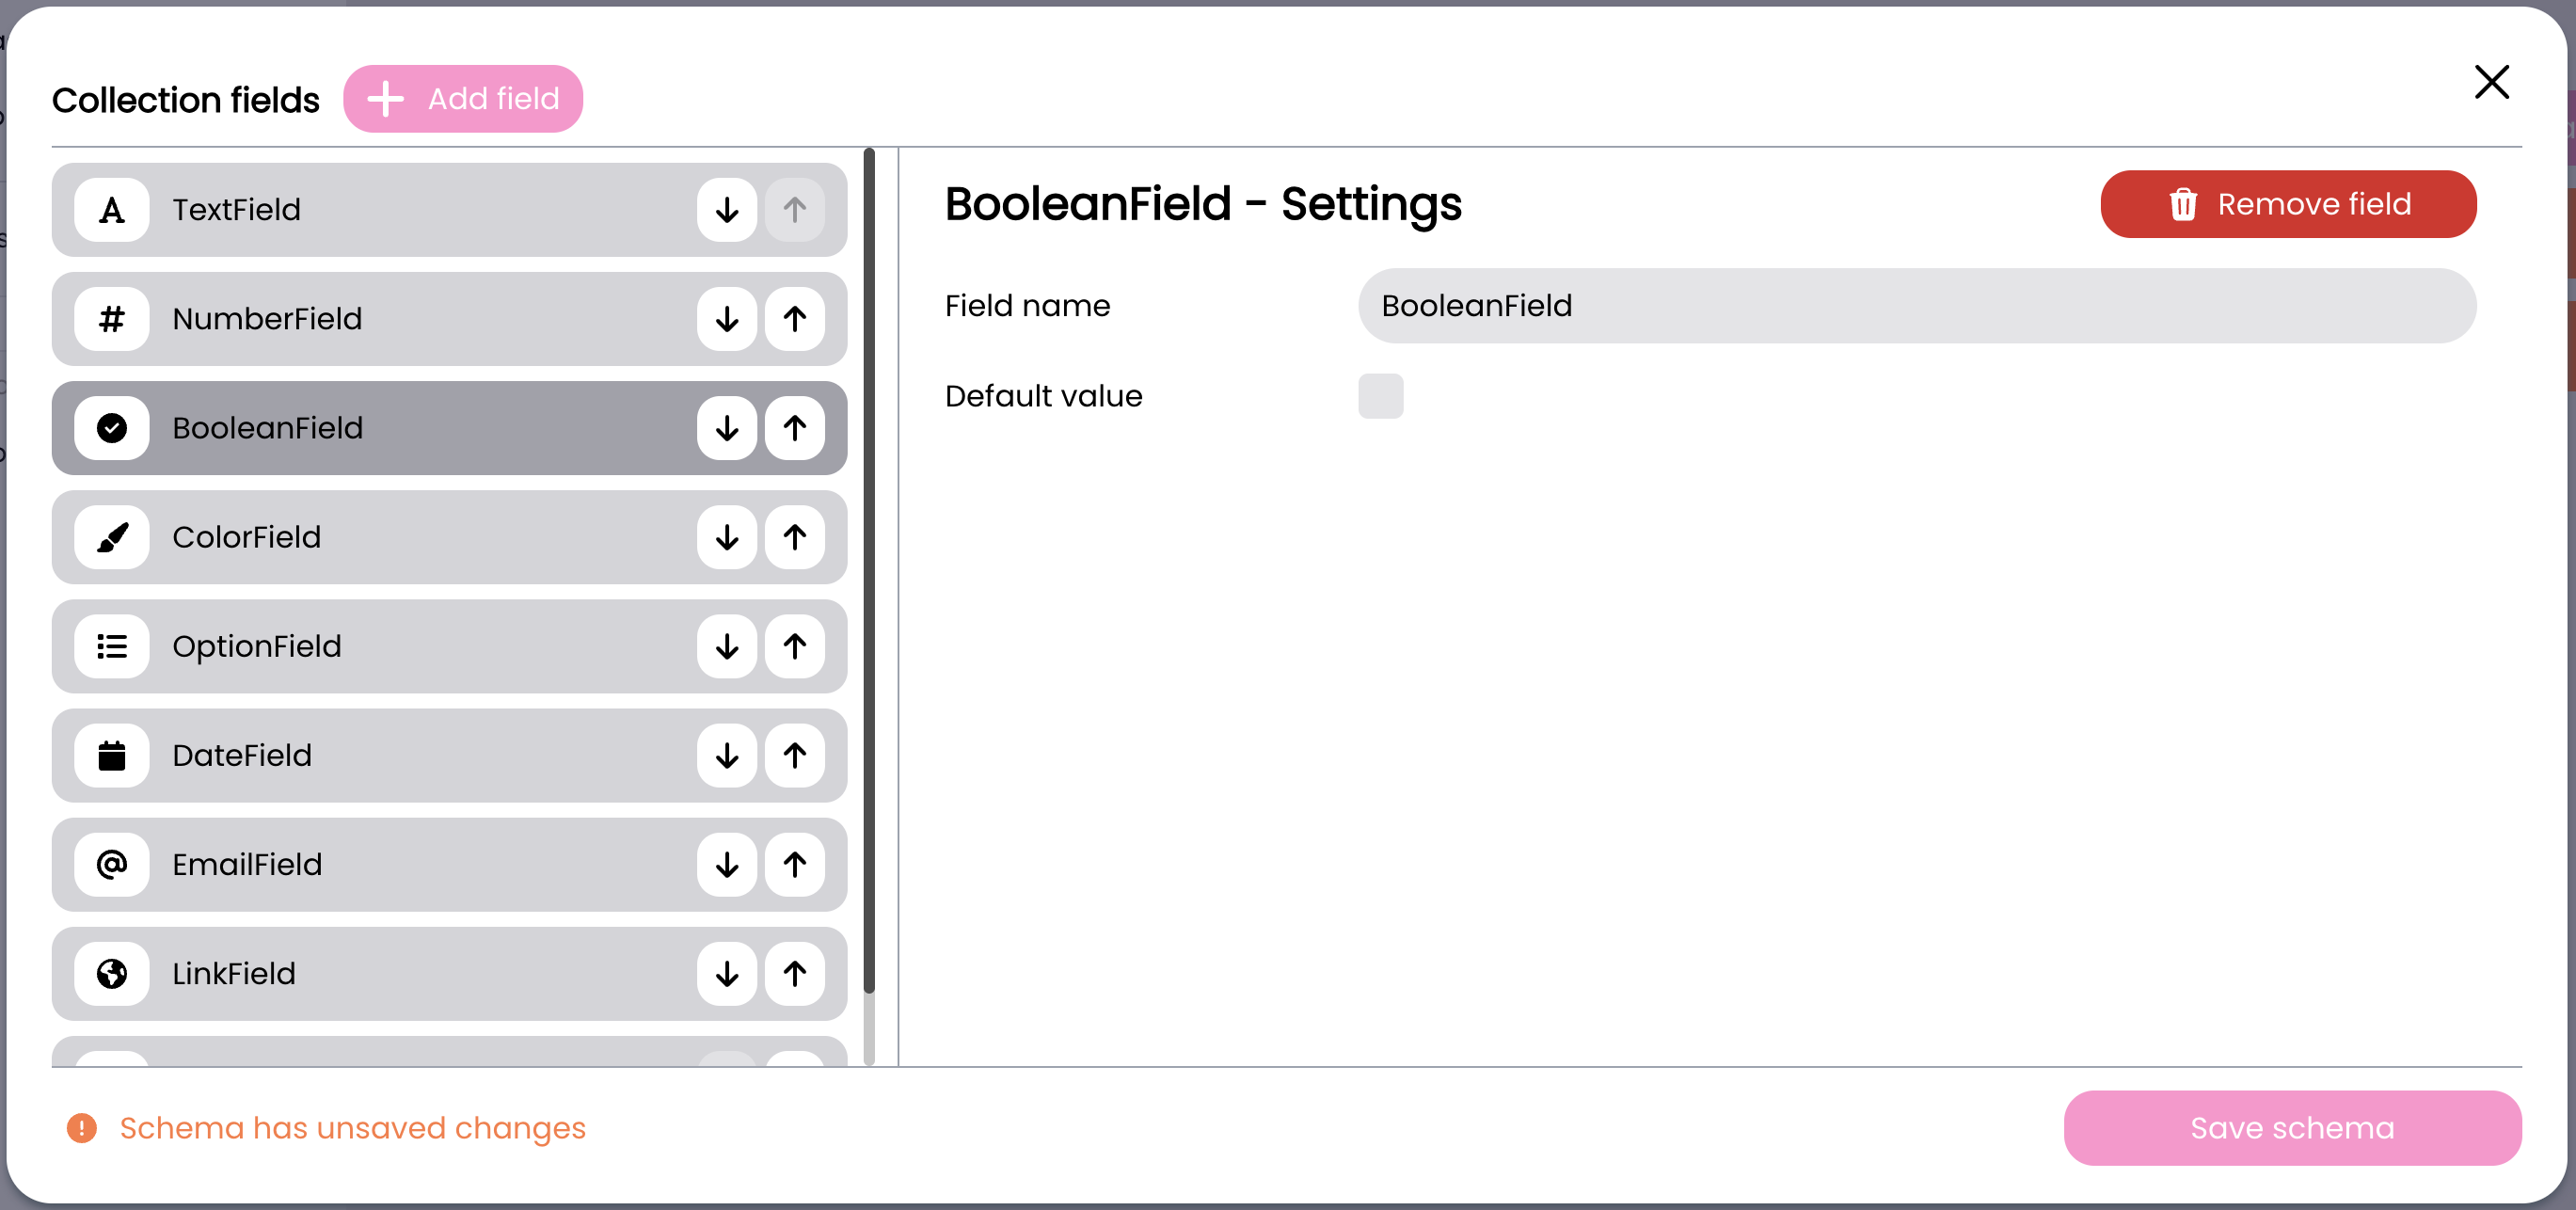
Boolean Field
The Boolean field type provides simple true/false configuration:
- Field name: The identifier for your field
- Default value: Toggle to set the default state (true/false)
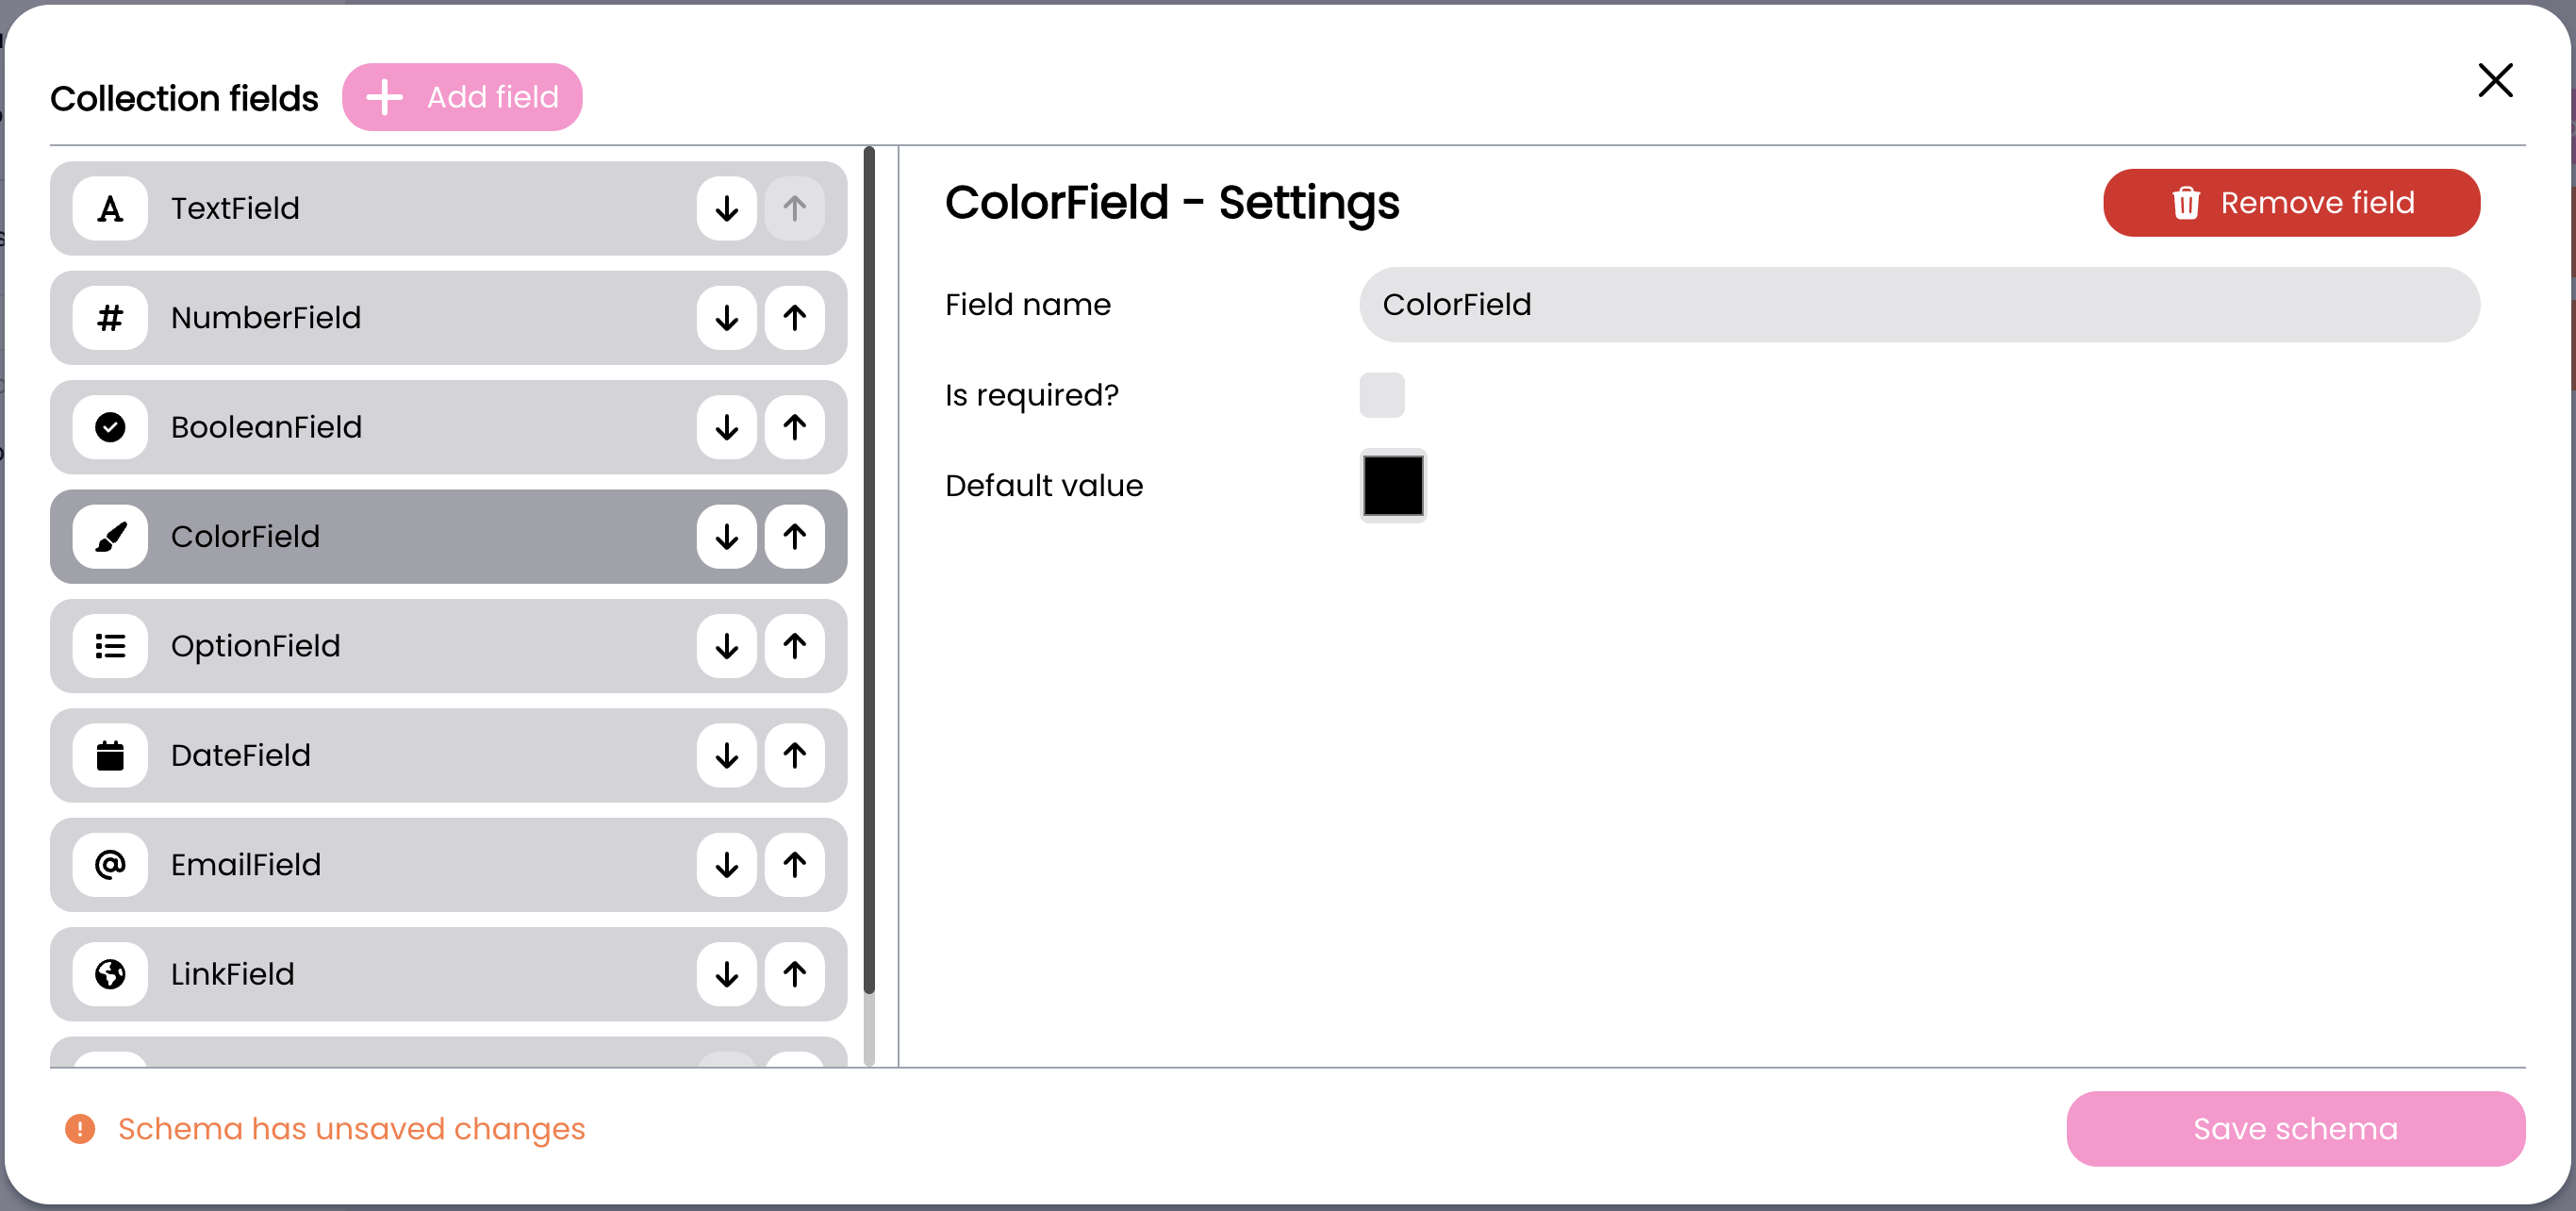
Color Field
The Color field type provides color selection configuration:
- Field name: The identifier for your field
- Is required?: Toggle to make the field mandatory
- Default value: Color picker to set the default color
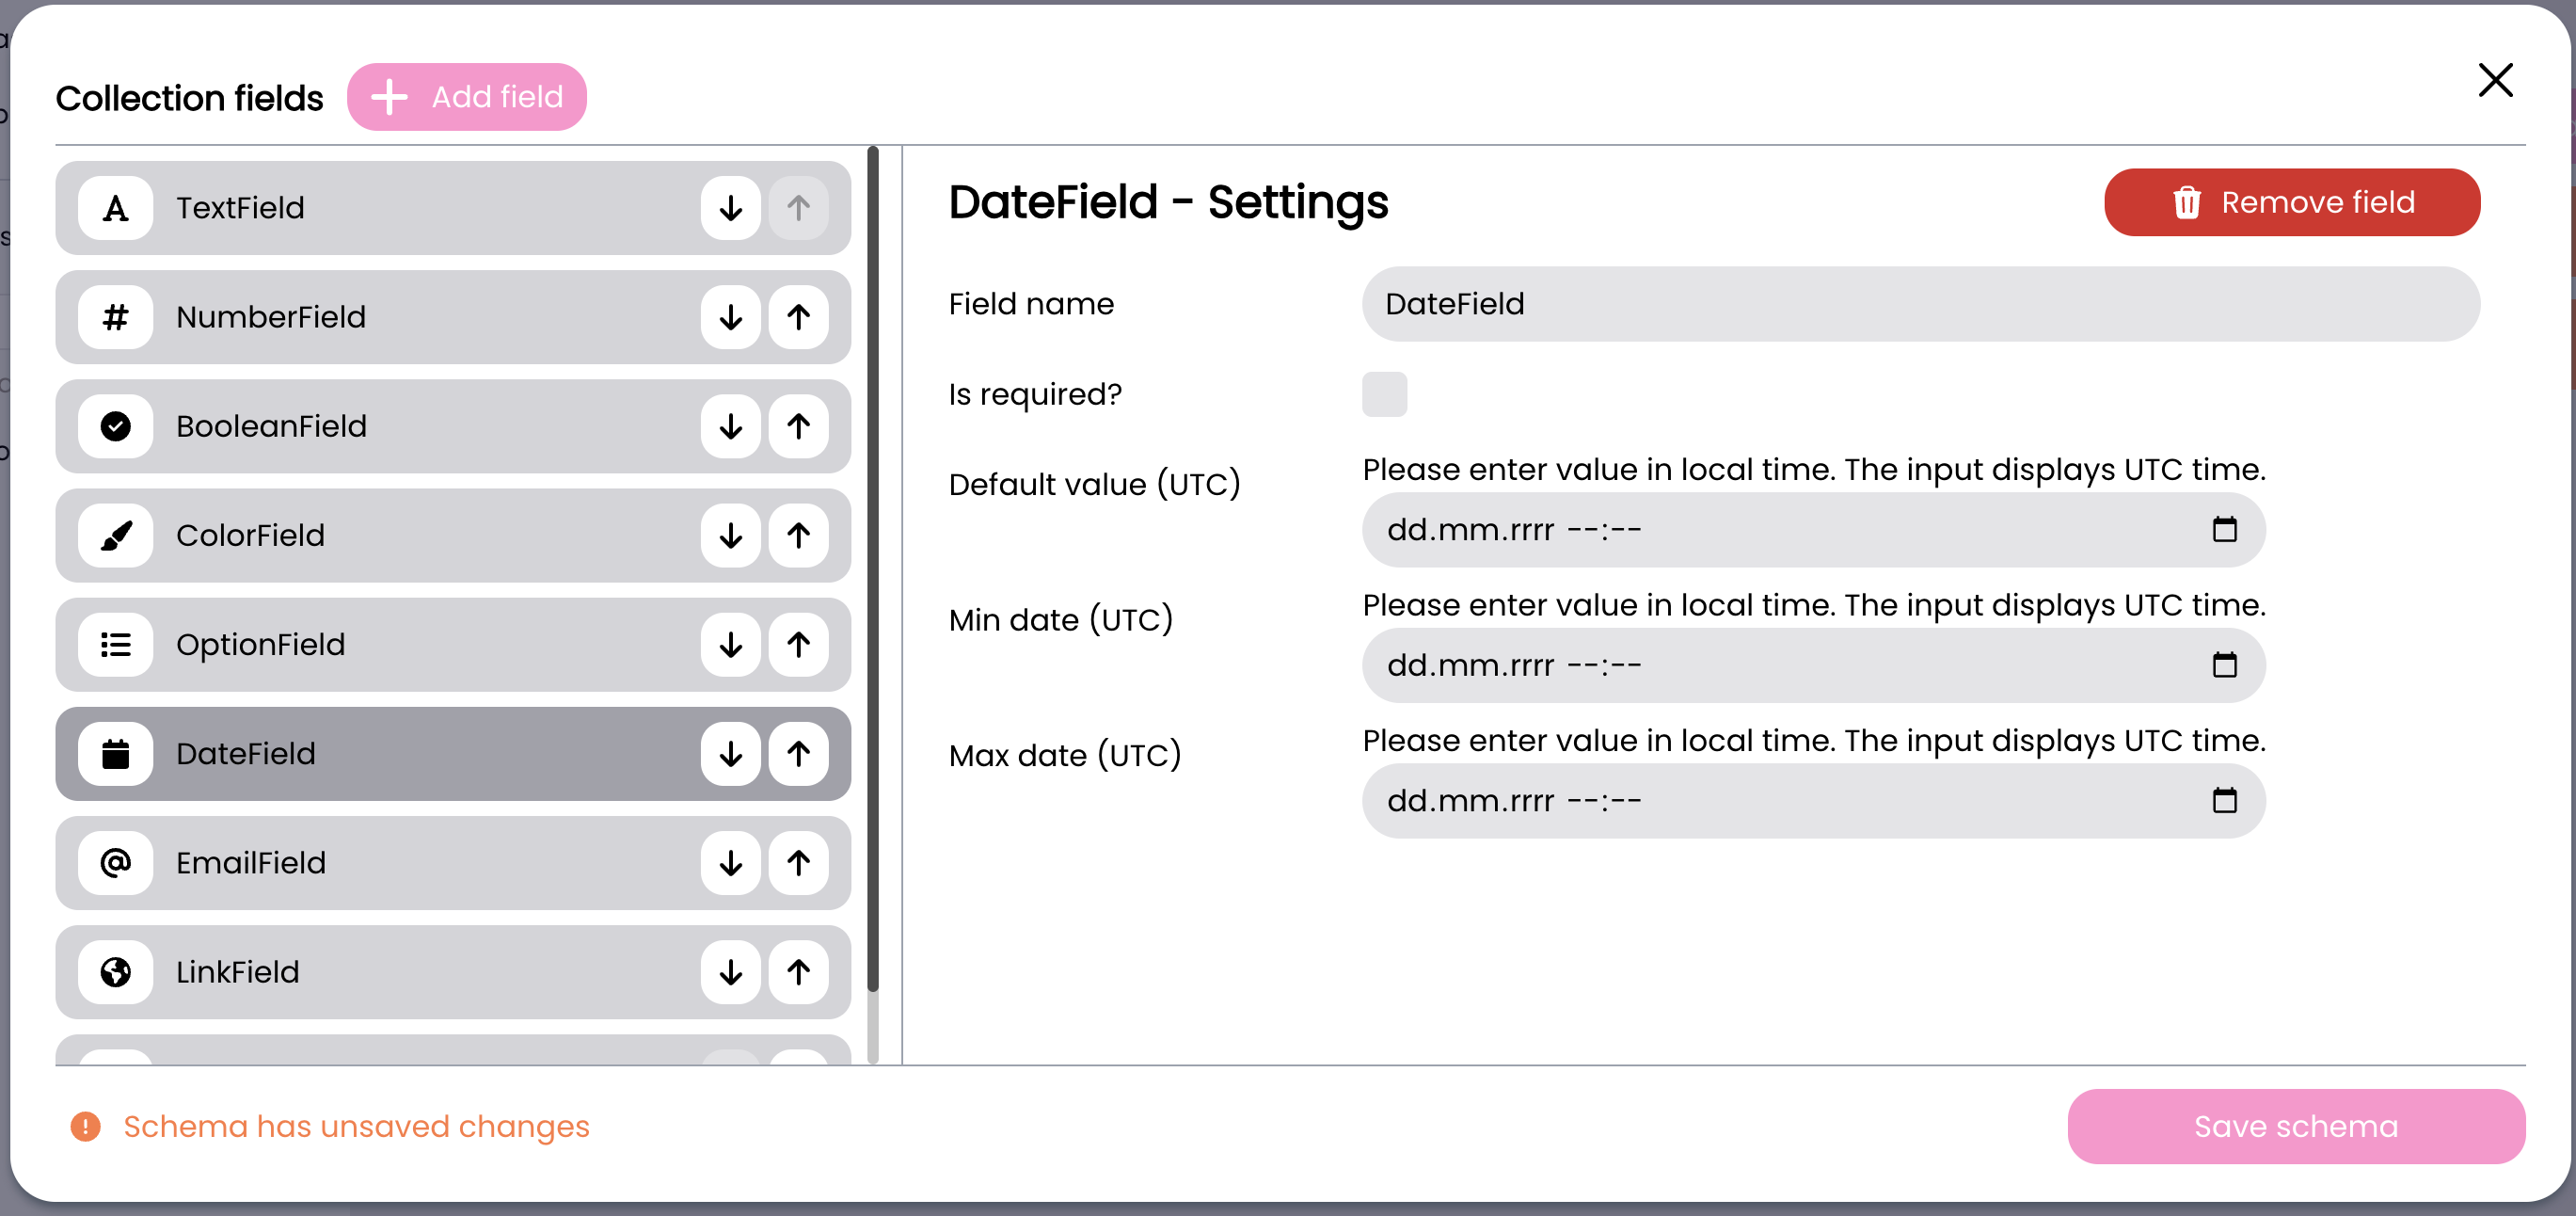
Date Field
The Date field type provides datetime configuration with UTC handling:
- Field name: The identifier for your field
- Is required?: Toggle to make the field mandatory
- Default value (UTC): Set the default date/time (input in local time, displays in UTC)
- Min date (UTC): Set the earliest allowed date/time (input in local time, displays in UTC)
- Max date (UTC): Set the latest allowed date/time (input in local time, displays in UTC) Note: All date inputs are entered in local time but are stored and displayed in UTC format.
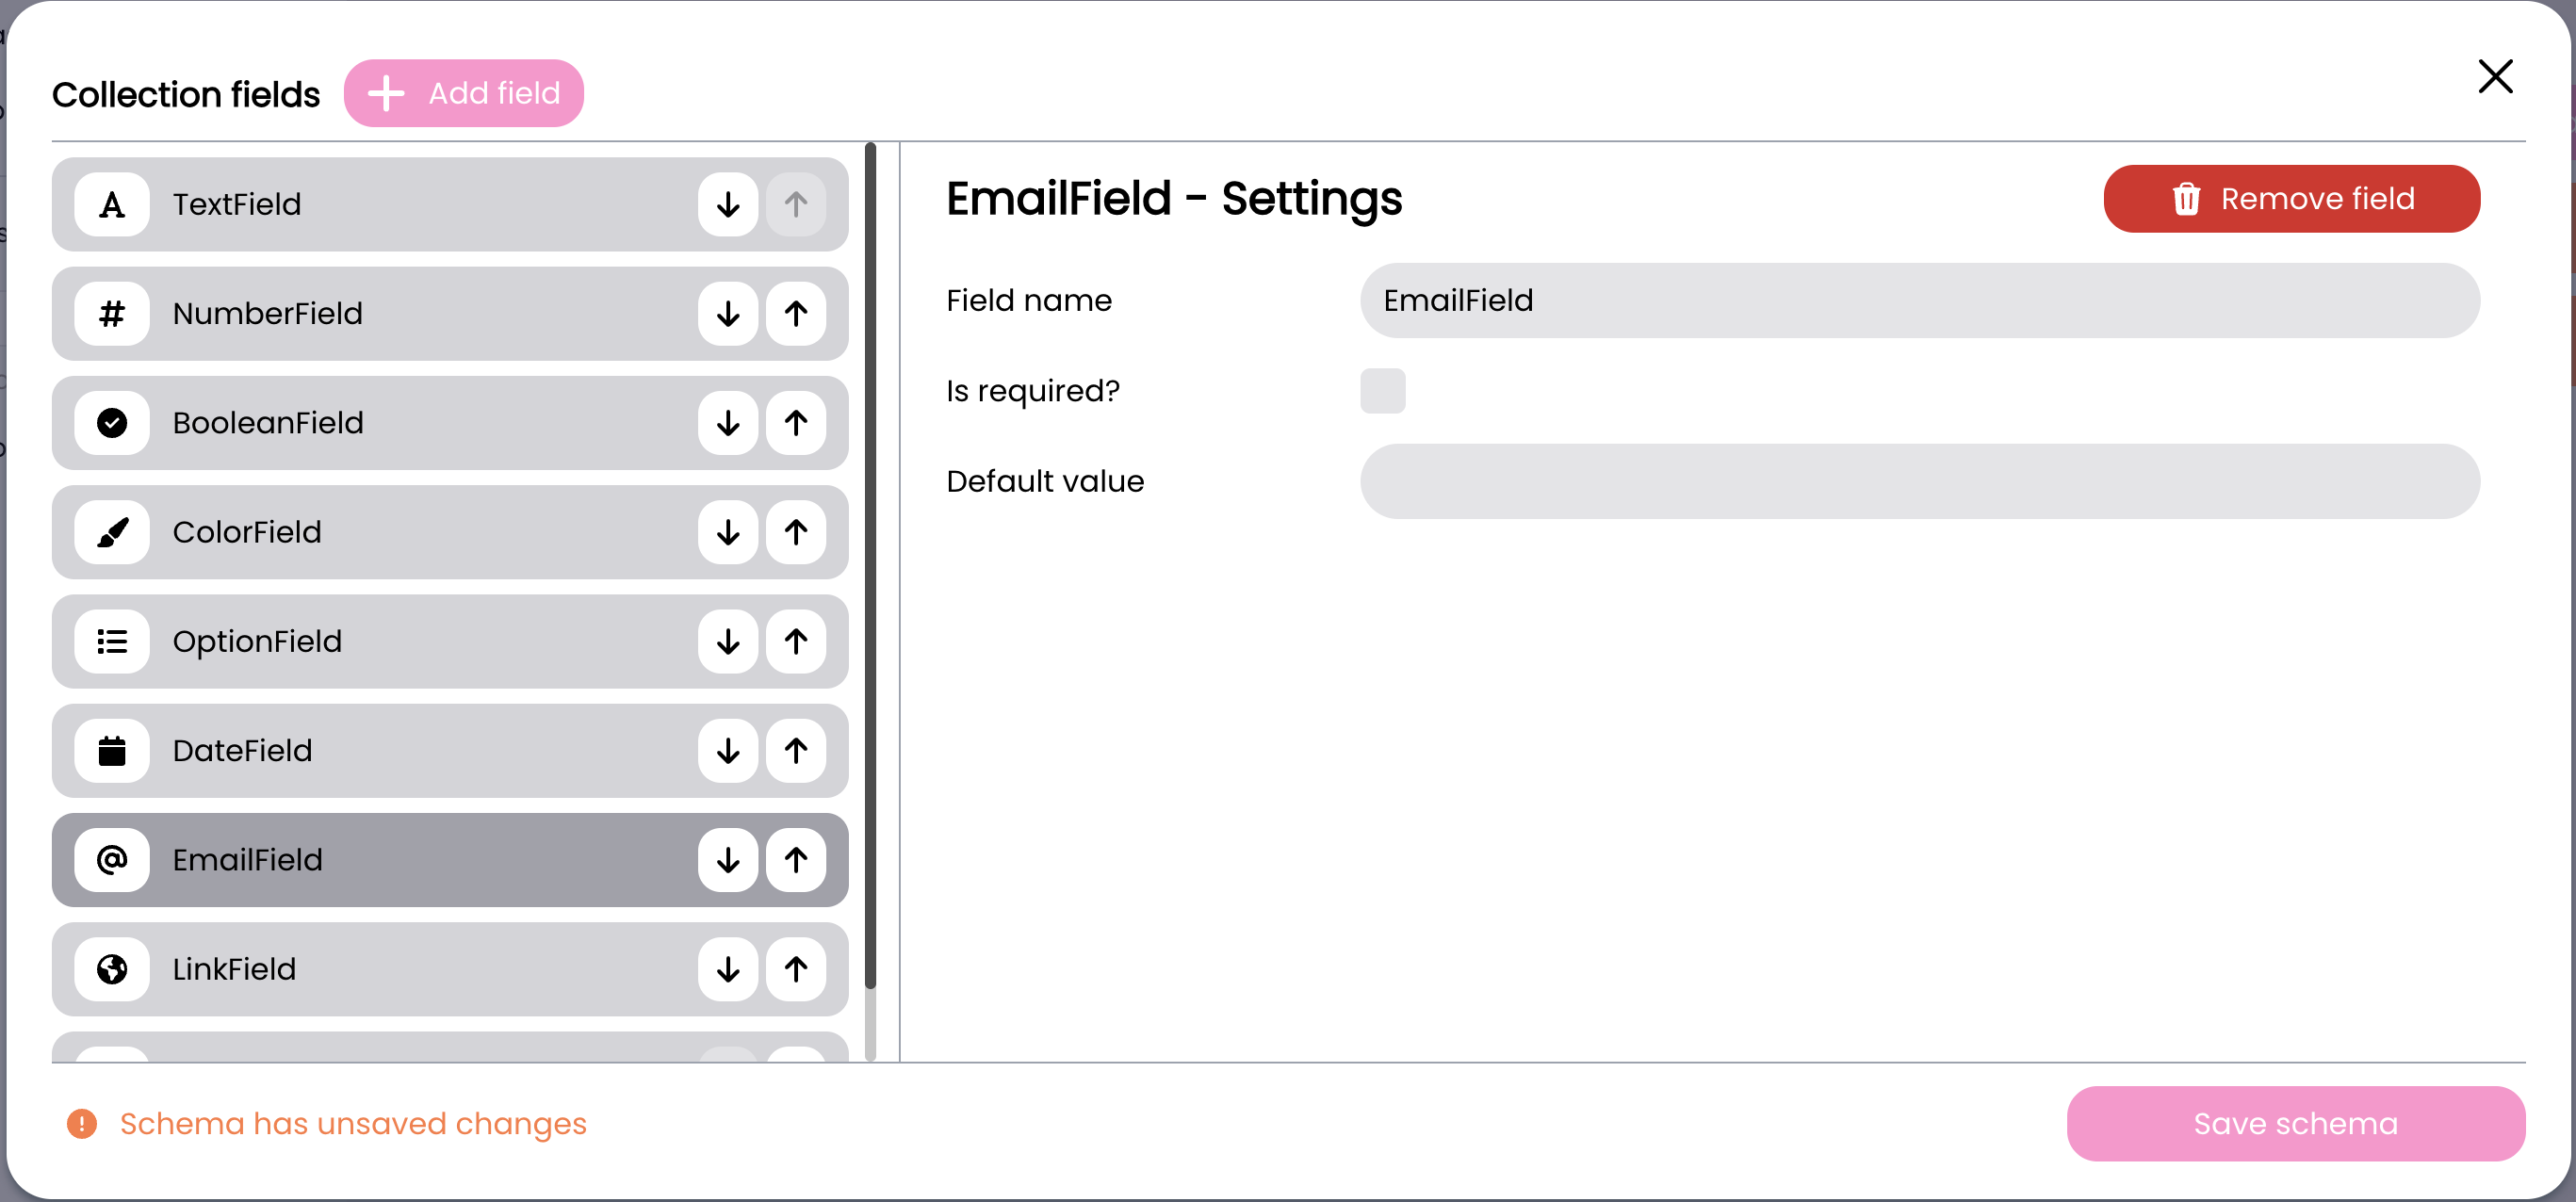
E-mail Field
The E-mail field type provides email address configuration:
- Field name: The identifier for your field
- Is required?: Toggle to make the field mandatory
- Default value: Set a default email address.
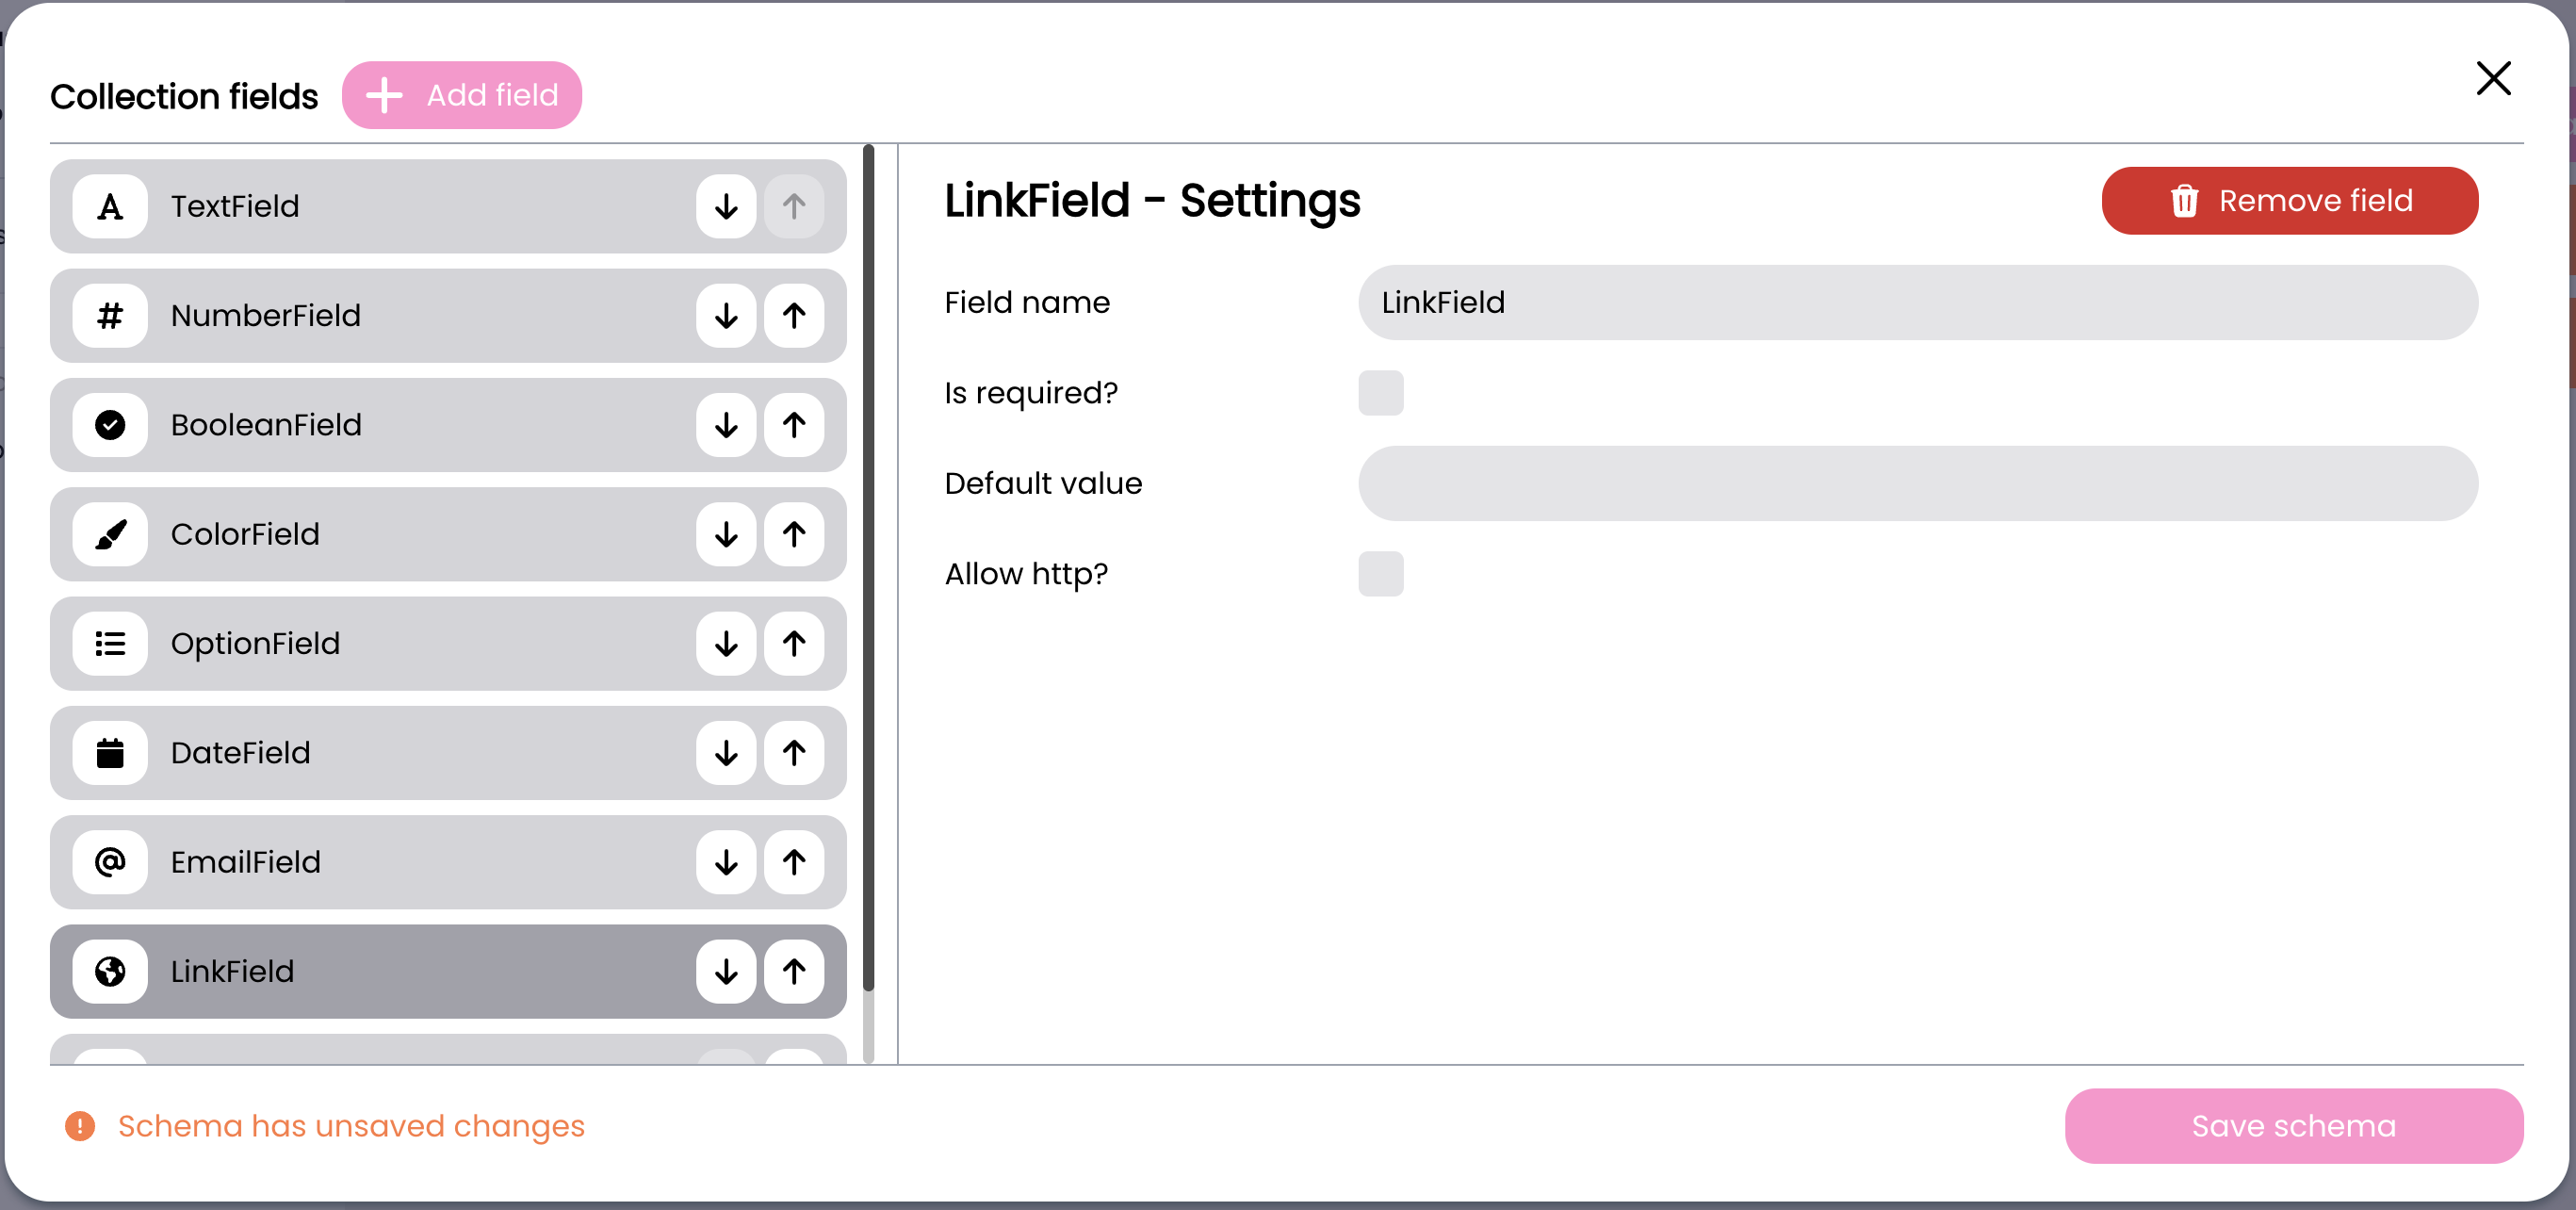
Link Field
The Link field type provides URL configuration:
- Field name: The identifier for your field
- Is required?: Toggle to make the field mandatory
- Default value: Set a default URL
- Allow http?: Toggle to allow non-https URLs (disabled by default for security)
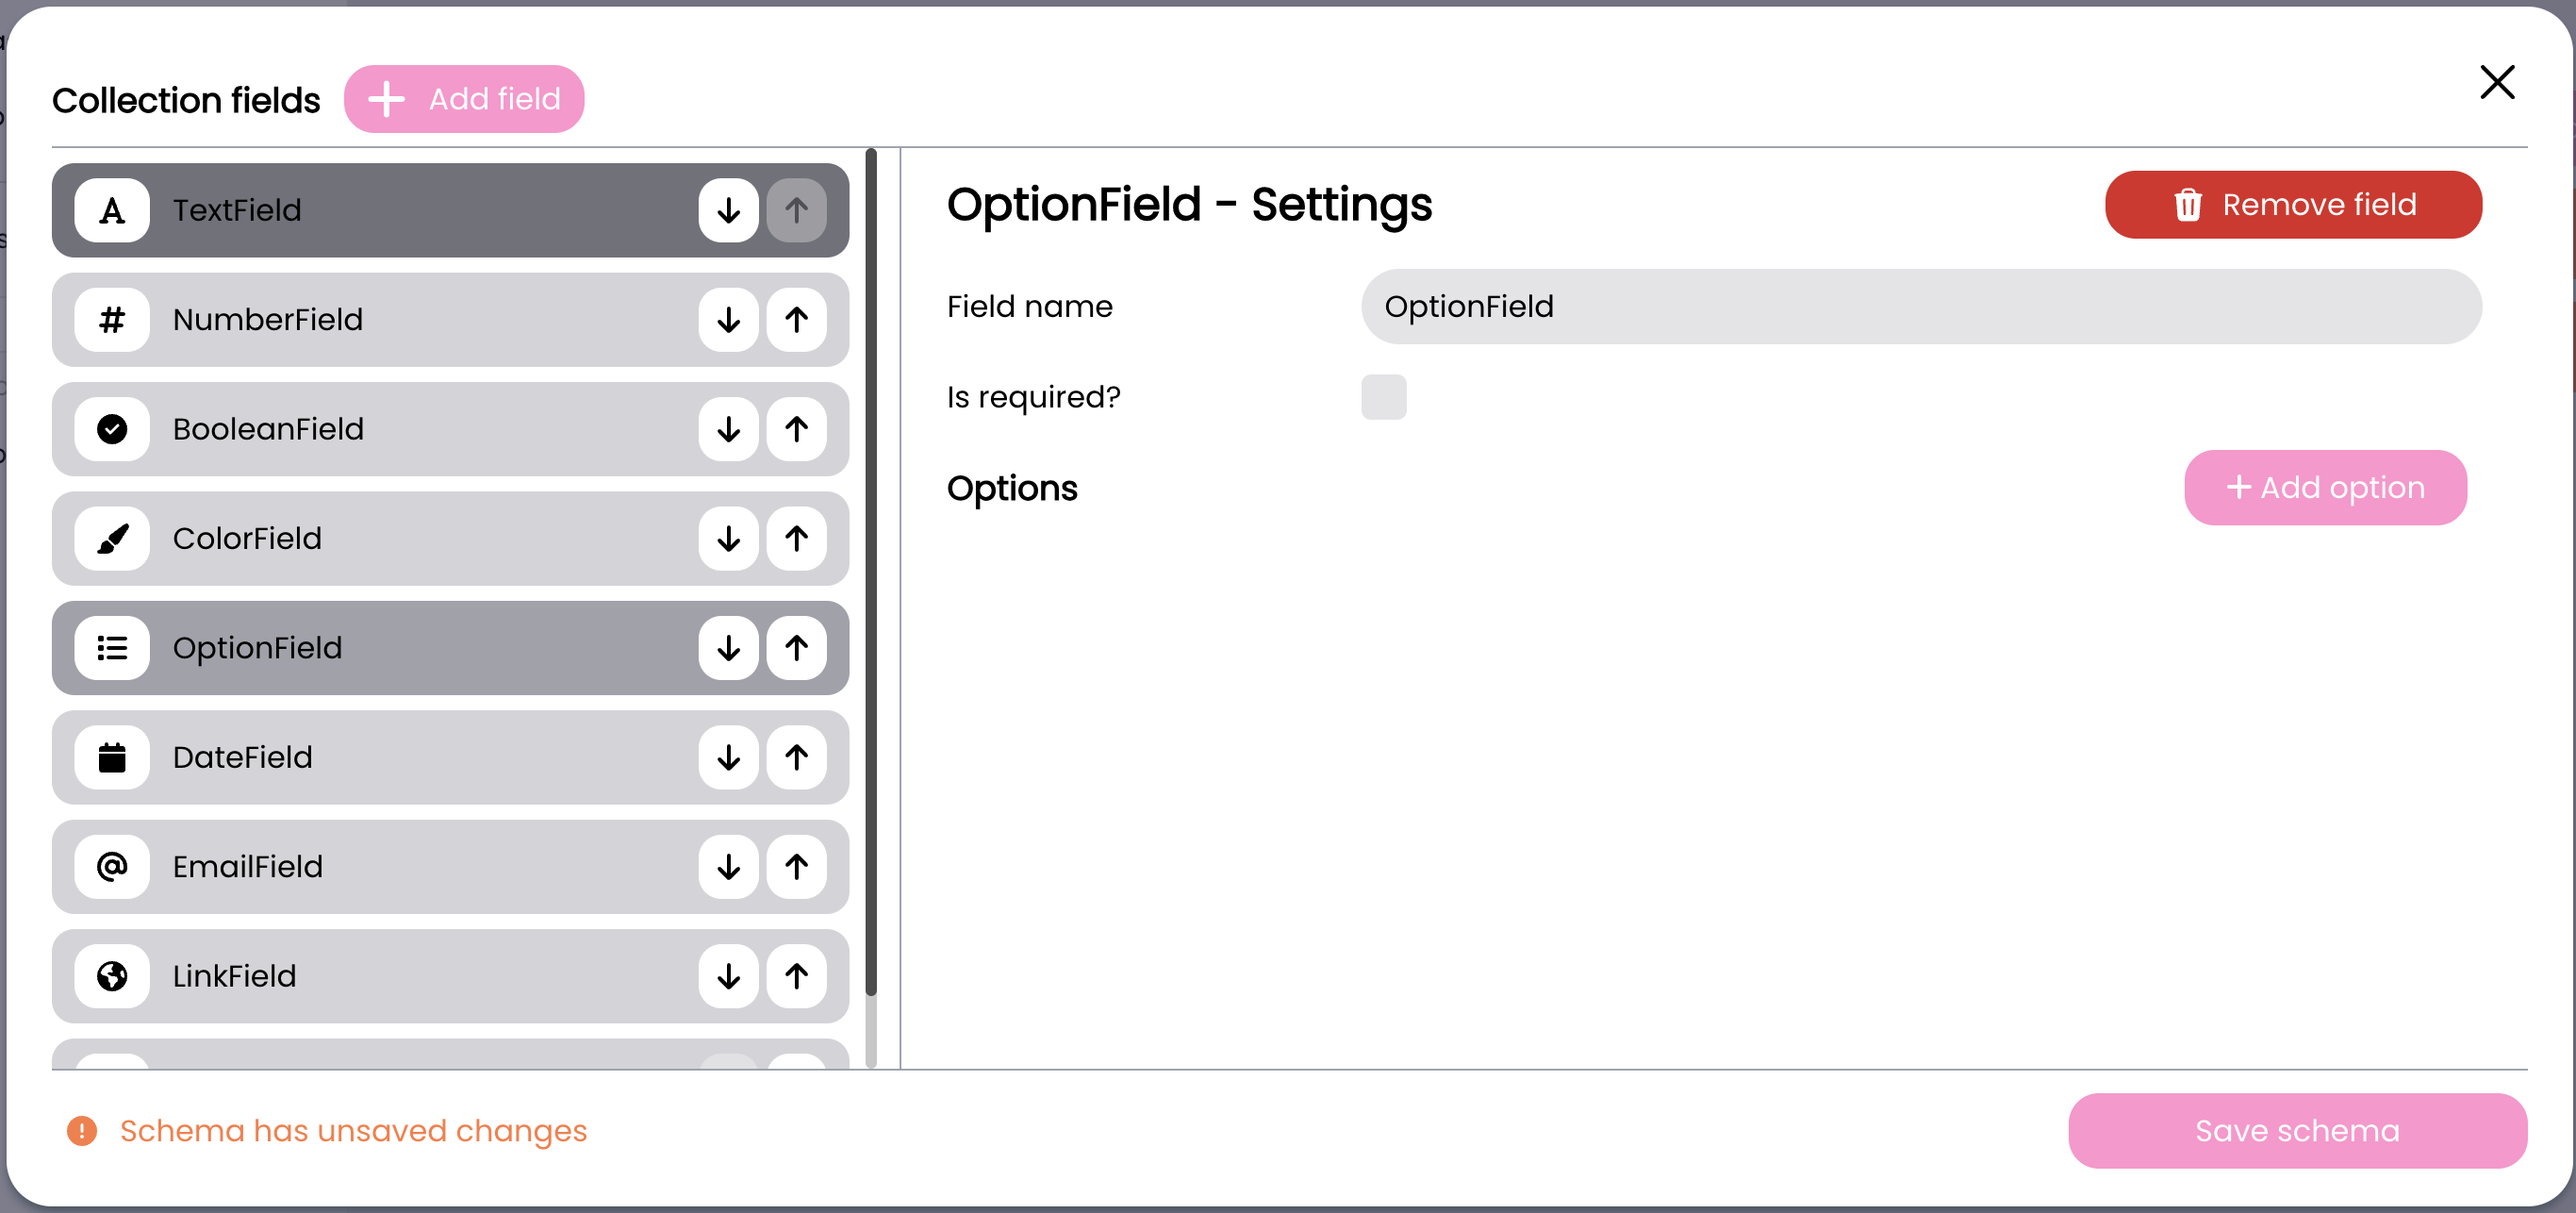
Option Field
The Option field type allows you to:
- Field name: The identifier for your field
- Is required?: Toggle to make the field mandatory
- Options: Add and manage a list of predefined choices.
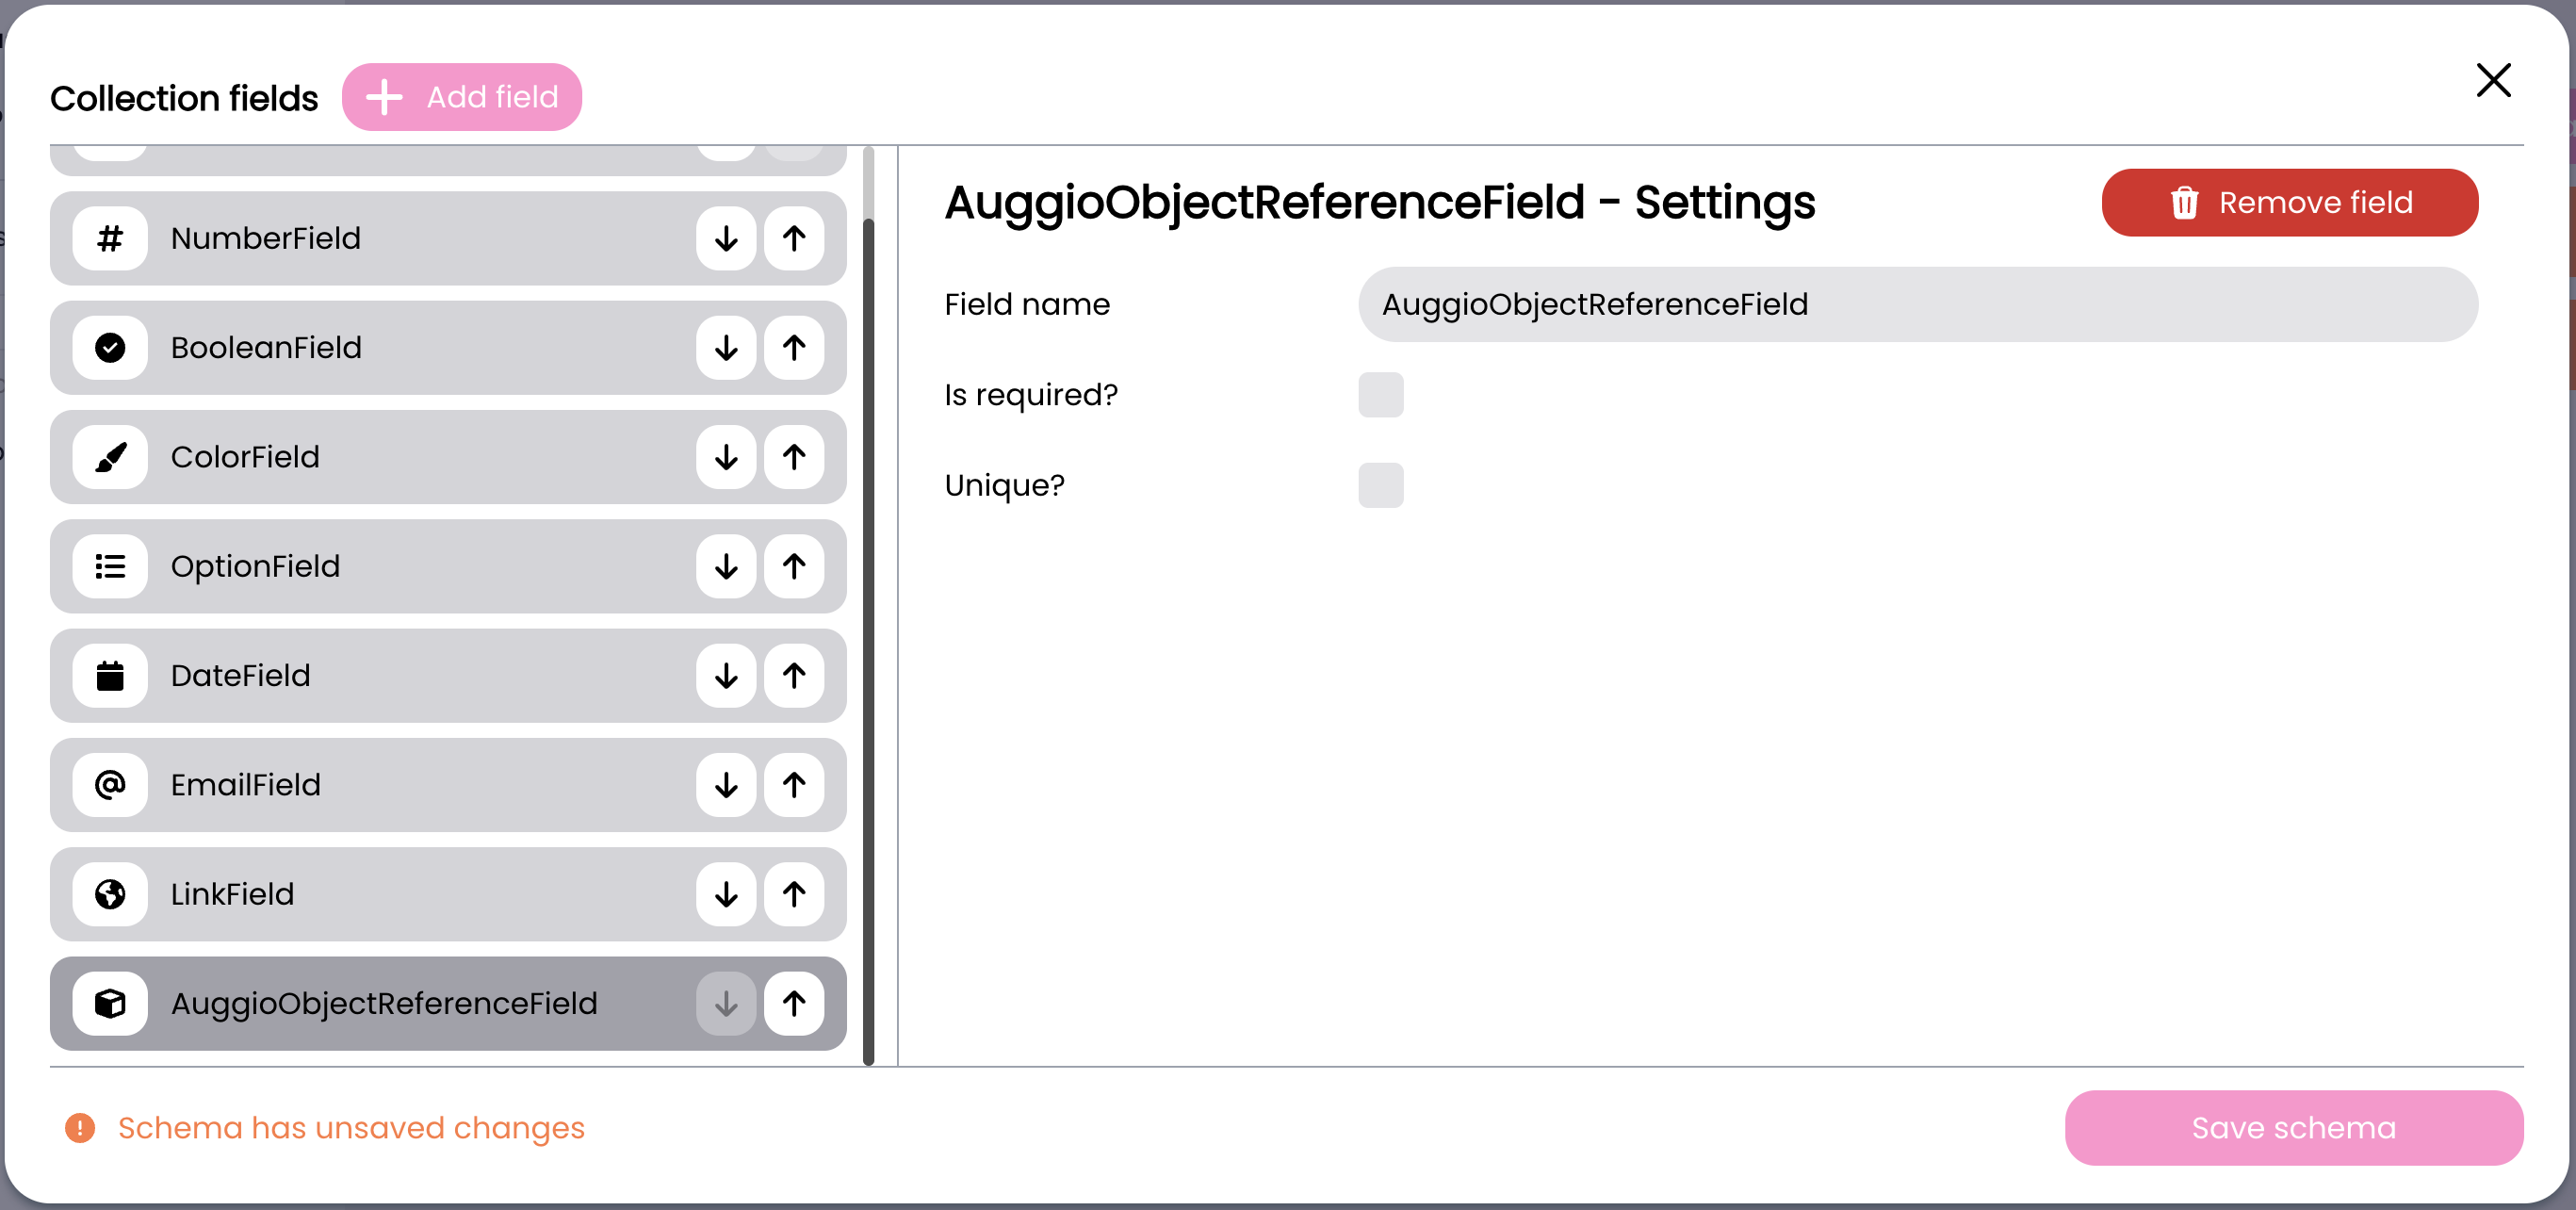
augg.io Object Reference Field
The augg.io object reference field type allows you to:
- Field name: The identifier for your field
- Is required?: Toggle to make the field mandatory
- Unique?: Whether value should be unique in the entire column
Working with Collection Items
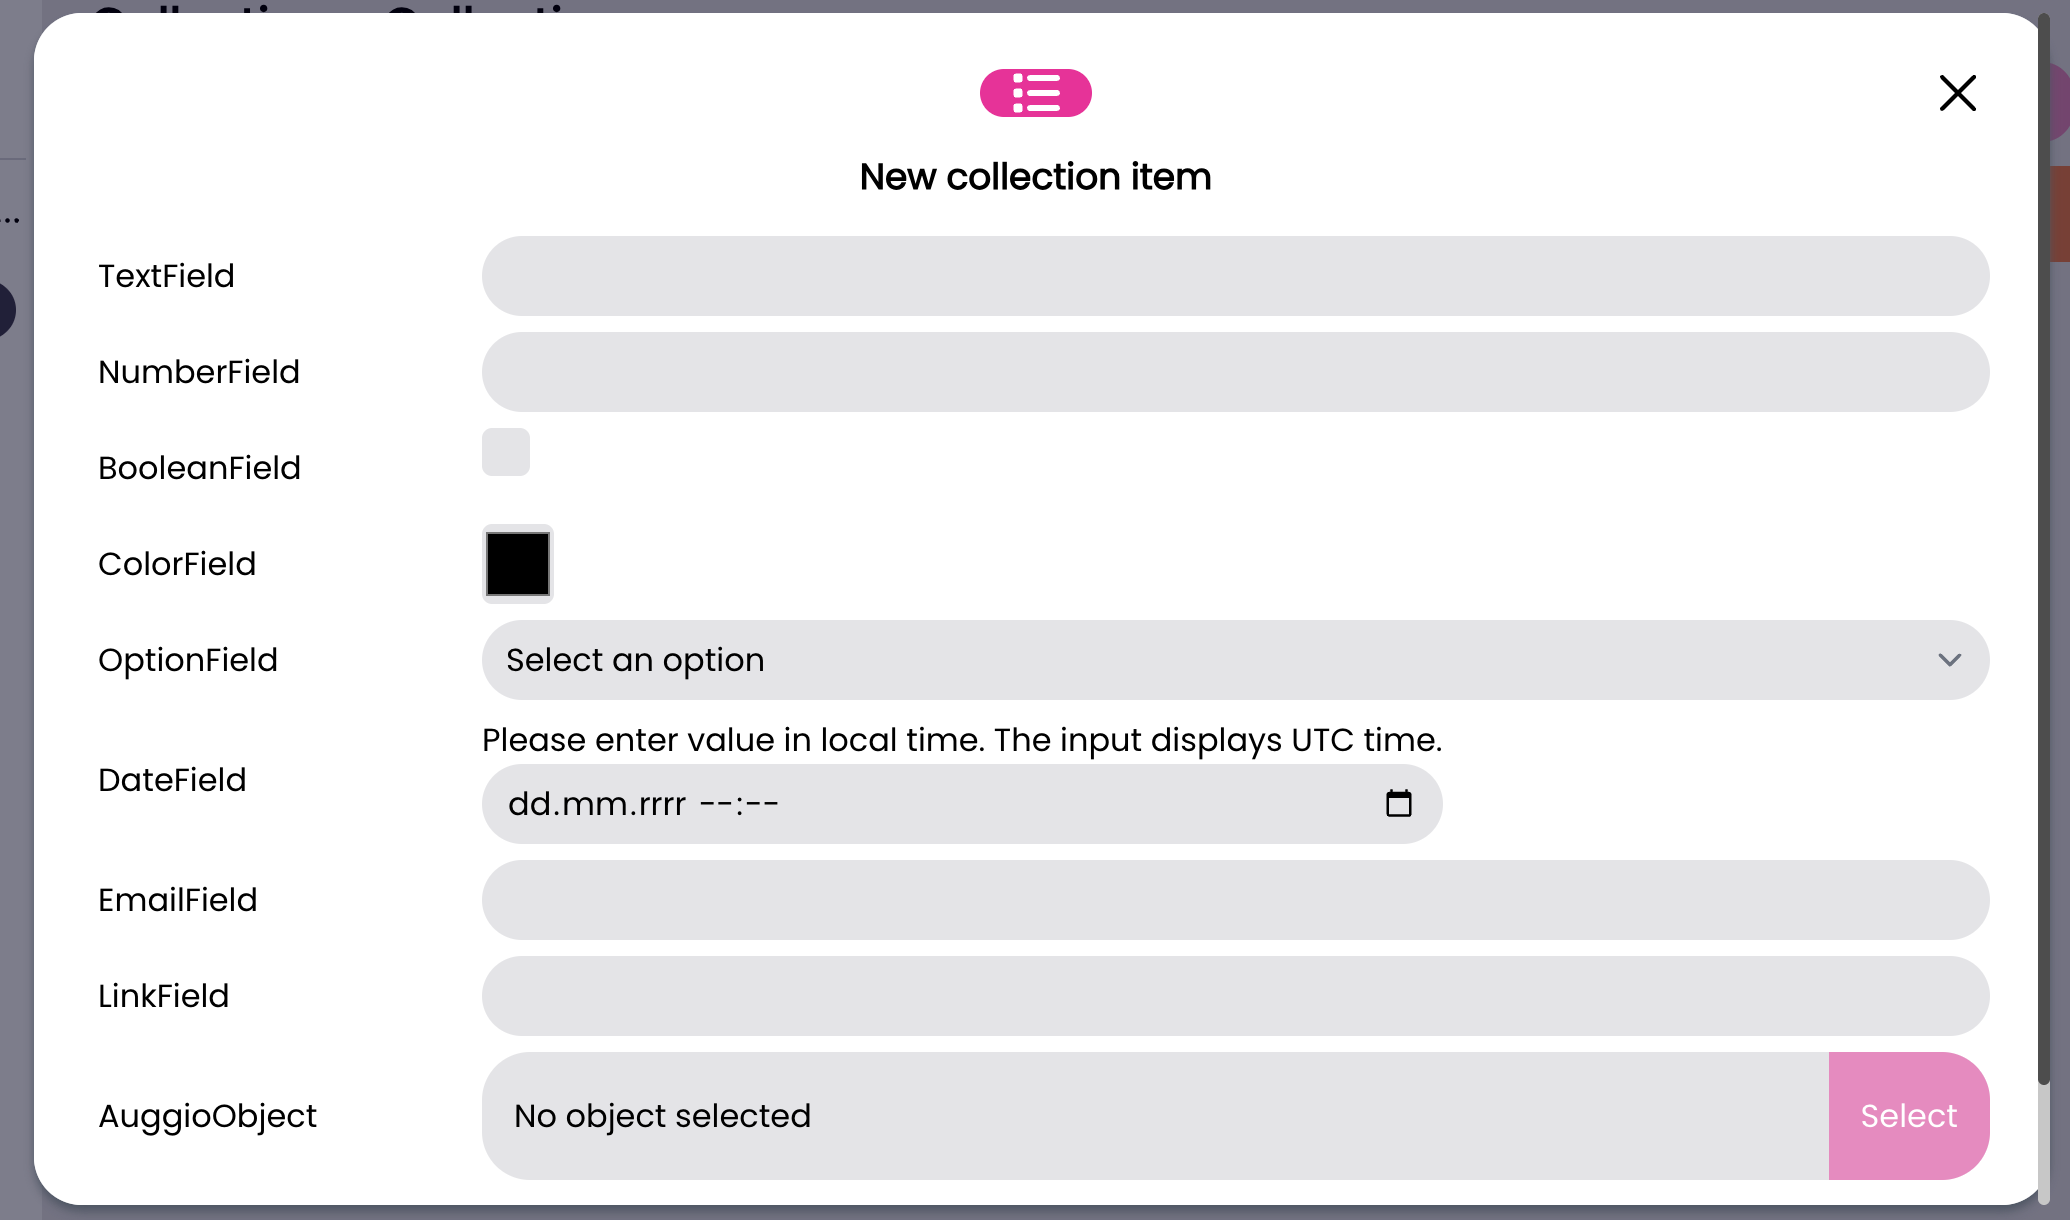
Once your schema is defined, you can start adding items to your collection:
- Select your collection
- Click “New Item”
- Fill in the form according to your schema
- Click “Save” to store the item
Editing Items
To modify existing items:
- Click on the row you want to edit in the collection view
- Update the values in the form
- Save your changes
Technical Integration
Setting Up Collections in Unity
To use collections in your Unity project:
- Create an empty GameObject in your scene
- Add the CollectionsProvider component to the GameObject
The CollectionsProvider has one important setting:
- Initialize On Awake: When enabled, collections will be initialized automatically when the scene starts.
Initializing Collections
Collections can be initialized in two ways:
- Automatic initialization if initializeOnAwake is set to true
- Manual initialization using the Initialize method:
CollectionsProvider.Instance.Initialize();
Handling Initialization Events
Subscribe to initialization events to handle success, progress, and errors:
CollectionsProvider.Instance.OnProviderInitialized += HandleInitialized;
CollectionsProvider.Instance.OnProviderInitializeError += HandleError;
CollectionsProvider.Instance.OnProviderInitializedProgress += HandleProgress;
Accessing Collection Data
Once initialized, you can access collections and their data:
- Get a collection by name:
Collection myCollection;
if (CollectionsProvider.Instance.GetCollectionByName("collectionName", out myCollection)) {
    // Use myCollection
}
-
Access collection rows:
- Get all rows: myCollection.Rows
- Get a specific row by ID:
myCollection.GetRowById("rowId")
-
Access field values within a row:
CollectionRow row = myCollection.GetRowById("rowId");
List<string> fieldValues = row.GetValueByFieldName("fieldName");
Note: Field values are stored as strings and should be converted to appropriate types based on the field’s schema definition.
Authentication
The SDK requires a file token for authentication:
- Download the token from www.augg.io for your application
- The token must be present in your project for collections to initialize
Best Practices
Collection Naming
- Use clear, descriptive names for collections
- Follow a consistent naming convention
- Consider grouping related collections with prefixes
Schema Design
- Define required fields appropriately
- Use appropriate field types for data validation
- Consider data organization when designing schemas
- Keep schemas focused and avoid overly complex structures
Unity Integration
- Initialize collections early in your application lifecycle
- Handle initialization errors gracefully
- Cache frequently accessed collection data
- Check if collections are initialized before accessing them
- Store Collection and CollectionRow references rather than looking them up repeatedly
- Consider caching GetValueByFieldName results if accessed frequently
- Handle missing or null values appropriately
Performance Optimization
- Cache collection references when accessing the same collection multiple times
- Cache row references when working with specific rows frequently
- Consider storing converted values (e.g., parsed numbers) rather than converting strings repeatedly
- Use null checks when accessing rows and field values
- Handle initialization state properly to avoid unnecessary lookups
Error Handling
- Always check if GetCollectionByName was successful before using the collection
- Verify row existence before accessing row data
- Implement appropriate error handling for missing or invalid field values
- Log errors appropriately for debugging purposes
Common Use Cases
Managing Application Text Content
Collections are particularly useful for managing text content in your application. Here’s an example scenario:
-
Create a “TextContent” collection with fields:
- Key: Text field (required) - Identifier for the text content
- Content: Text field (required, text area) - The actual text content
- Category: Text field =- Optional grouping of related texts
-
Access text content in your Unity scripts:
public class TextContentManager : MonoBehaviour
{
    private Collection textCollection;
    private Dictionary<string, string> textCache = new Dictionary<string, string>();

    private void Awake() {
        CollectionsProvider.Instance.OnProviderInitialized += HandleCollectionsInitialized;
    }

    private void OnDestroy() {
        if (CollectionsProvider.Instance != null) {
            CollectionsProvider.Instance.OnProviderInitialized -= HandleCollectionsInitialized;
        }
    }

    private void HandleCollectionsInitialized() {
        if (CollectionsProvider.Instance.GetCollectionByName("TextContent", out textCollection)) {
            CacheTexts();
        }
    }

    private void CacheTexts() {
        textCache.Clear();
        foreach (CollectionRow row in textCollection.Rows) {
            List<string> keyValues = row.GetValueByFieldName("Key");
            List<string> contentValues = row.GetValueByFieldName("Content");
            if (keyValues.Count > 0 && contentValues.Count > 0) {
                string key = keyValues[0];
                string content = contentValues[0];
                if (!string.IsNullOrEmpty(key) && !string.IsNullOrEmpty(content)) {
                    textCache[key] = content;
                }
            }
        }
    }

    public string GetText(string key, string defaultText = "") {
        string text;
        if (textCache.TryGetValue(key, out text)) {
            return text;
        }
        return defaultText;
    }
}
- Benefits of this approach:
- Content can be updated without code changes
- Content can be organized by categories
- Non-technical team members can edit text through the CMS
- Consistent text management across the application