Using Roles and Membership
Roles and Membership allows you to manage permissions and content visibility for accounts invited to your Organization.
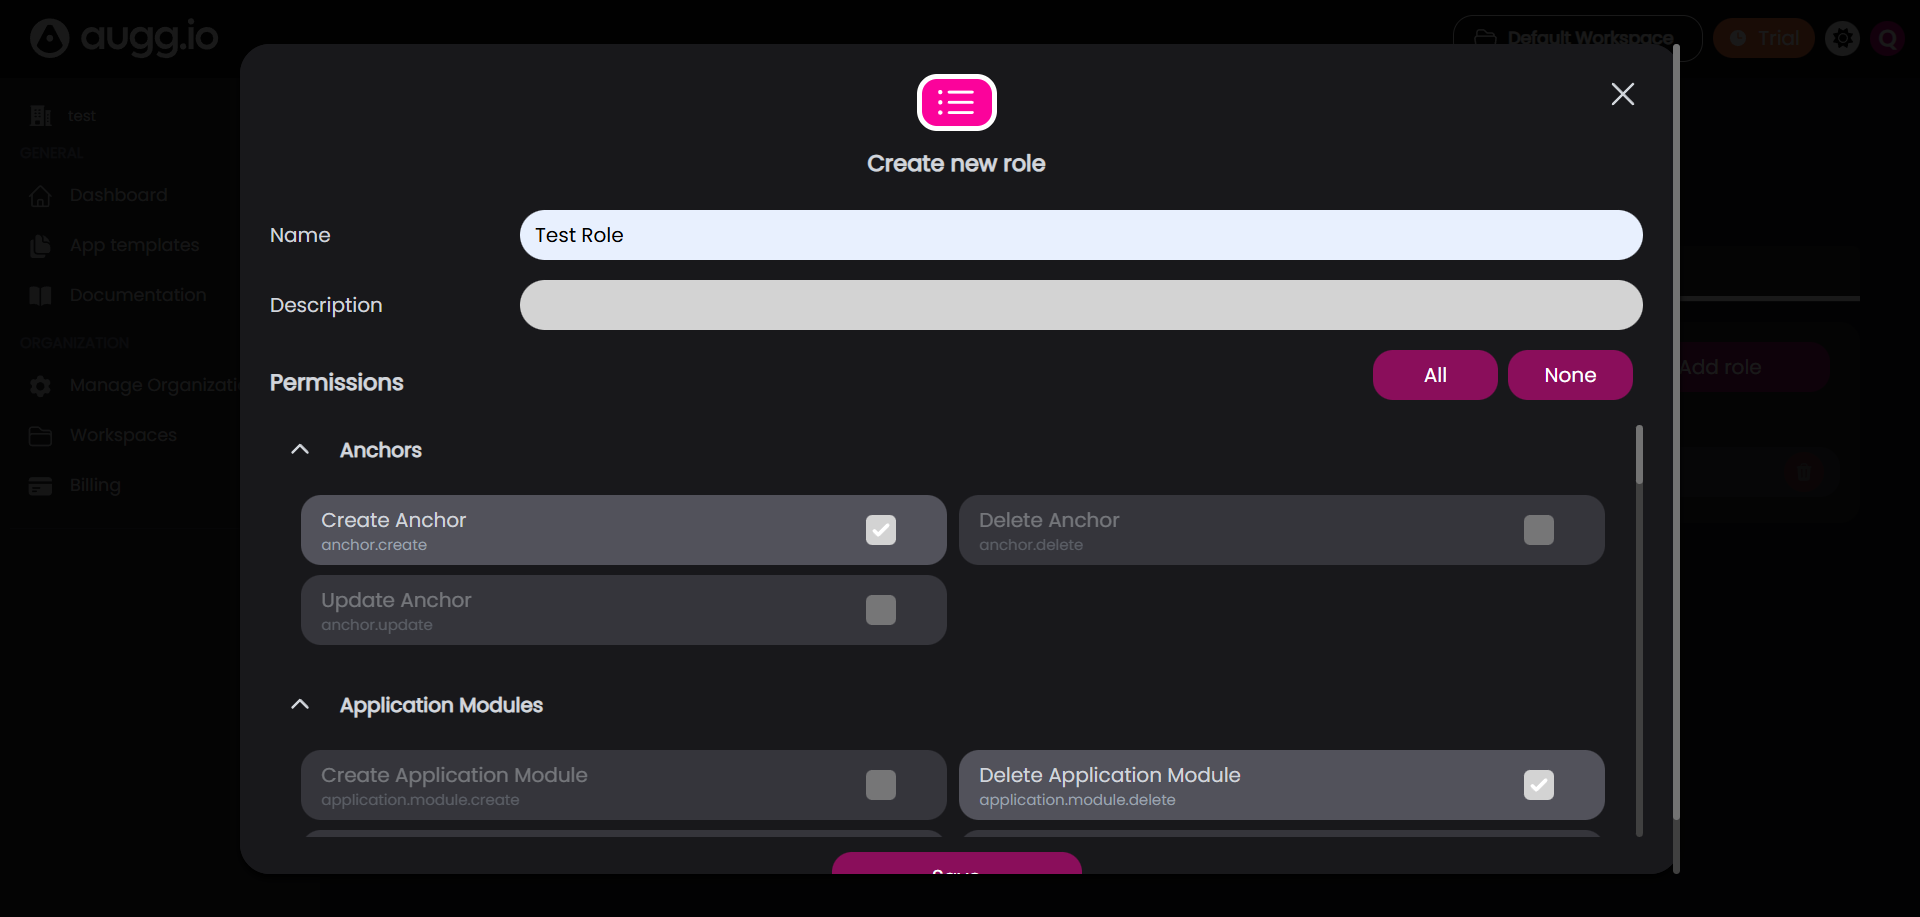
Creating New Roles
Custom Roles allow you to define granular permission sets for users in your Organization.
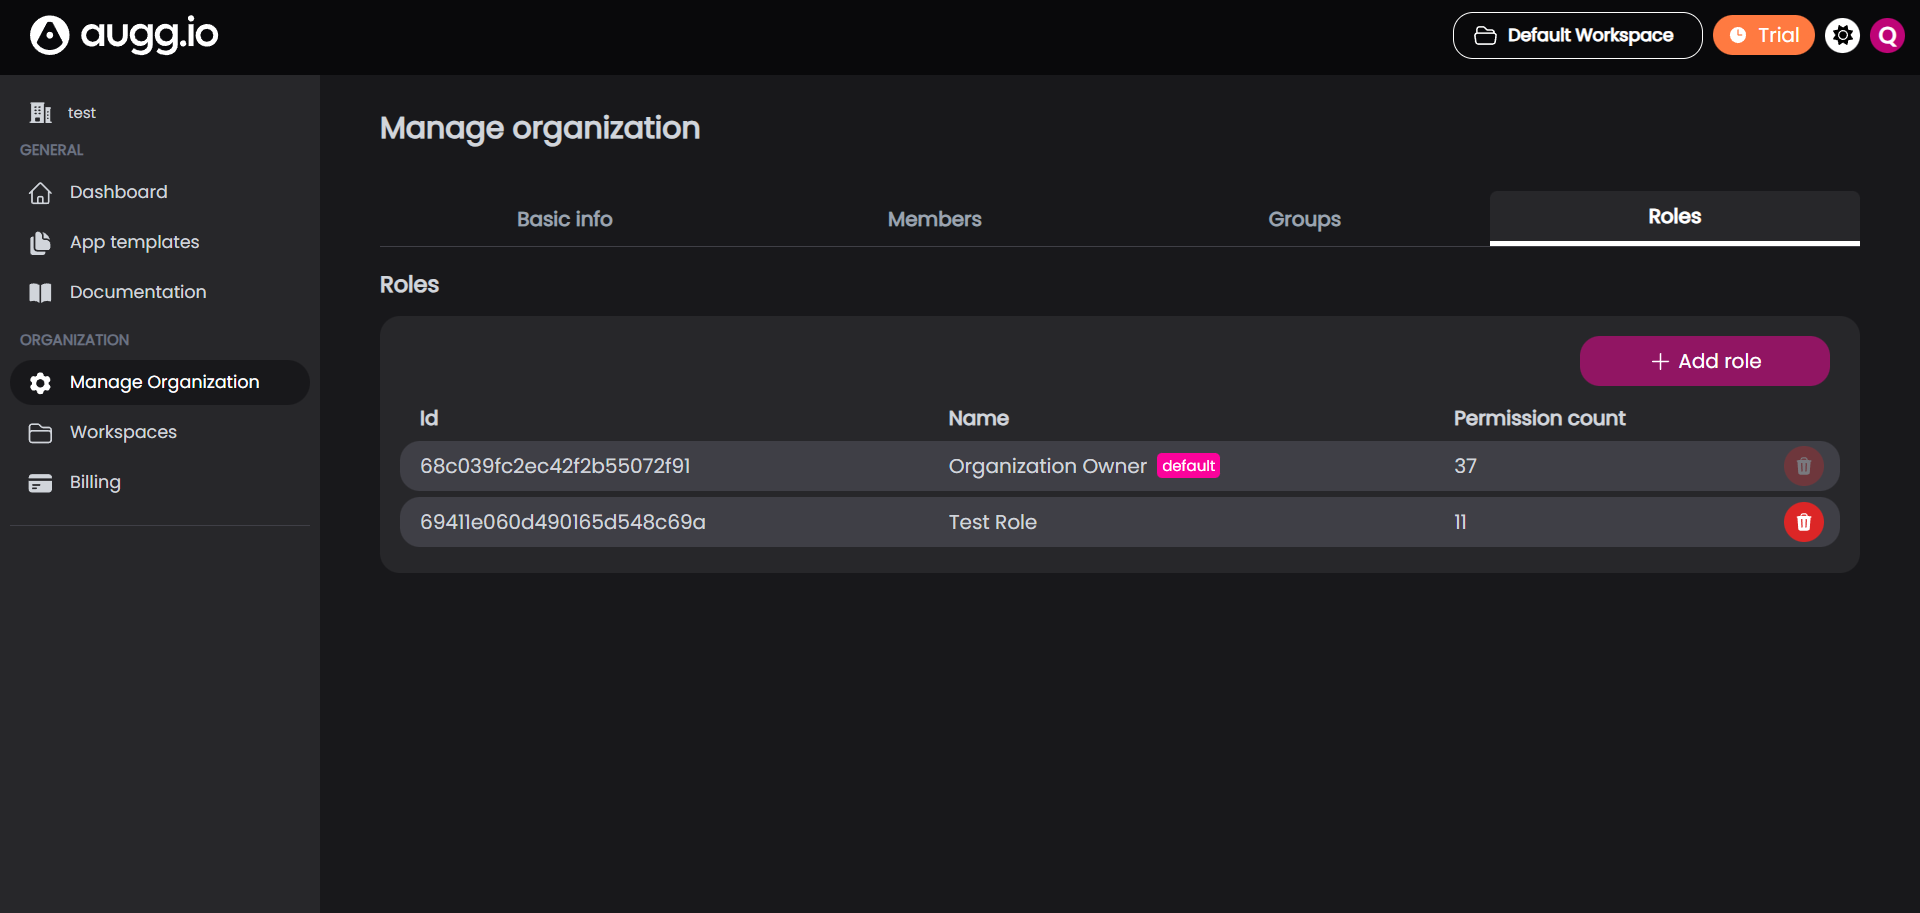
Step 1: Access the Role Creation Page
- Navigate to Manage Organization from the main dashboard.
- Select the Roles tab.
- Click the + Add role button.
Step 2: Define Role Details and Permissions
Select the specific permissions you want this role to have.
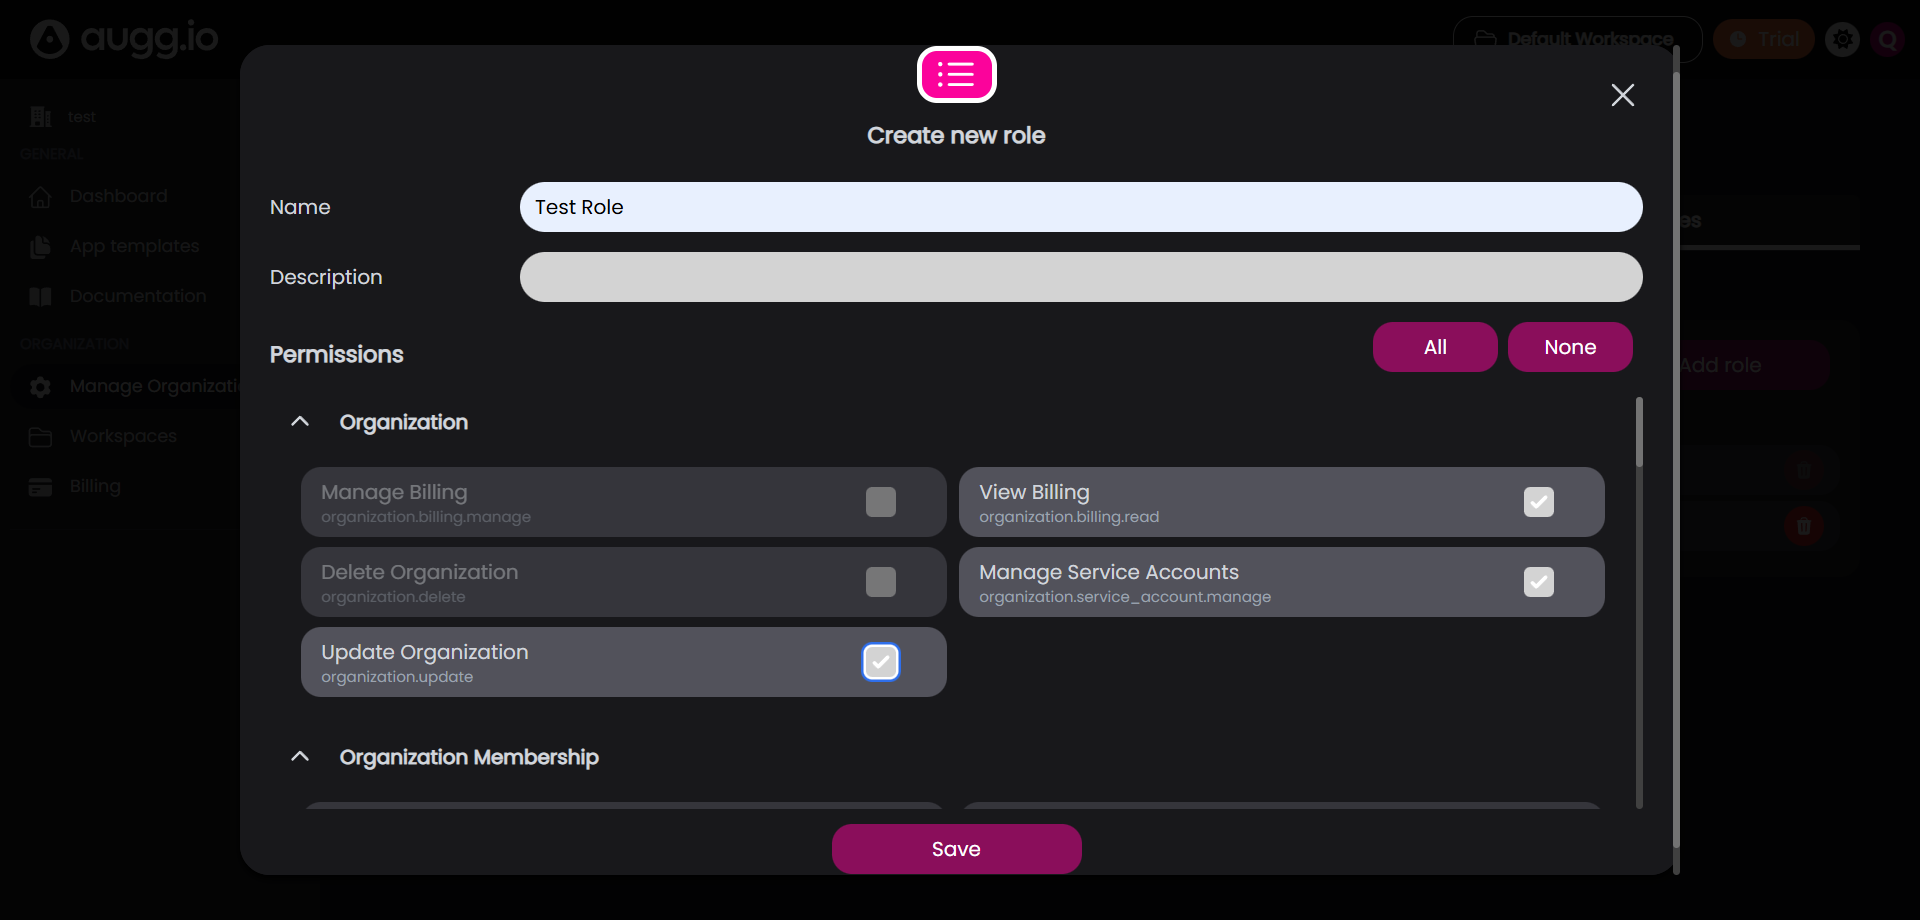
Administrative Overrides
These powerful options bypass standard permissions and membership rules. They should be used sparingly for administrative or high-level technical roles.
- Override Organization Membership:
- Effect: Gives the account membership to all created Applications, Locations, and Experiences without the need to manually add them via Content Membership.
- Restriction: Accounts with this override cannot be removed from content memberships. This is intended for high-level accounts that must see everything.
- Override Workspace Permissions:
- Effect: Grants the user all workspace-level permissions, meaning they can freely manage all Applications, Locations, and Experiences in any workspace they have access to.
Step 3: Save the Role
After setting the details and permissions, click Save. The new role is now available to be assigned to any account and you can see it in the list of roles where it can be updated by simply clicking on it or deleted by clicking the red trash icon.
Inviting Accounts
You can invite other accounts to your organization and set up what they have access to.
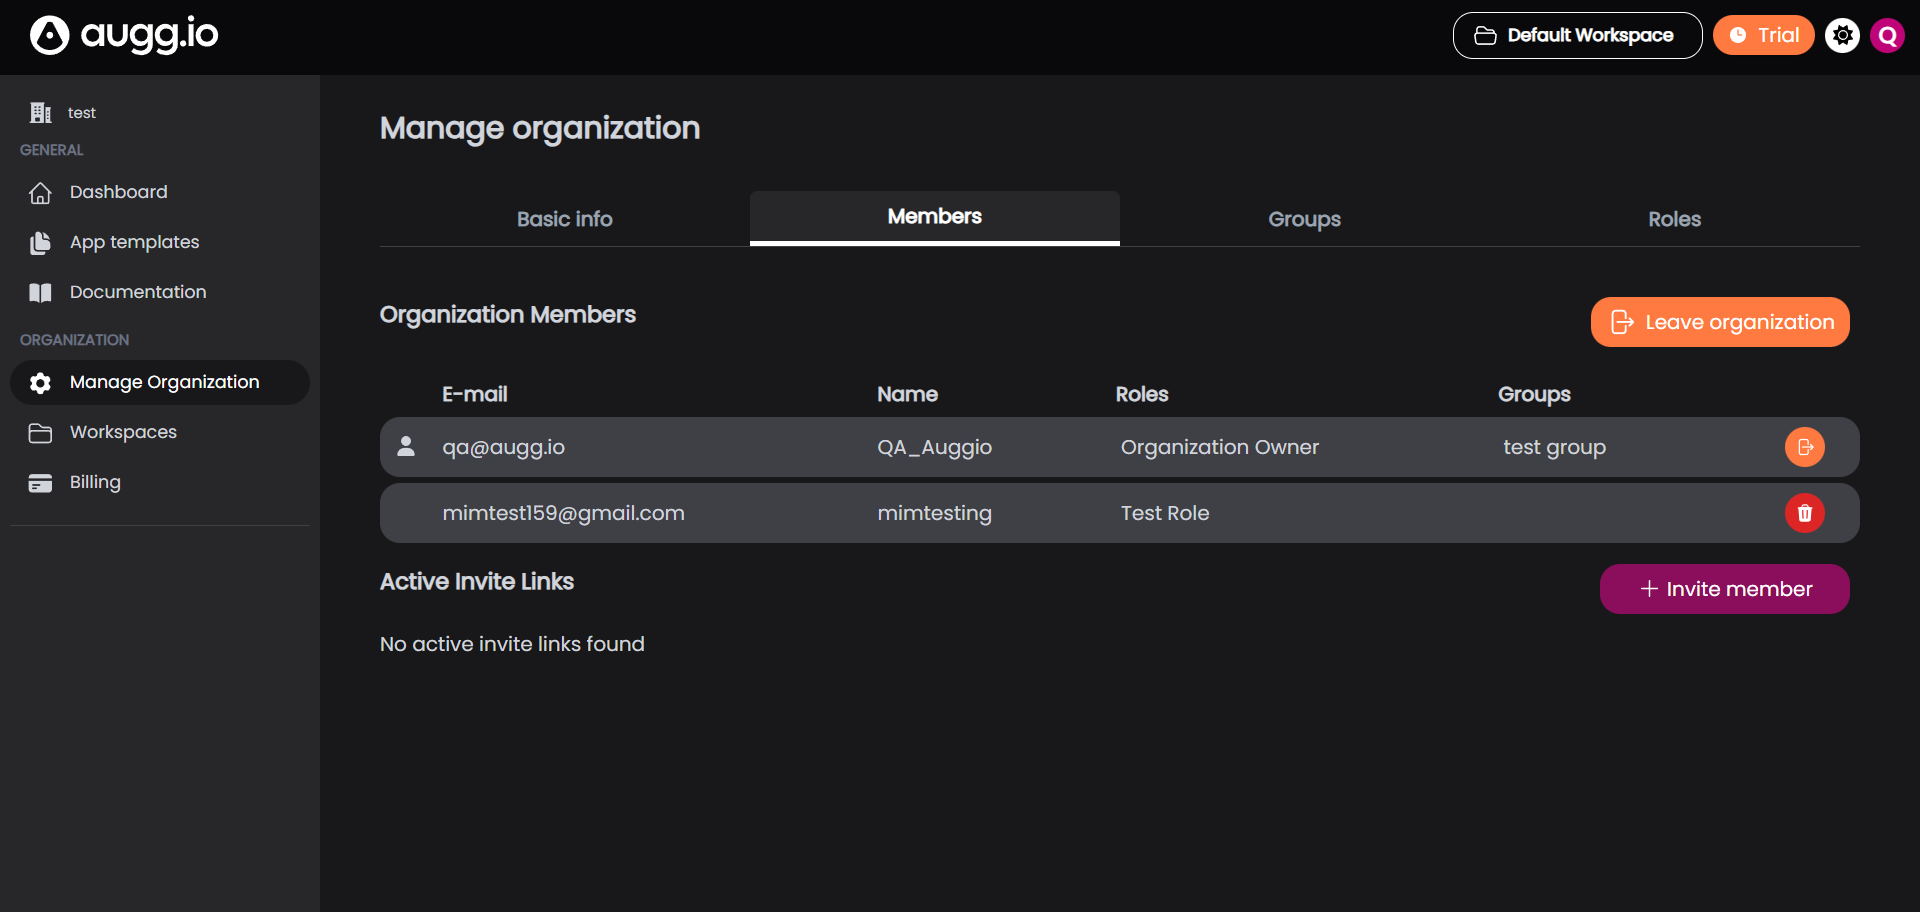
Step 1: Access the Members List
- Navigate to Manage Organization from the main dashboard.
- Select the Members tab.
Step 2: Inviting a New Member (Role Assignment via Link)
- Click the + Invite member button.
- Select Roles: You can select one or multiple roles from the list. The invited user will automatically get these roles assigned after accepting the invite.
- Generate invite link
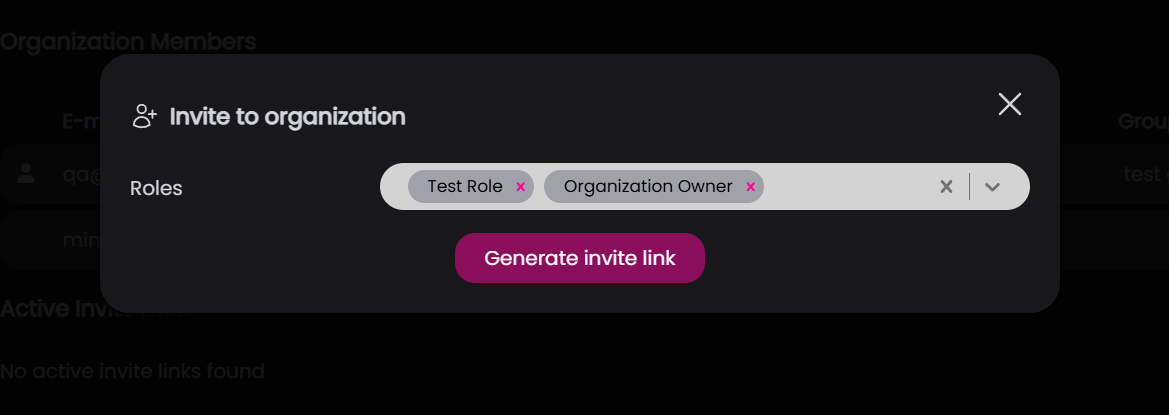
- Copy and Share Link: Copy the link and share it directly with the account you wish to invite.
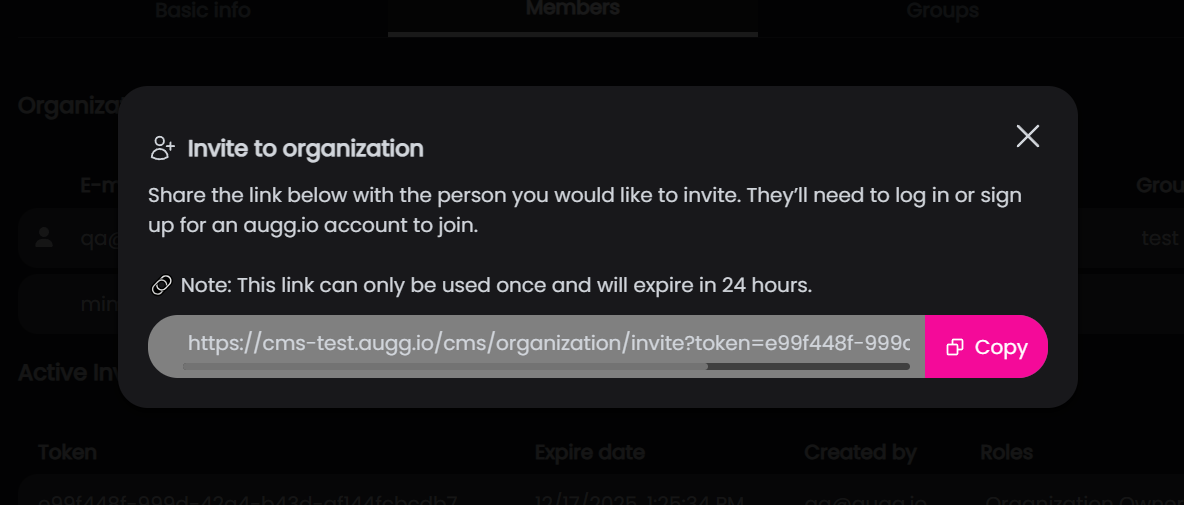
Step 3: Managing Active Invitation Links
After creation, the active link remains visible on the Members page under a section dedicated to pending invitations.
- Link Status: The link is one-time use only. Once an account uses the link to join the organization, it is automatically deleted from the list.
- Actions: From this list, you can:
- Copy the link again to share with the intended recipient.
- Delete the link immediately if it was sent incorrectly or is no longer needed. Deleting the link renders it unusable.
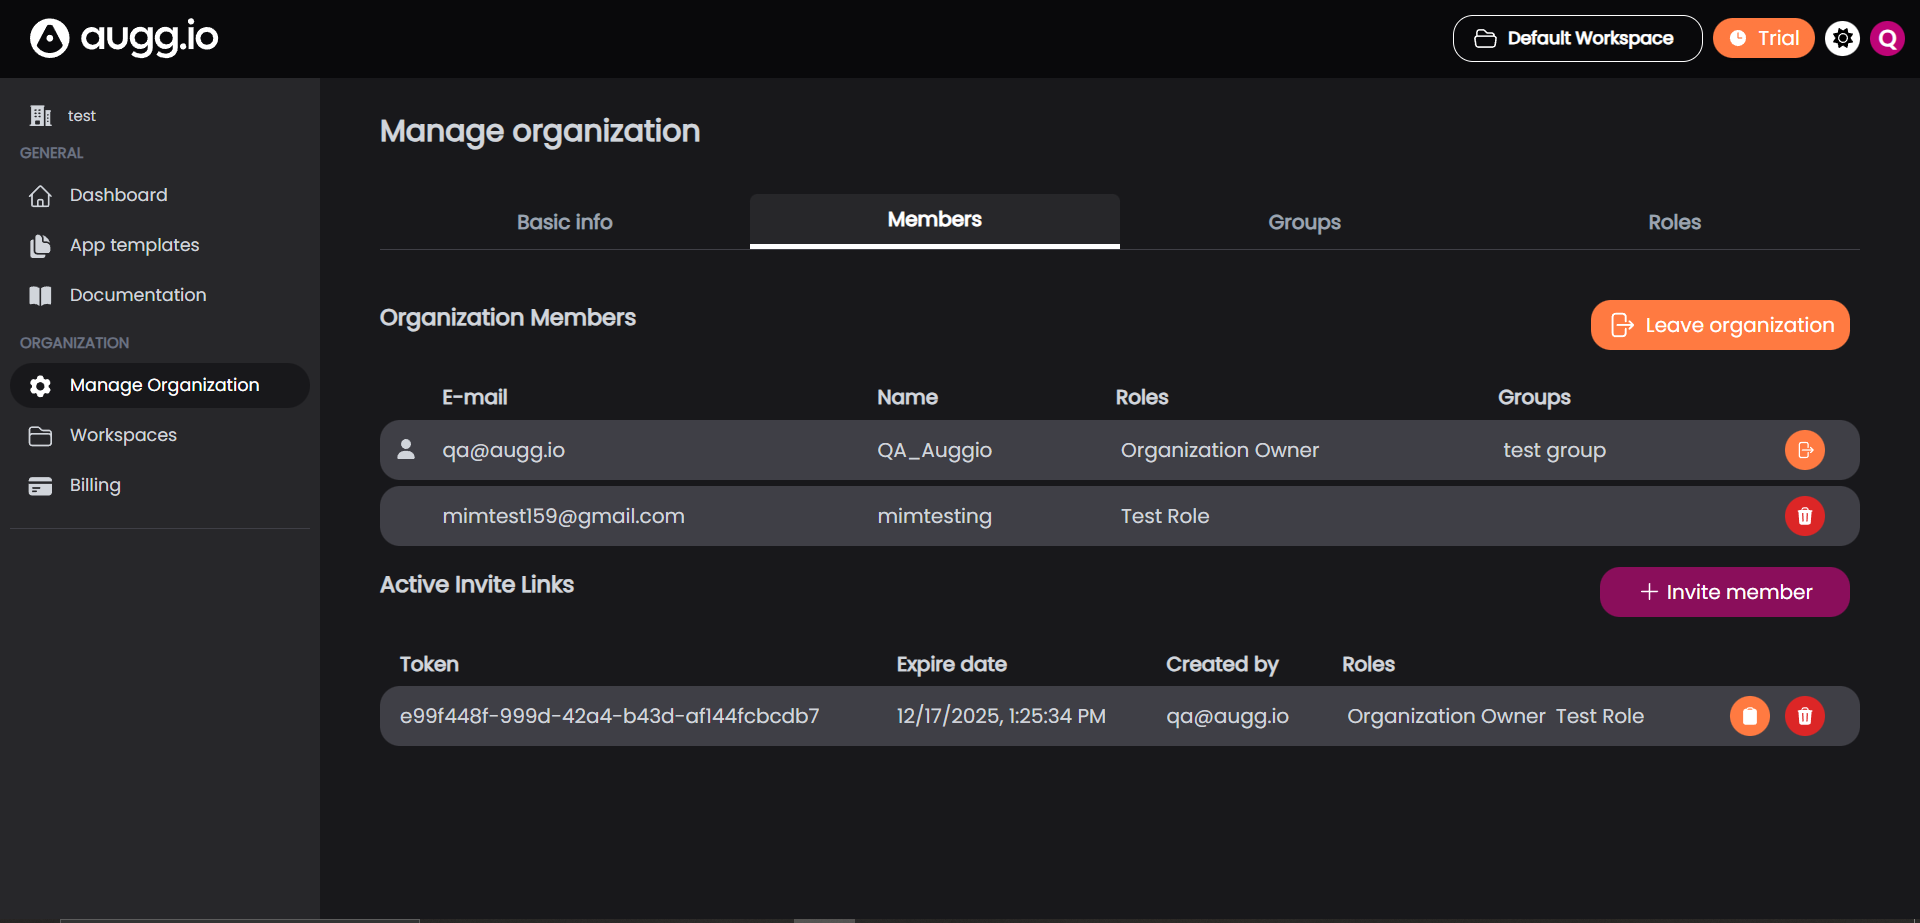
Step 4: Managing Existing Members
On the Members list:
- Locate the member you wish to edit and click on them.
- You can update the member’s assigned roles and groups.
Membership: Workspace and Project Visibility
Membership allows you to restricts user’s visibility to only the Applications, Locations, and Experiences they’ve been assigned to.
Crucially, all Applications, Locations, and Experiences are organized under Workspaces. Therefore, content visibility and project-specific permissions are controlled at the Workspace level. The Workspace Management screen is the central hub for managing all content-related actions.
Creating Workspace-Level Roles
Workspaces have their own set of custom roles, similar to Organization Roles, but the permissions apply only to the content within that specific Workspace.
- Navigate to the Workspaces tab within Organization Settings.
- Click on the specific Workspace you wish to manage.

- In the workspace select the Roles tab.
- Click the + Add Role button.
- Select the specific permissions you want this role to have.
Assigning Workspace Membership
- Navigate to the Workspaces tab.
- Click on the specific Workspace.
- Select the Members tab.
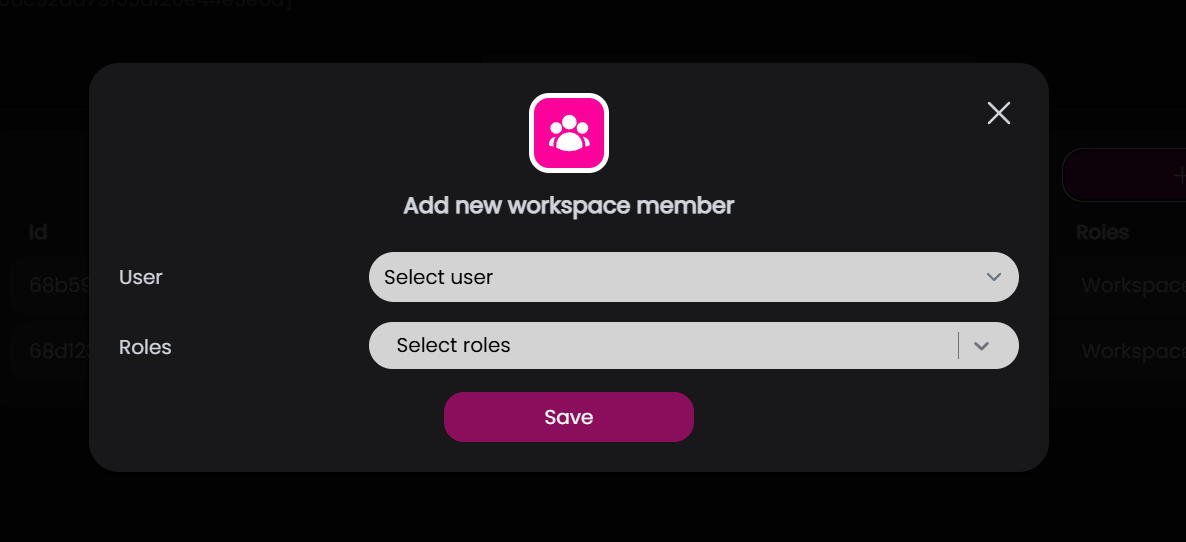
- Click the + Add member button.
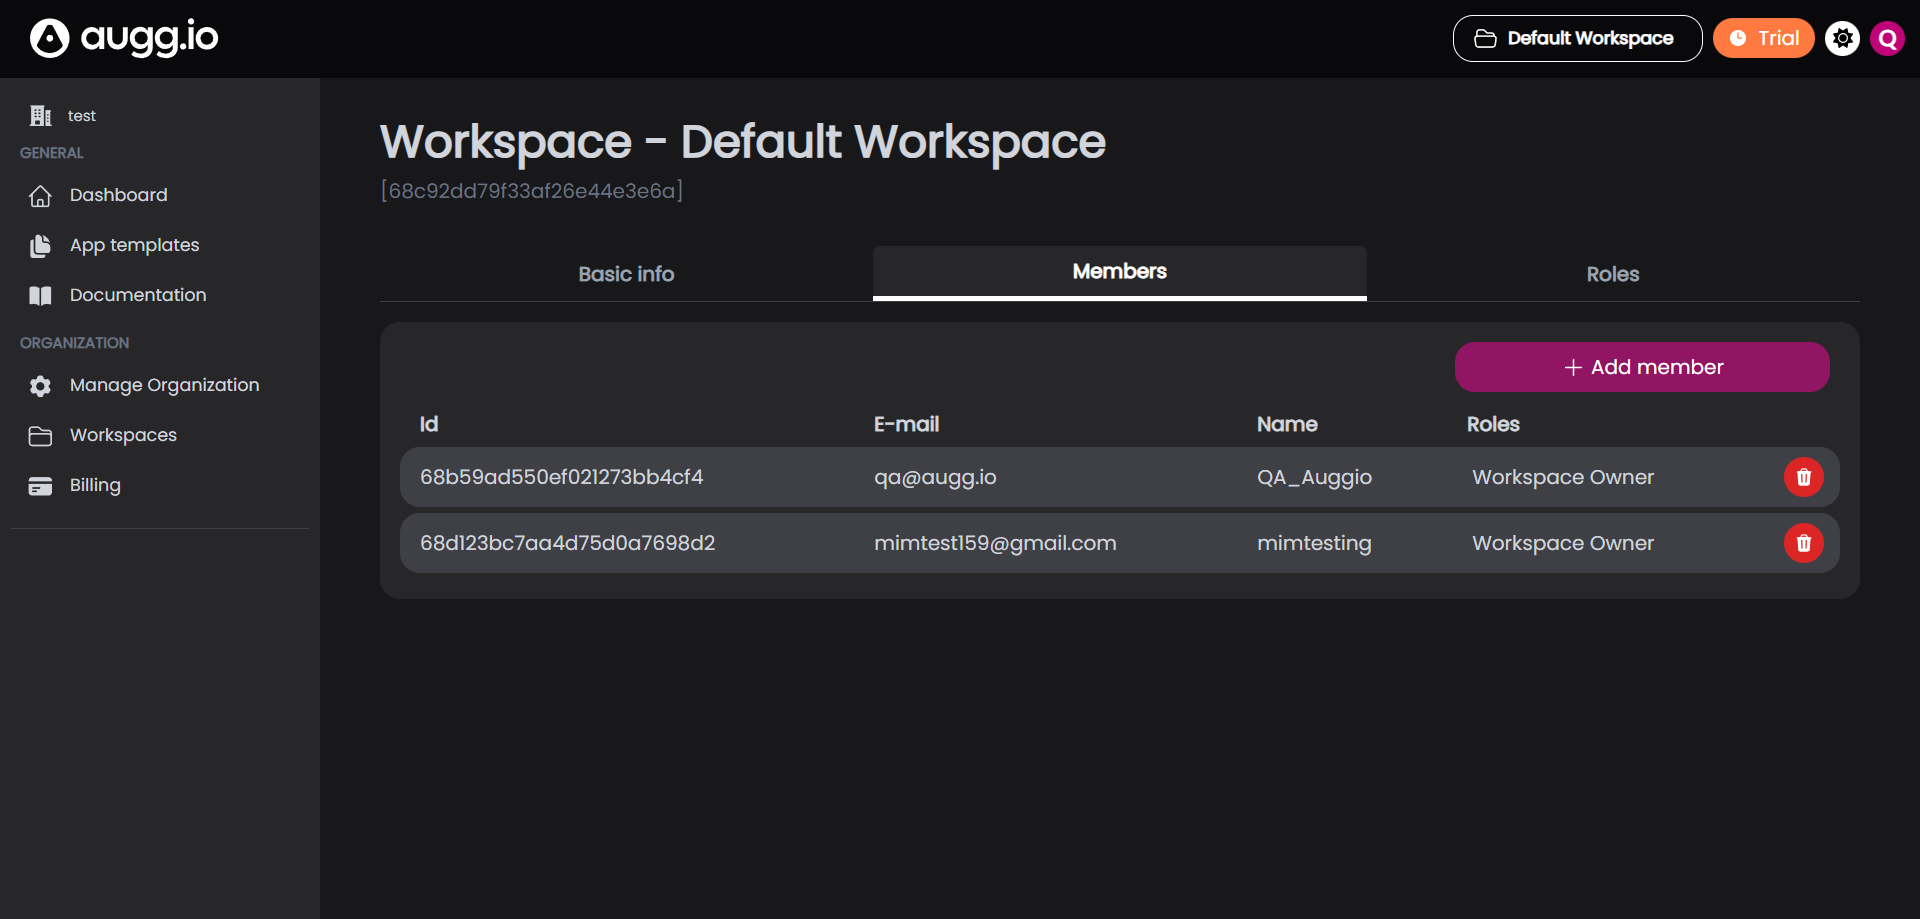
- Select the user and what roles you want to give them.
- Save to finish adding the member.
Workspace Content Membership
While the user has Workspace membership, you still need to give them membership for specific content inside the workspace for them to see it.
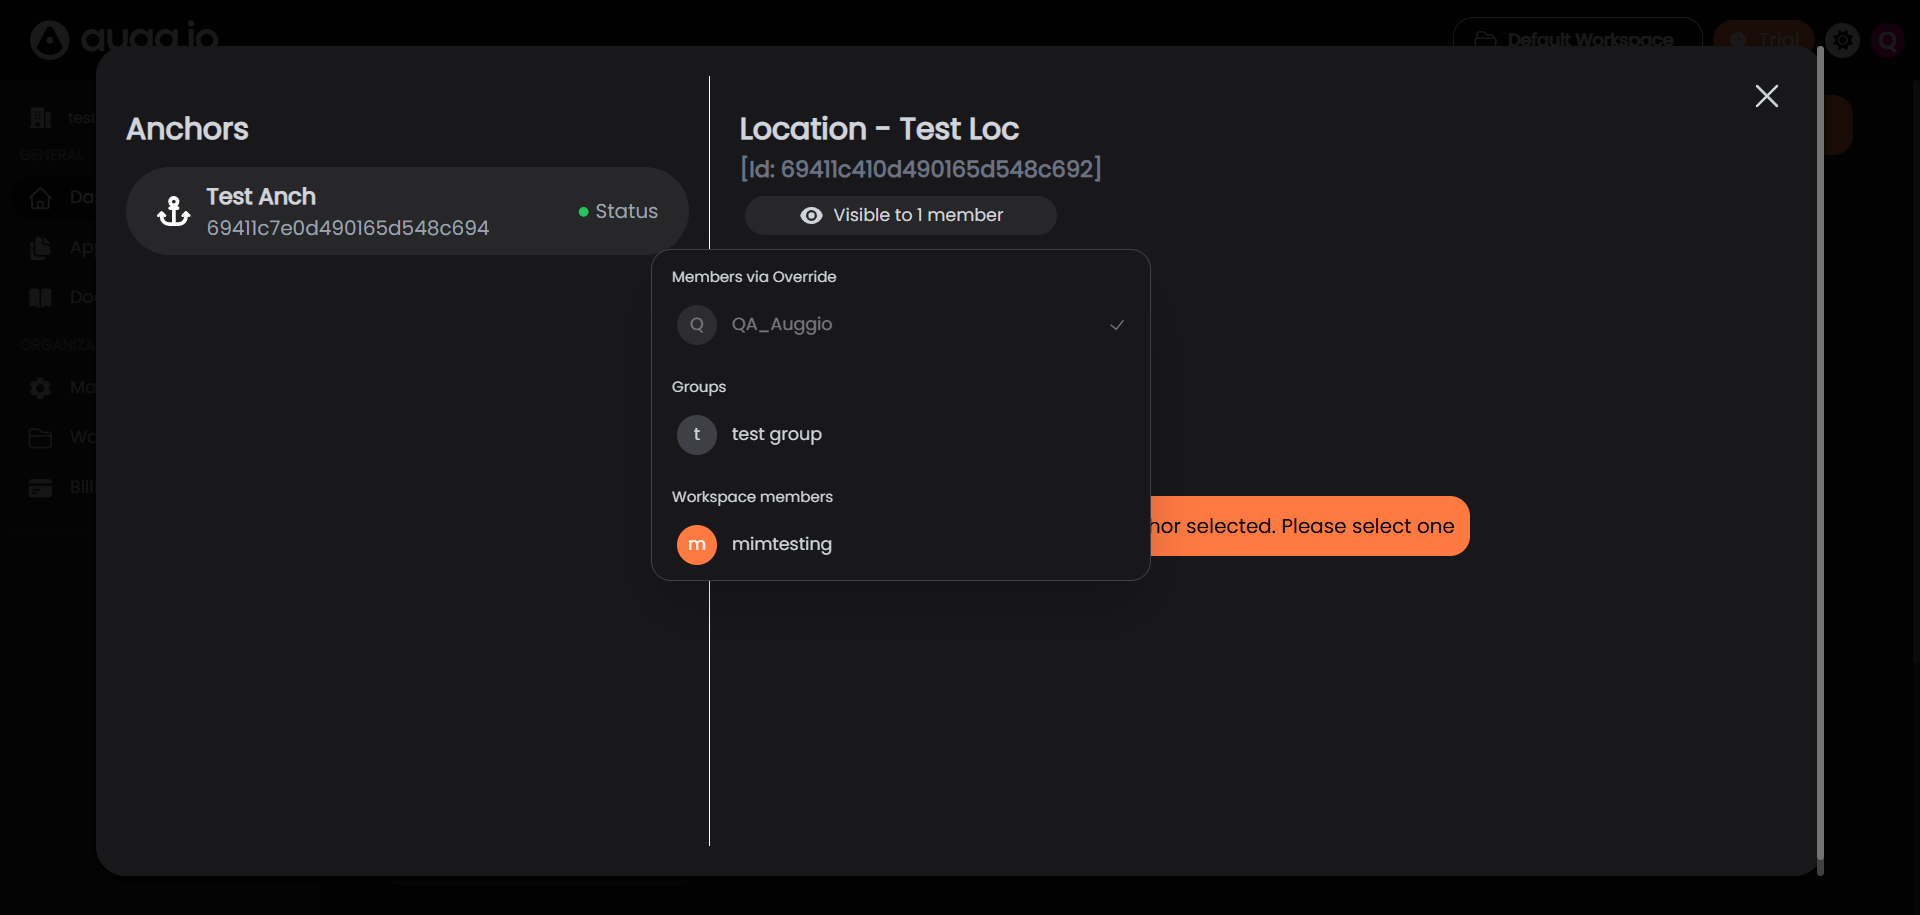
- Locate Membership Button: On any content item (Application, Location, or Experience), locate the button that displays the current number of accounts or groups who can see that item.
- Access Membership View: Click this button to open the Content-Item Membership view.
- Assign Membership: You will see a list of available Groups and Workspace Members. You can manually add existing Workspace Members or pre-defined Groups to grant them access to this specific item.
Using Groups for Batch Membership
Groups are a utility designed for efficiently assigning Content-Item Membership to multiple users at once.
- Group Creation: Groups can be created in the Groups tab of Manage Organization.
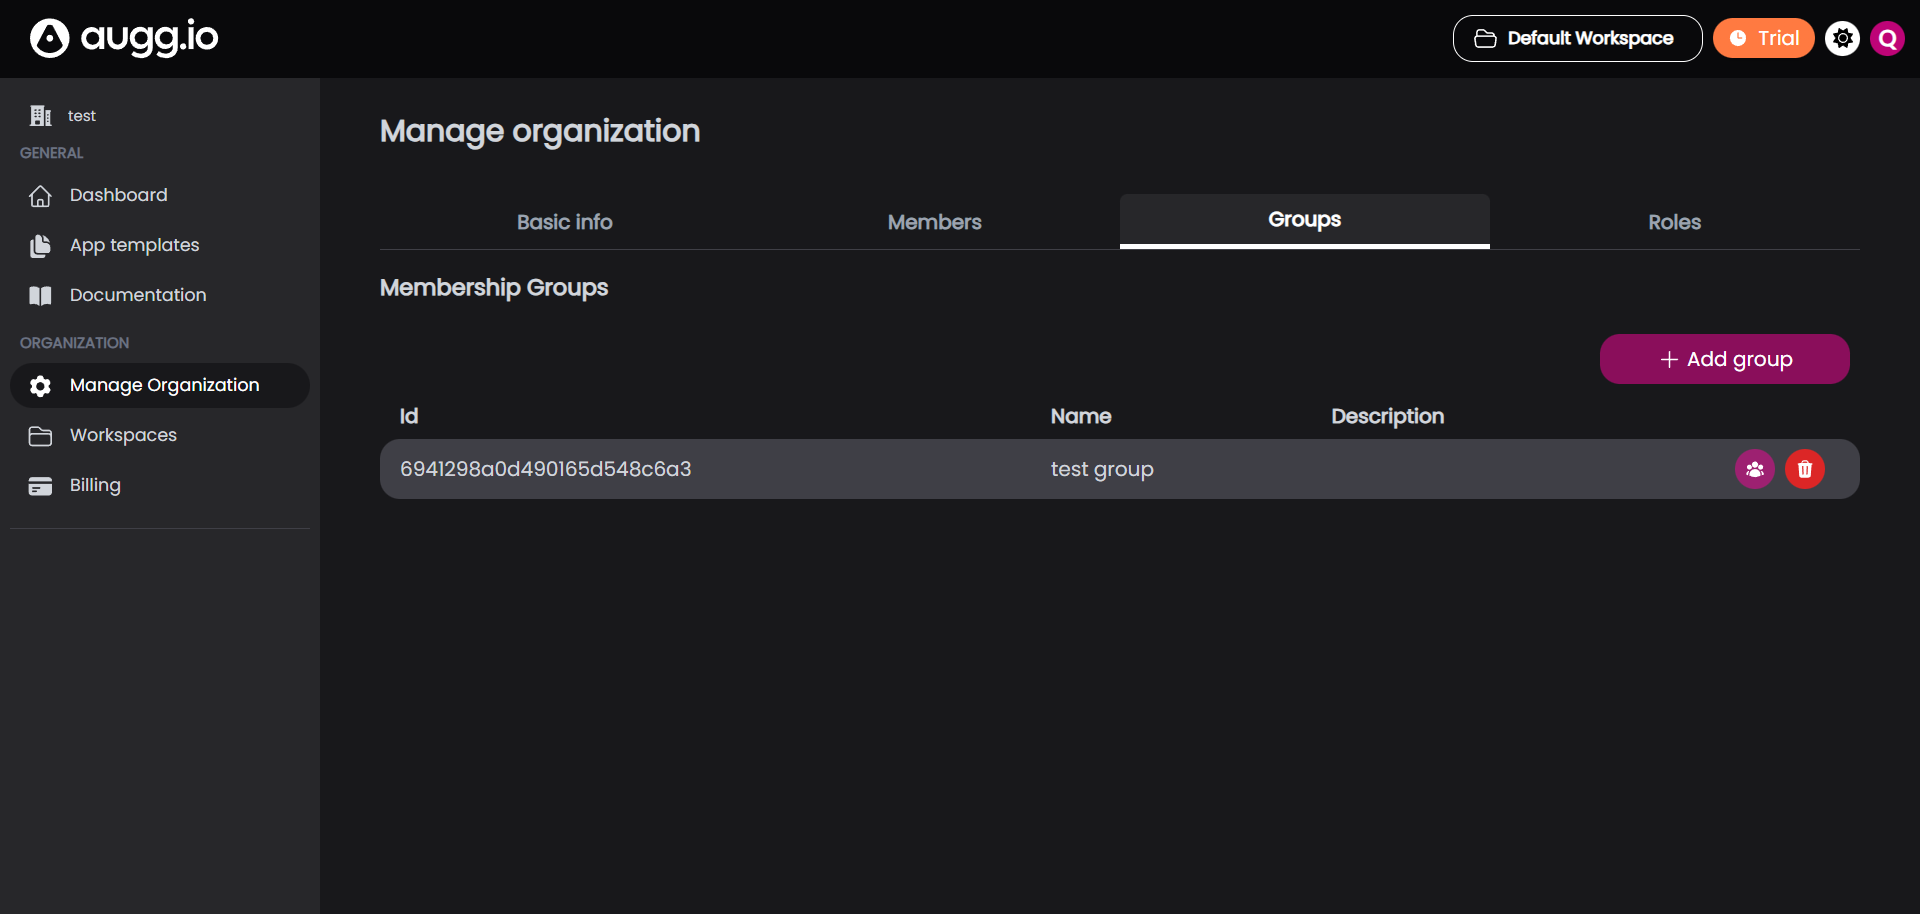
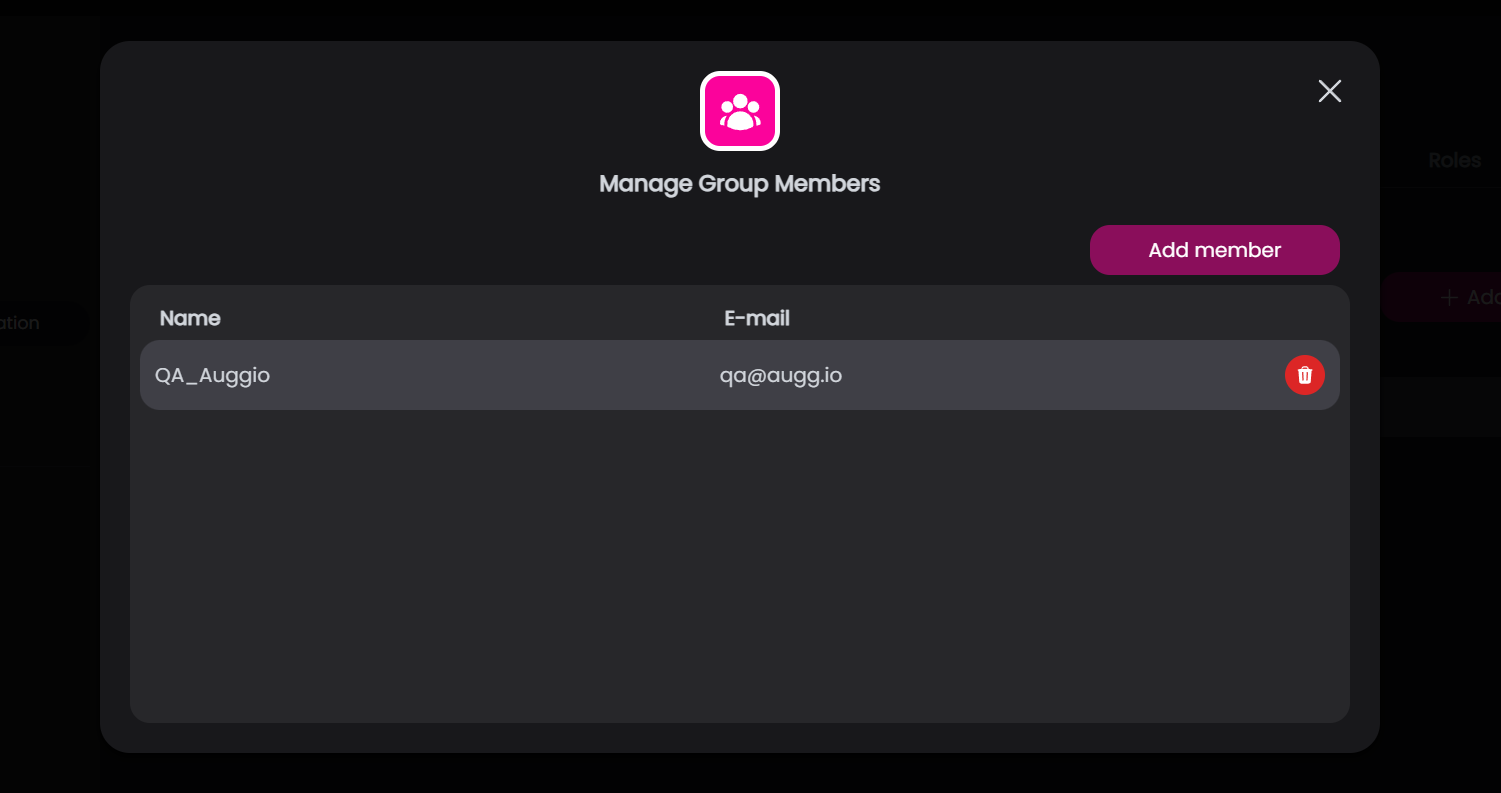
- Adding Members to Groups: Click the icon on the group to add individual accounts from your Organization’s member list to the newly created group.
- Group-Based Membership: Instead of individually assigning Content-Item Membership to every member, you can select the Group itself in the Content-Item Membership view.
- Effect: Every account currently belonging to the Group will instantly receive access to the content, simplifying management for larger teams.
Summary
- A user’s effective permissions are a combination of:
- Organization Role: Defines organization level permissions (mostly for managing the organization itself).
- Workspace Role: Defines workspace level permissions (mostly to access and create the actual content).
- Content-Item Membership: Grants the ability to see a specific Application, Location, or Experience.