Using Tags
Tags in augg.io CMS
Tags allow you to create customizable labels that can be assigned to objects.
You can also link tags with collections, which automatically links them to objects they’re assigned to.
This guide will walk you through creating, using and managing tags.
Why use Tags
Tags can help you organize and categorize objects in meaningful ways.
Example:
Suppose you are creating an Easter egg hunt game. Players find eggs of different colors, and each color has a different point value.
After placing the eggs, you can create tags that match the egg colors and assign them to the eggs.
When the game is over, you can quickly and easily identify which objects (eggs) belonged to which color group thanks to the tags.
Creating Tags
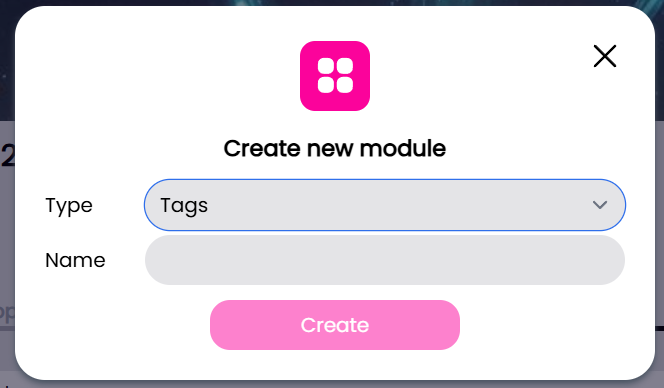
Before you can create tags, you must first add a Tags module to your application.
Creating Tags module
To create a new tag module:
- Navigate to your application in the CMS
- Select the Modules tab in your application
- Click the Add new module button
- Select Tags as the type of the module
- Enter a name for the module
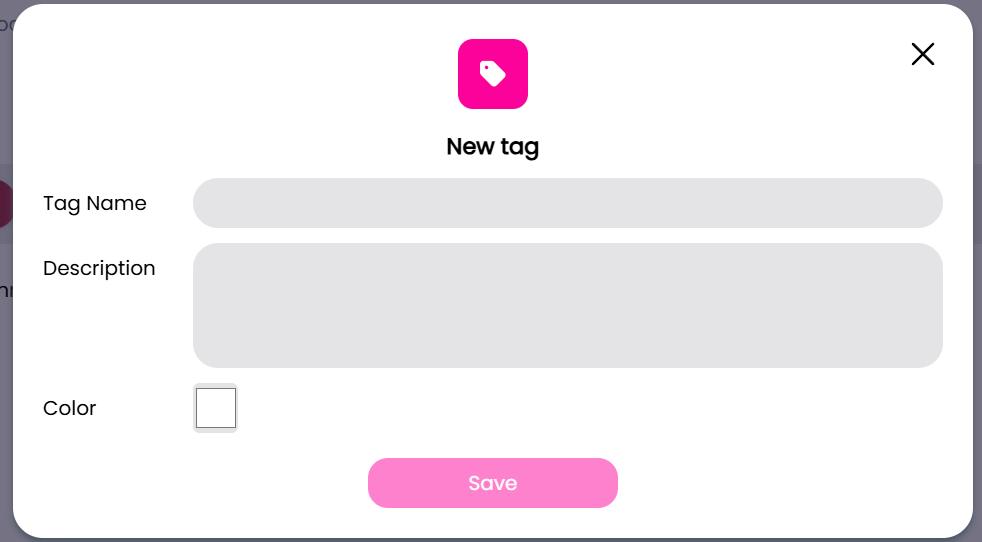
Creating a tag
To create a new tag:
- Open the Tags module
- Click the New Tag button
- Enter a name of the tag
- Optionally, add a description and choose a tag color
Linking Tags
You need to link your tags with an experience to add them to objects in that experience. You can also link your tags to collections to give them more functionality, this can be done while in the Tags module
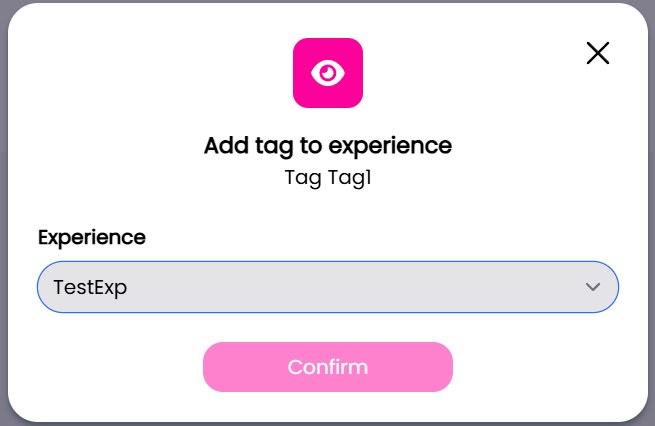
Connecting Tags to Experiences
To connect a tag to an experience:
- Click the pink eye icon of the tag you want to link to an experience
- Click Add experience
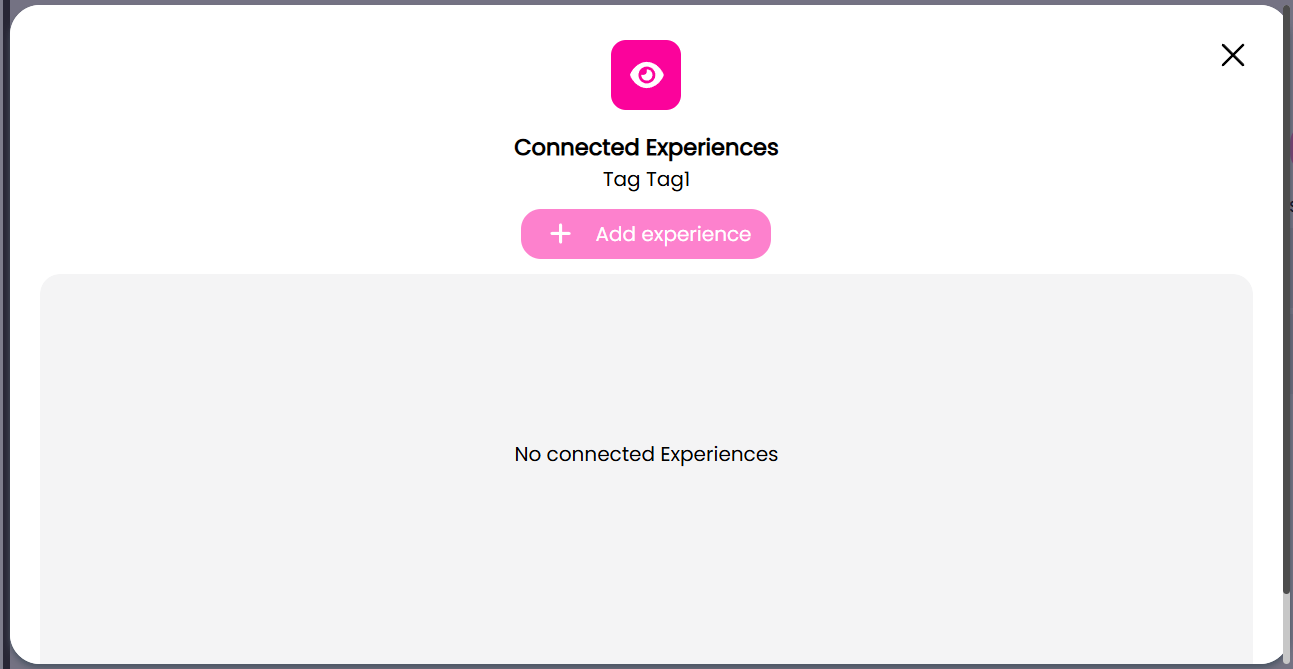
- Select the experience you want the tag linked to
- confirm the linking of the tag and the experience
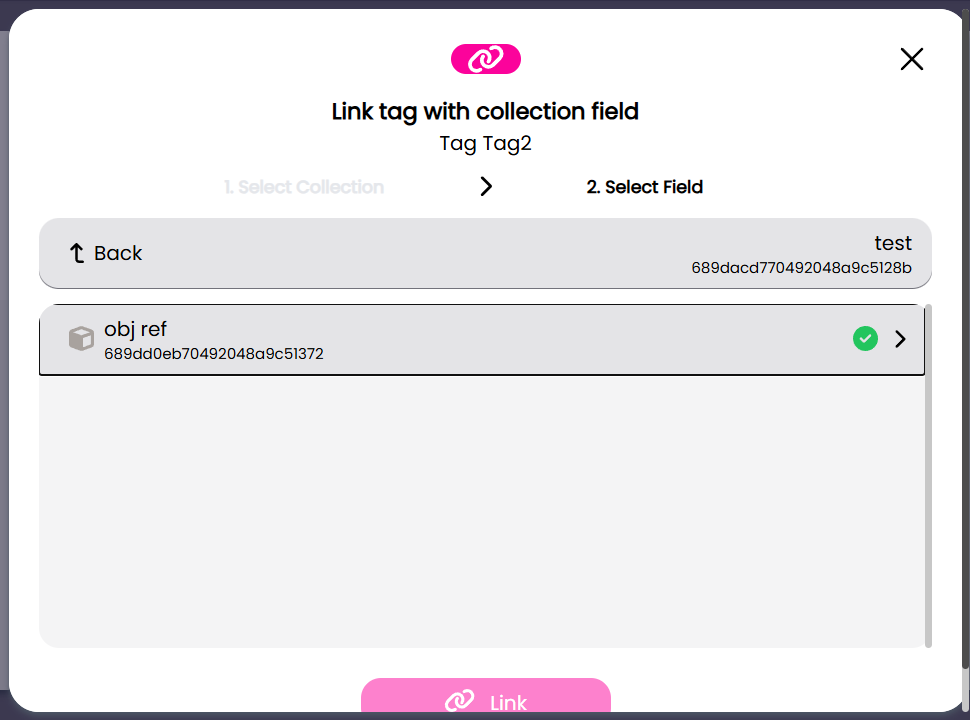
Linking Tags to Collections
To link a collection to a Tag:
- Click the blue chain icon of the tag you want to link to a collection
- Click Add collection field
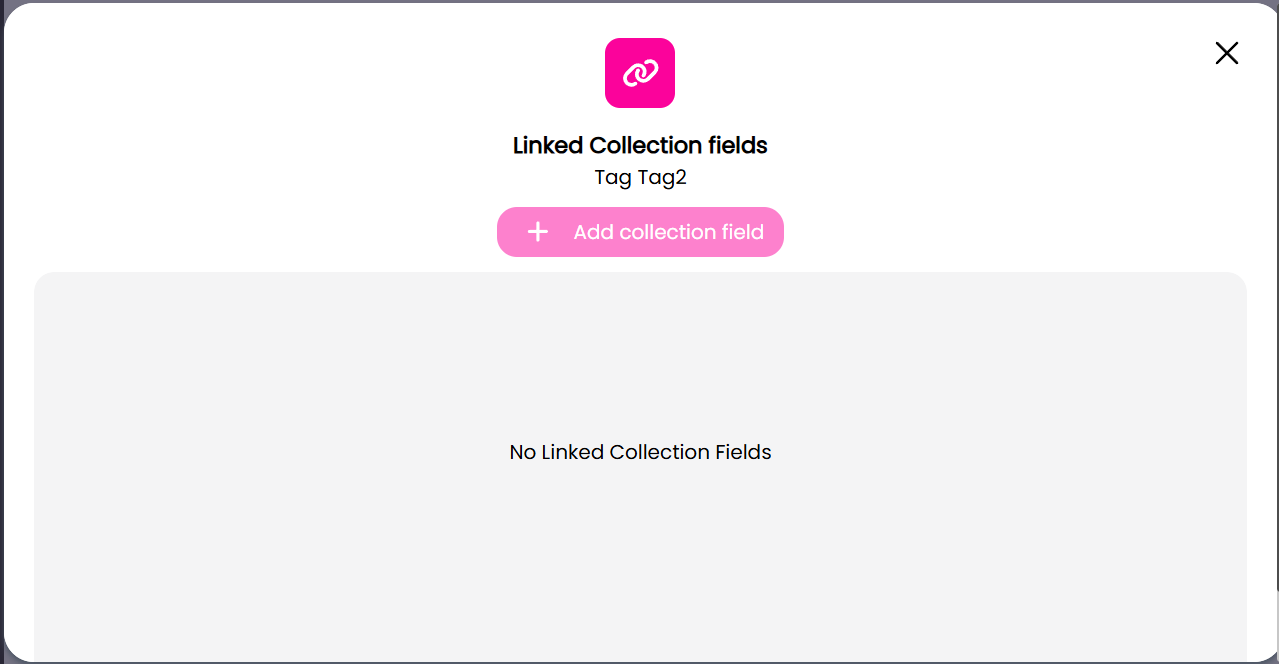
- Choose which collection you want to link with the tag
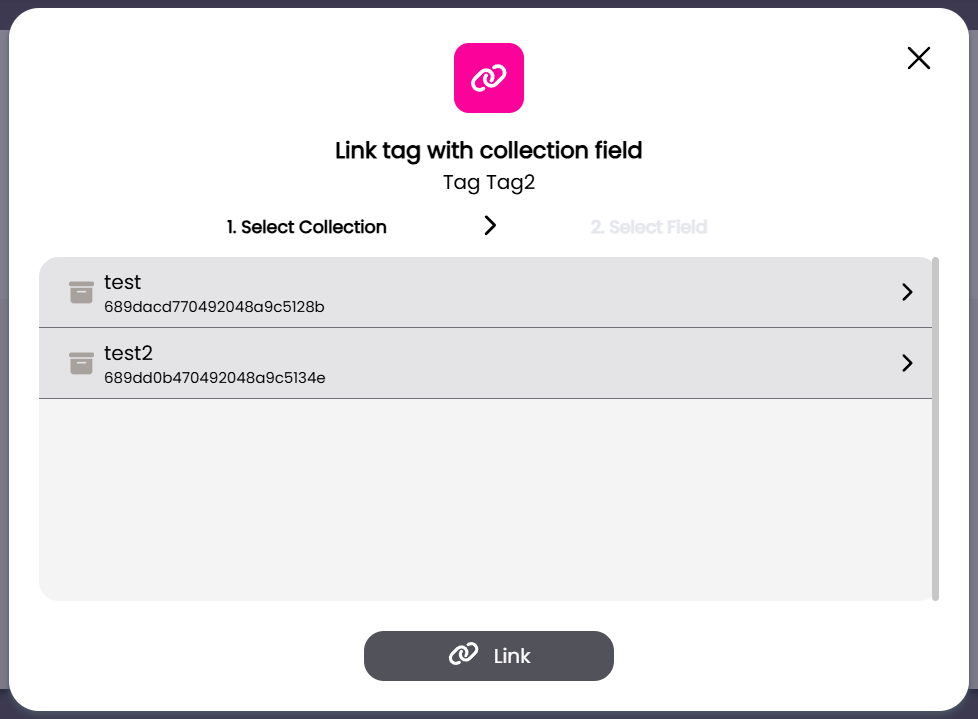
- If there are available collection schema fields to link, you will see them here
- If there are none, you will see the option to create one
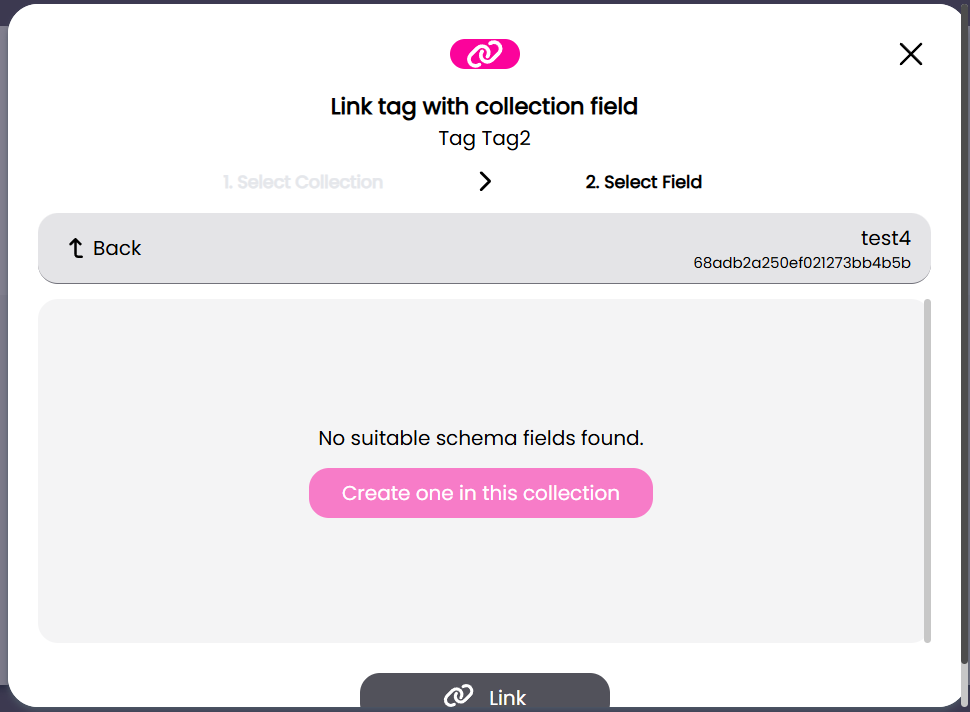
- Enter a name and confirm the creation

- after creating the field, you should see it in the list of available fields to link, just select it and finish the linking
Managing Tags
You can manage your tags while in the Tags module
Editing Tags
To edit an existing tag:
- Click on the tag you want to edit
- Update the name, description or color in the form
- Save your changes
Deleting Tags
To delete an existing tag:
- Click the red trashcan icon of the tag you want to delete
- Confirm the deletion
Using Tags
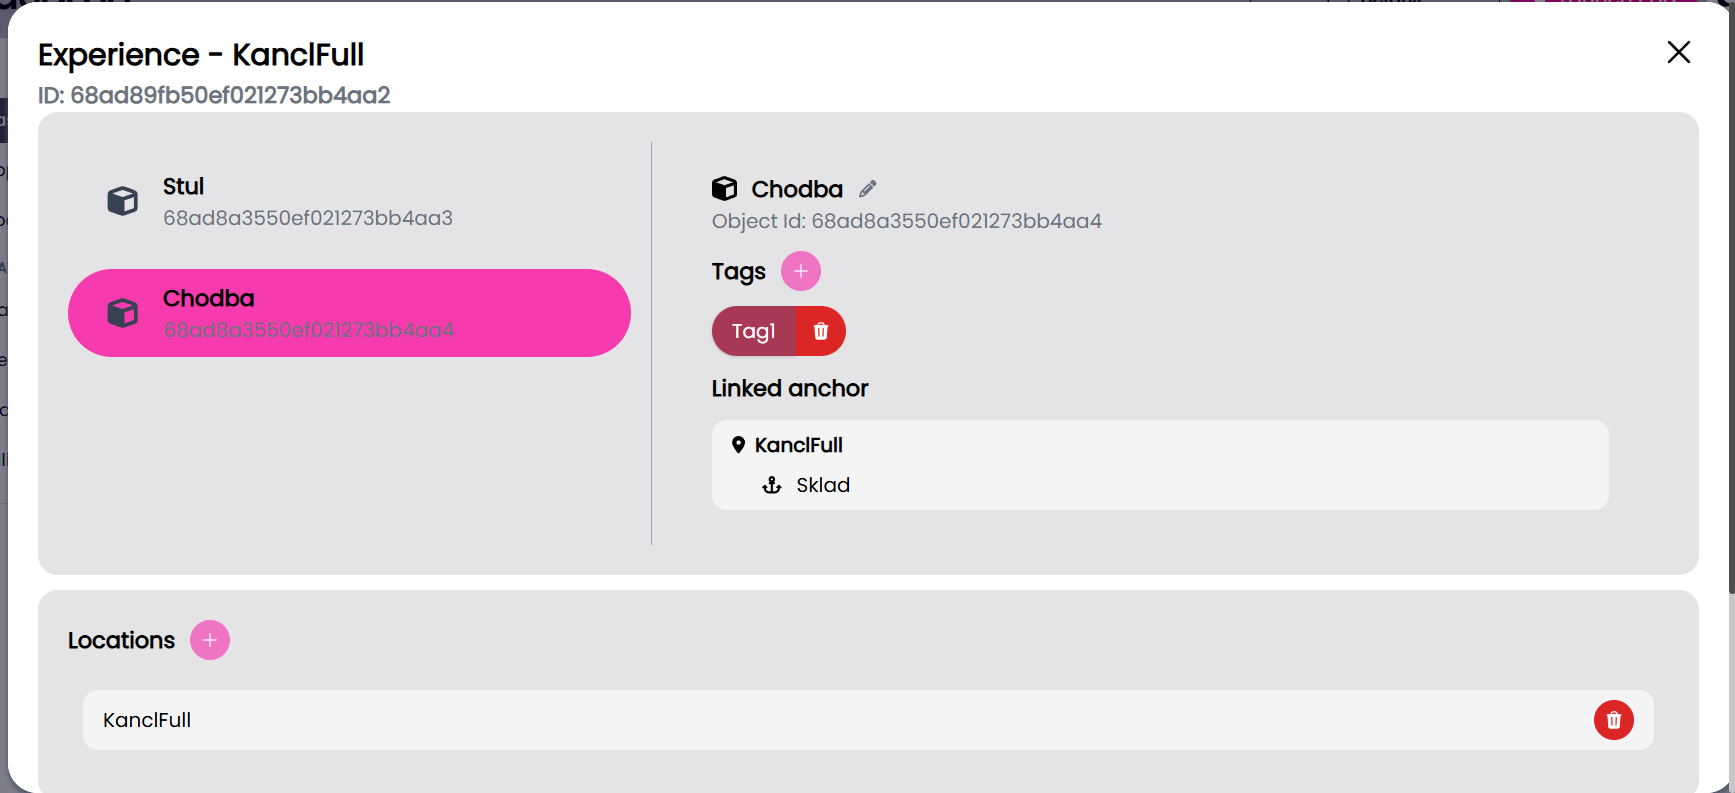
Assigning Tags to objects
To assign a tag to an object:
- Navigate to your experience in the CMS and open it
- Select the object you want to add tags to
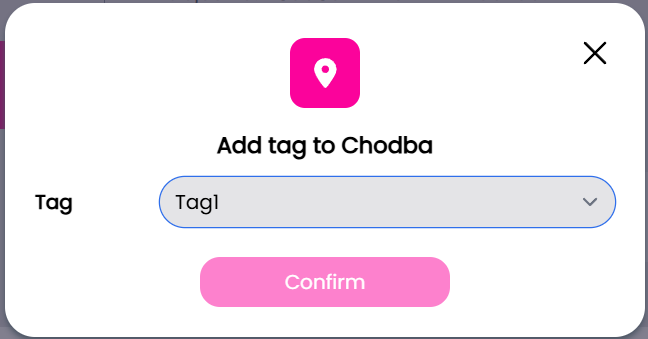
- Click the pink + icon next to Tags
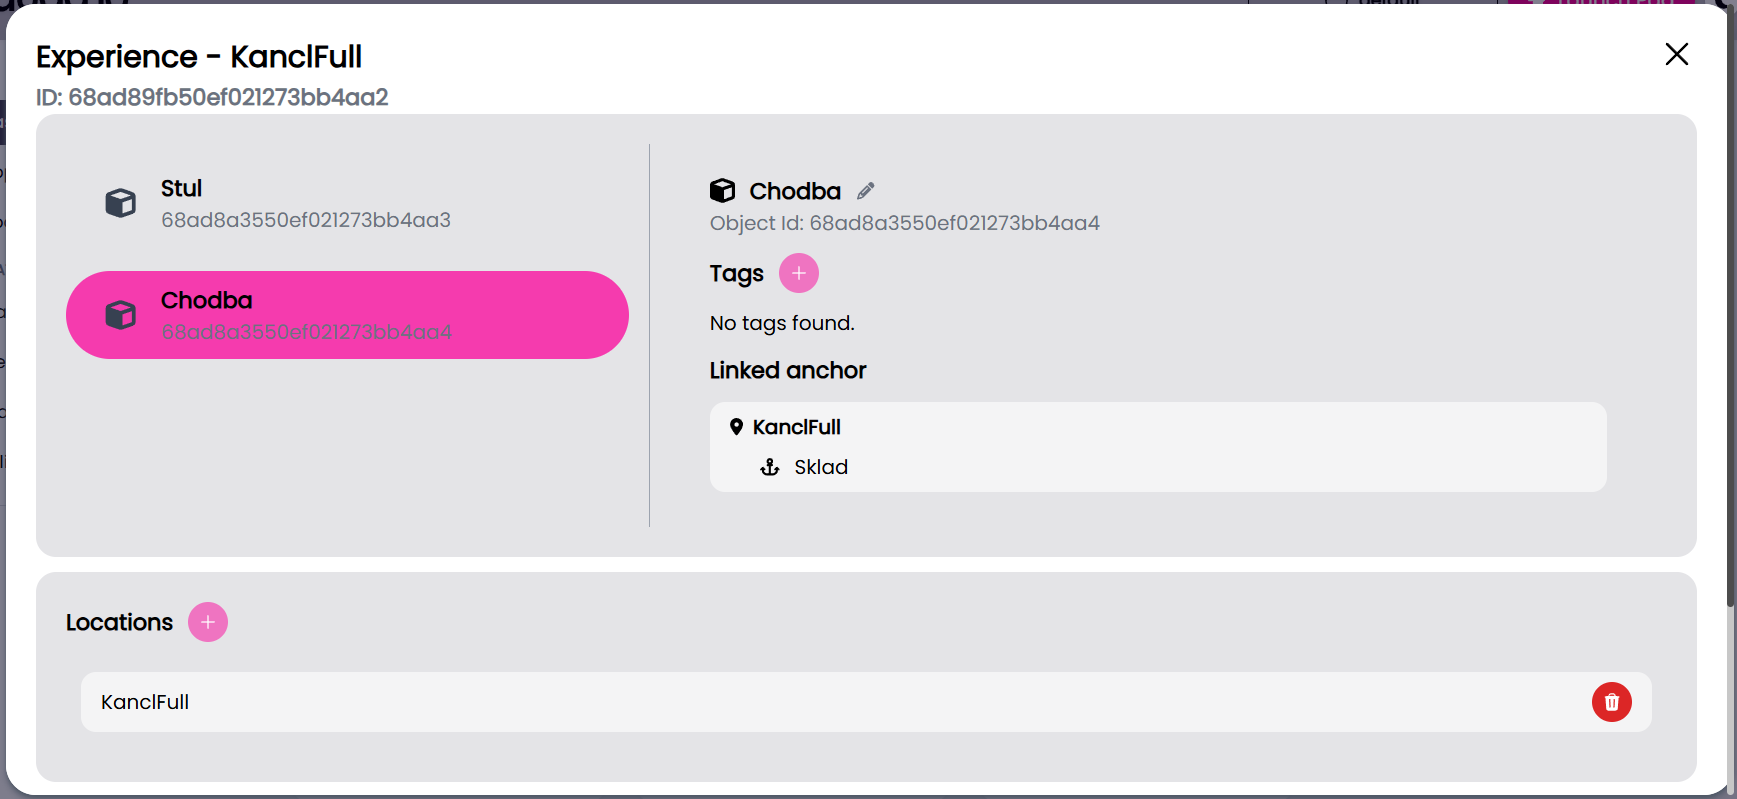
- Select the tag you want to add
Removing Tags from objects
To remove a tag from an object:
- Navigate to your experience in the CMS and open it
- Select the object you want to remove the tag from
- Click the red trash icon next to the tag you want to remove