Creating an empty project
Please use Unity 6 or newer.
Create project
-
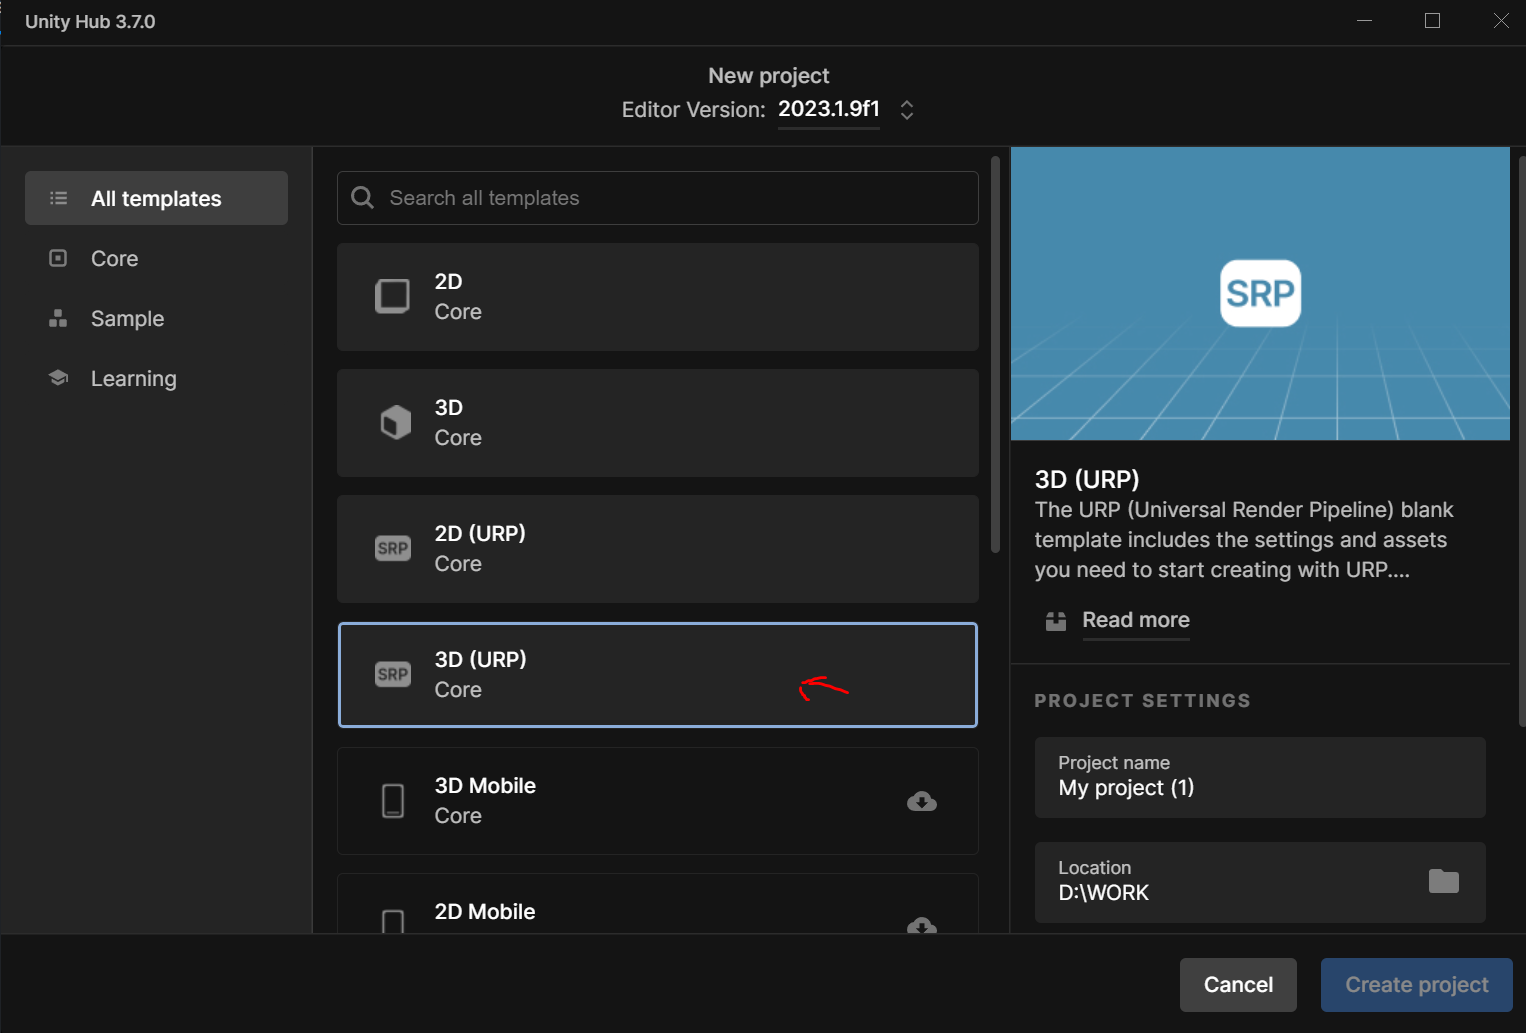
Create an empty Unity project. When asked for the template choose 3D (URP).
-
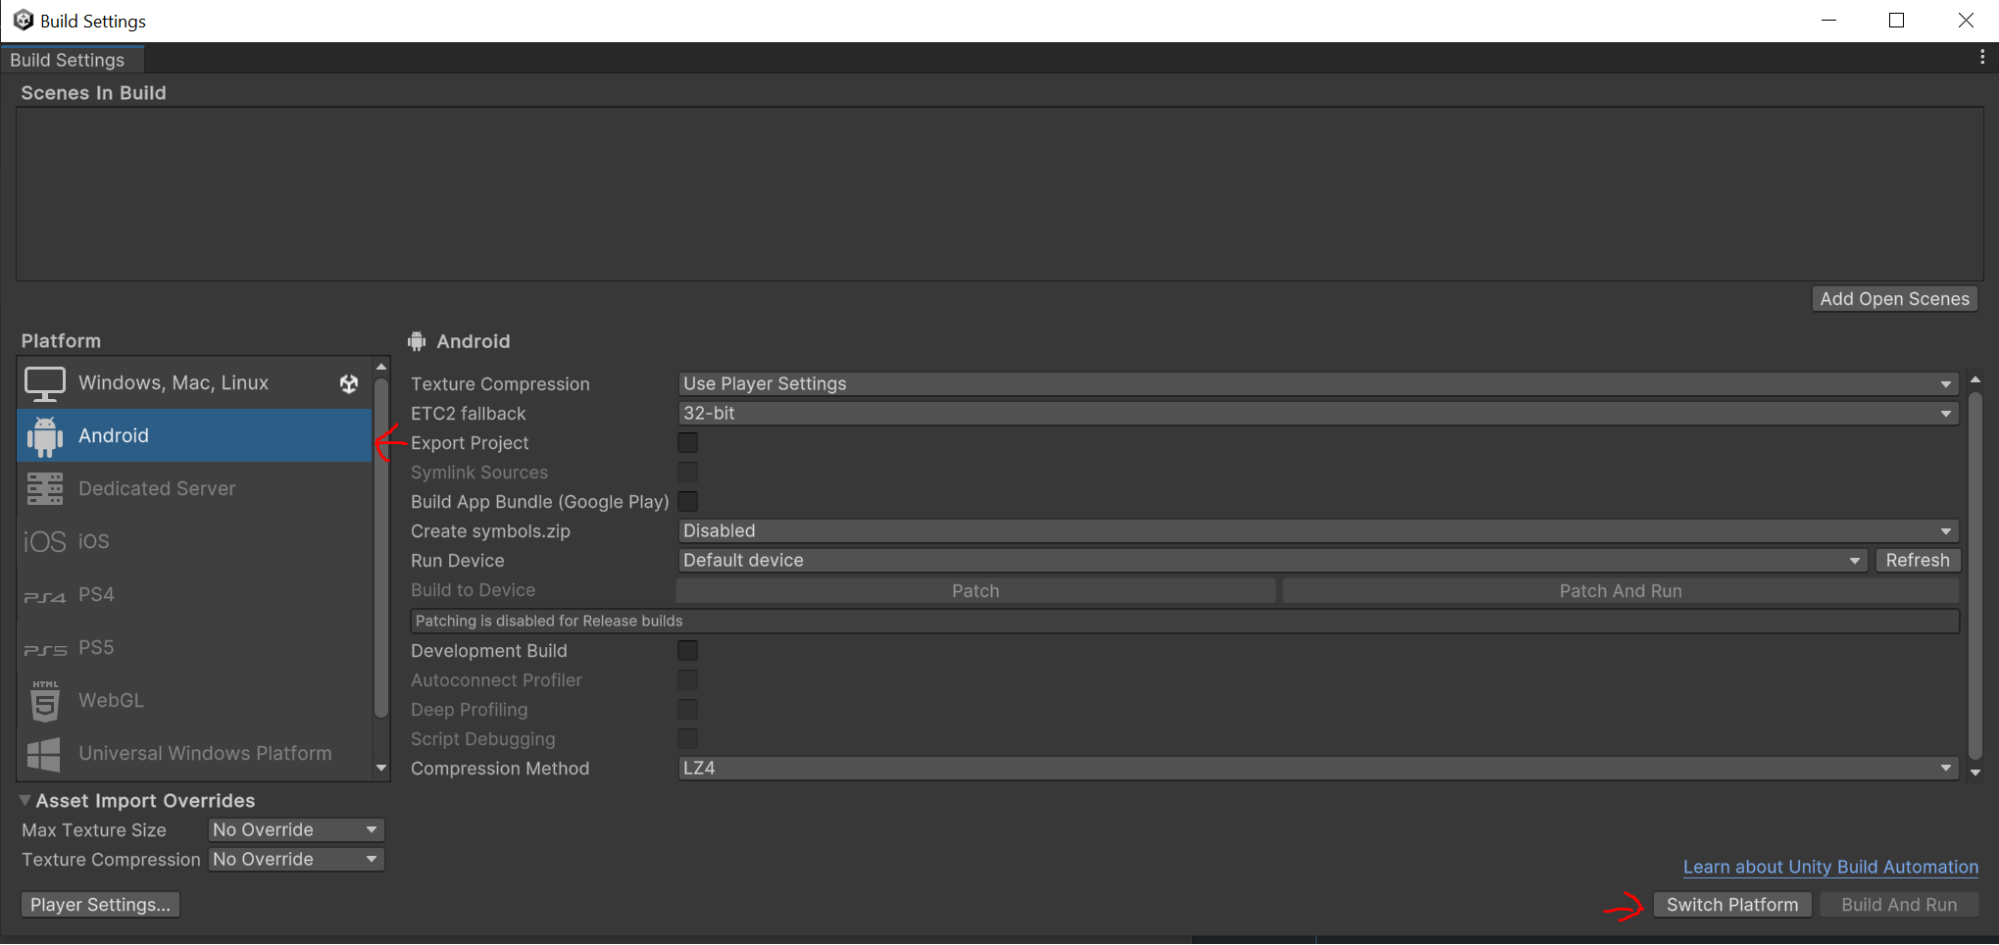
In the top menu click File -> Build Settings. In the window select Android (iOS) and click “Switch platform”.
Setup player settings (Android)
-
In the build settings window click on “Player Settings” in the left bottom corner.
-
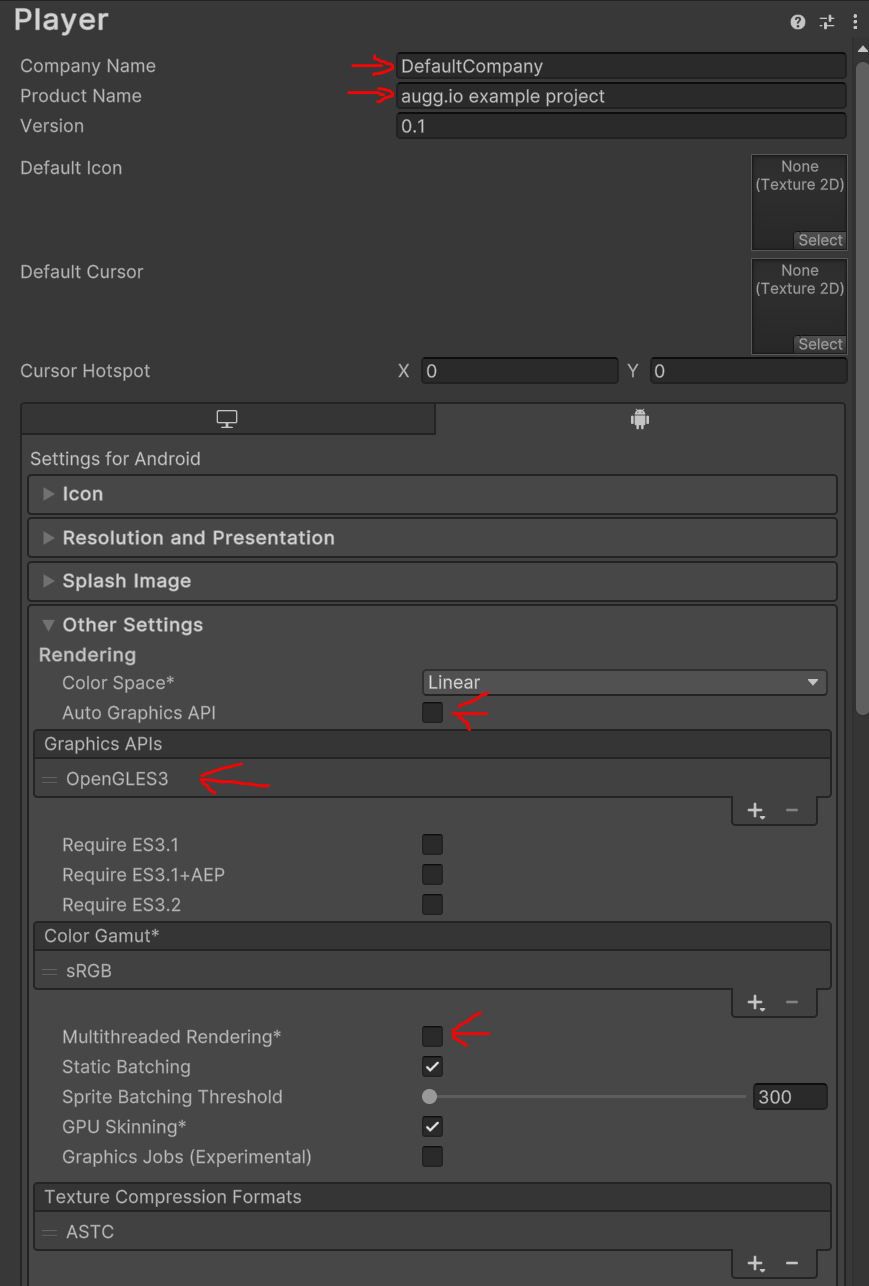
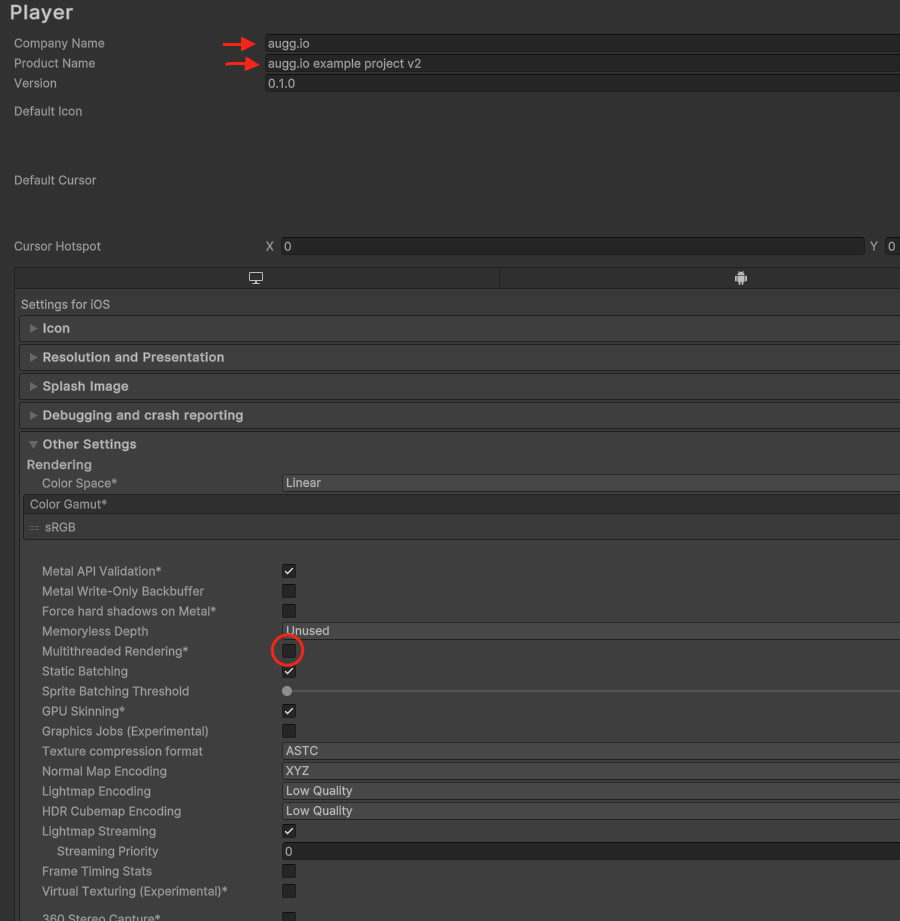
Fill in the company name and product name.
-
Set Auto Graphics API to false
-
Remove Vulkan from the list and only keep OpenGLES3.
-
Disable multithreaded rendering.
-
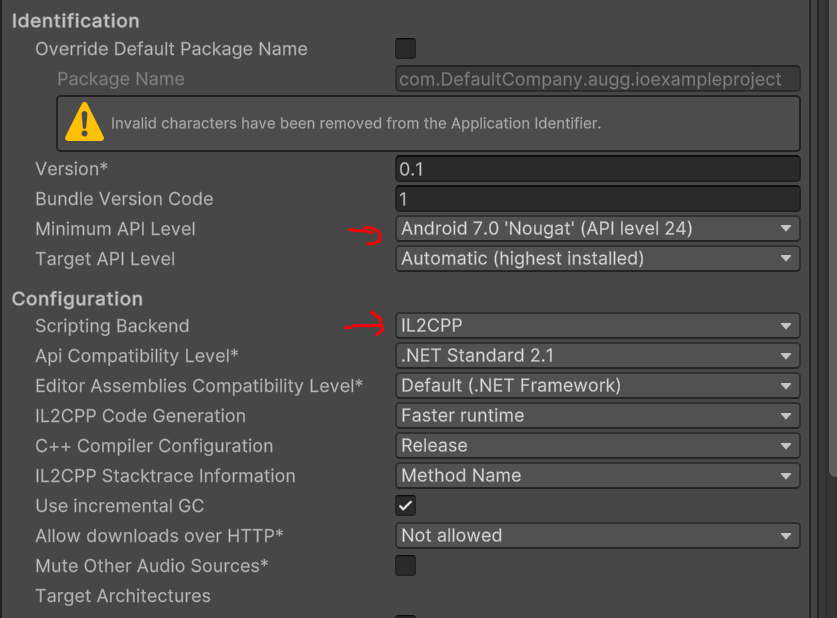
Set Minimum API Level to at least 24
-
Make sure the scripting backend (under Configuration) is set to IL2CPP.
Setup player settings (iOS)
-
In the build settings window click on “Player Settings” in the left bottom corner.
-
Fill in the company name and product name.
-
Disable multithreaded rendering.
-
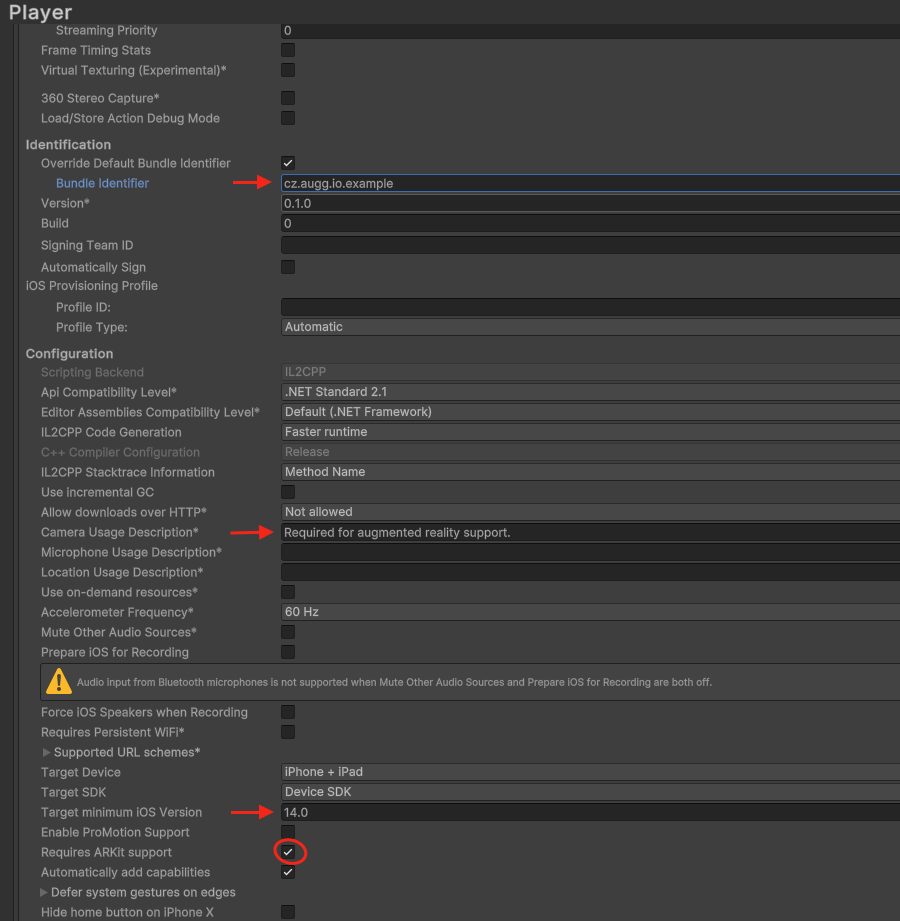
Set bundle identifier
-
Set Target minimum iOS version to 14.0
-
Set Requires ARKit Support to ‘true’
-
Fill in Camera Usage Description if not already filled in
Installing packages
-
In the top menu click on Windows -> Package Manager
-
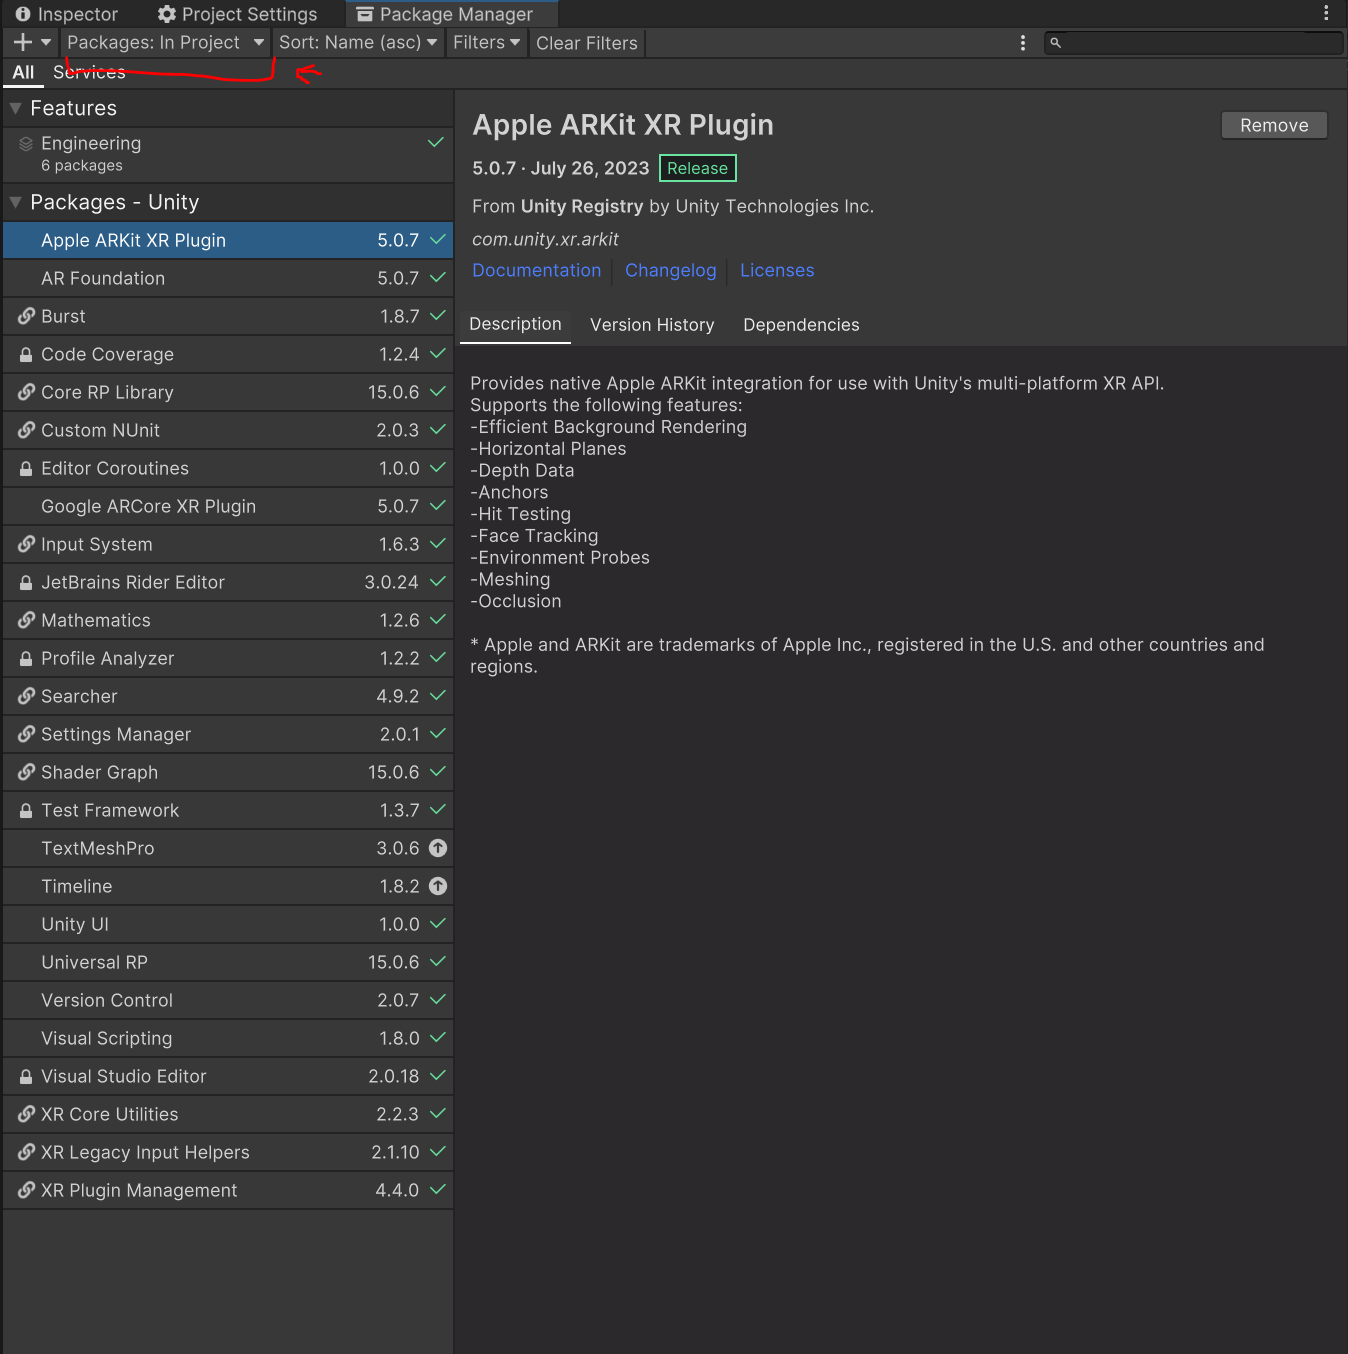
Change packages shown to Unity Registry.
-
Install Universal RP
-
Install AR Foundation
-
Install Google ARCore XR Plugin
-
Install Apple ARKit XR Plugin
-
Click the + button in the top right corner and select install package from tarball.

-
Install ARCoreExtensions by following the tutorial by Google.
-
Click the + button again and find the path to augg.io SDK tarball (tar.gz file extensions) and install into the project.
Important: If you installed an older version of ARCoreExtensions (e.g. 1.39 which is shipped with some earlier versions of augg.io) you may have a problem with building the application to iOS 18. To resolve this issue, upgrade to a newer version of ARCoreExtensions by following this tutorial Upgrading ARCoreExtensions in the project.
Setting up URP
-
Open Settings folder
-
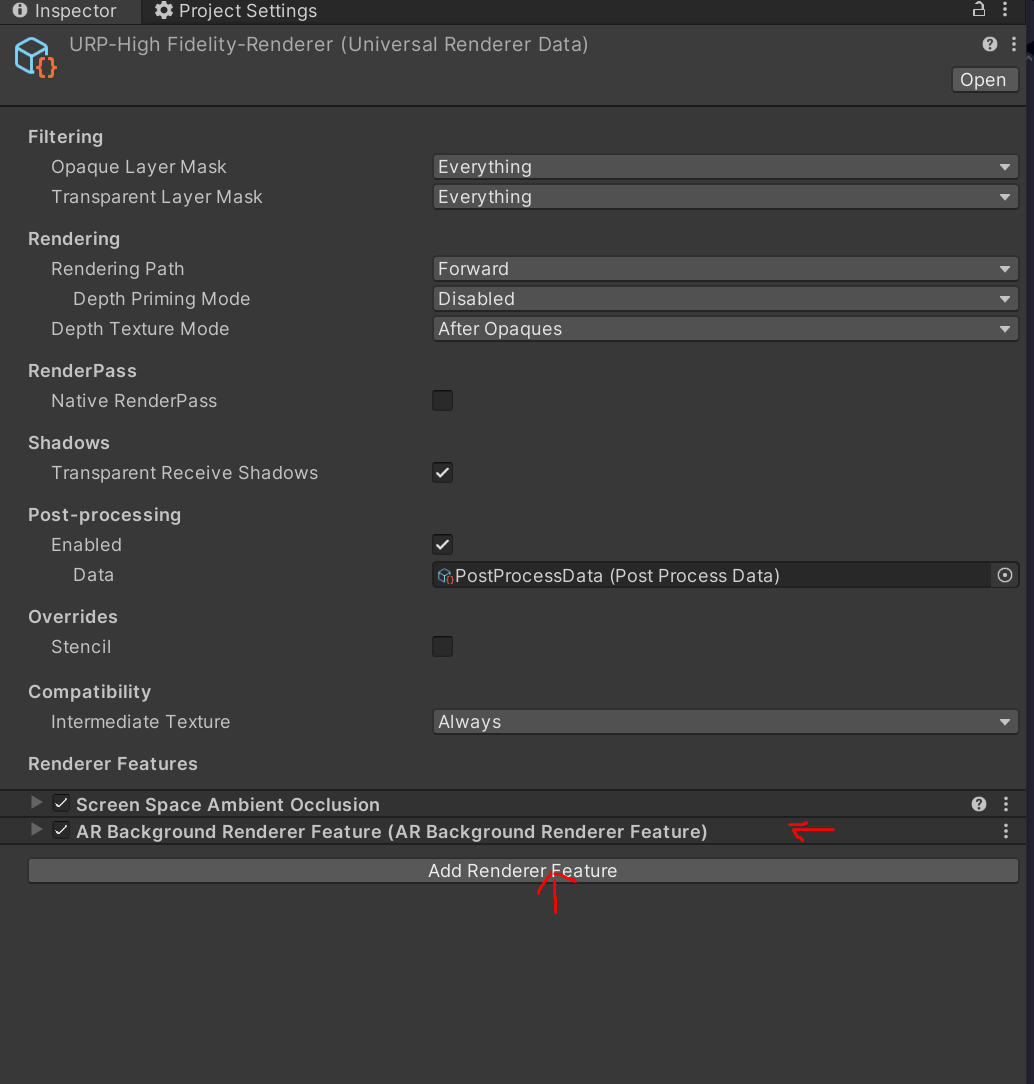
Select URP-HighFidelity-Renderer and add ARBackgroundRendererFeature.
Setting up XR
-
In Project Settings go to XR Plug-in Management
-
Set ARCore to true and confirm restart.
-
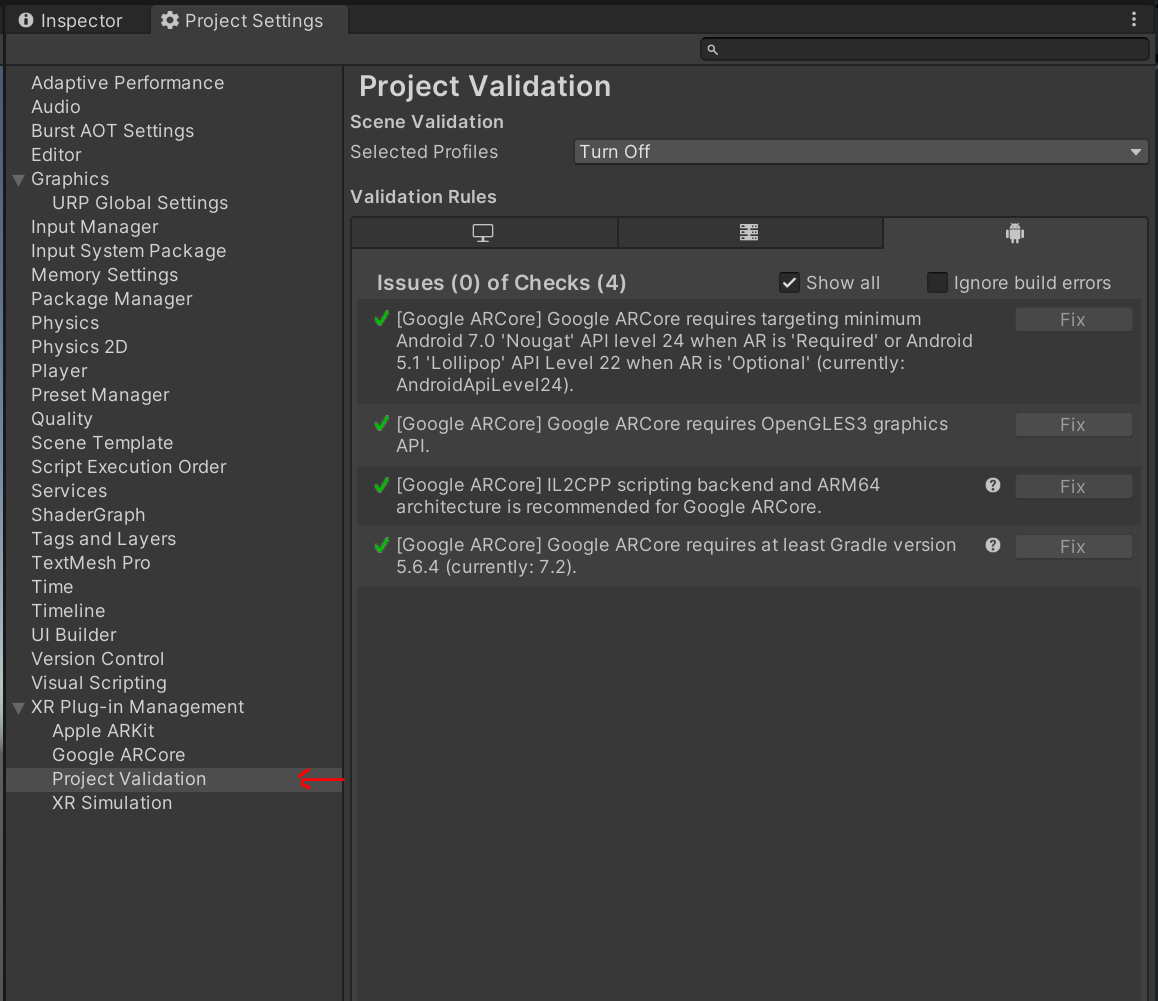
In the top menu click Edit -> Project Settings
-
Select Project Validation
-
If there are any issue click on Fix
Prepare scene
-
Create empty scene (or remove everything from the sample scene)
-
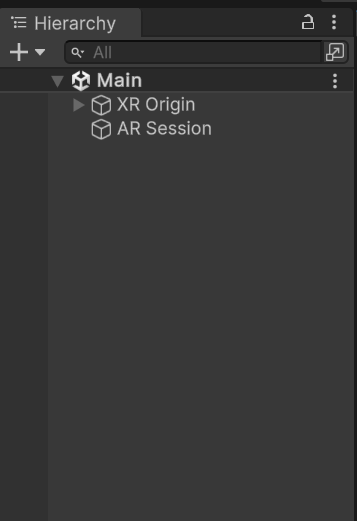
Right click in the Hierarchy window. XR -> AR Session
-
Right click in the Hierarchy window. XR -> XR Origin (Mobile AR)
-
Select XR Origin. Click add component and add ARAnchorManager (the field can be empty).
Setup ARCoreExtension
-
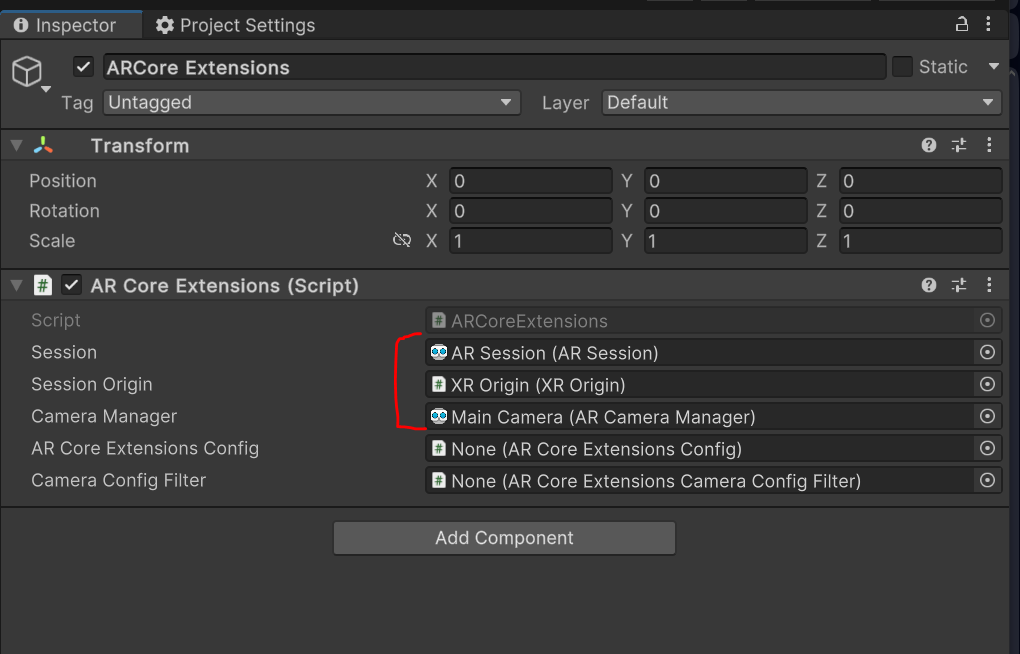
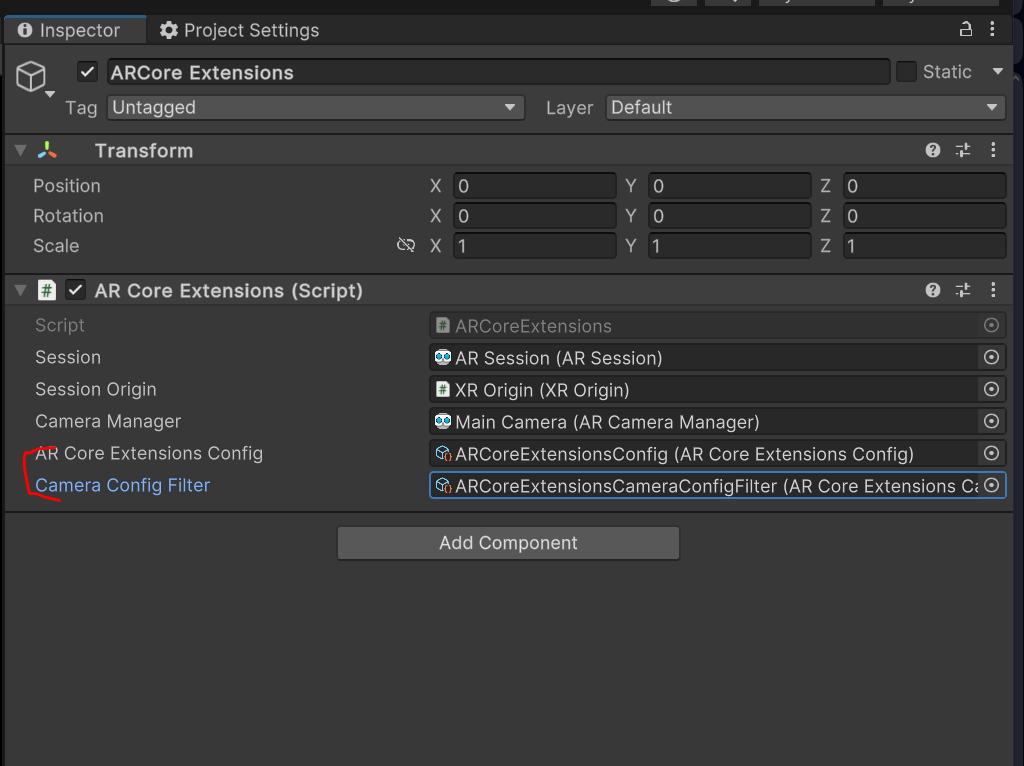
Right click in the hierarchy window. Select XR -> ARCore Extensions
-
Fill in the first three fields. Just click and select the only option available
-
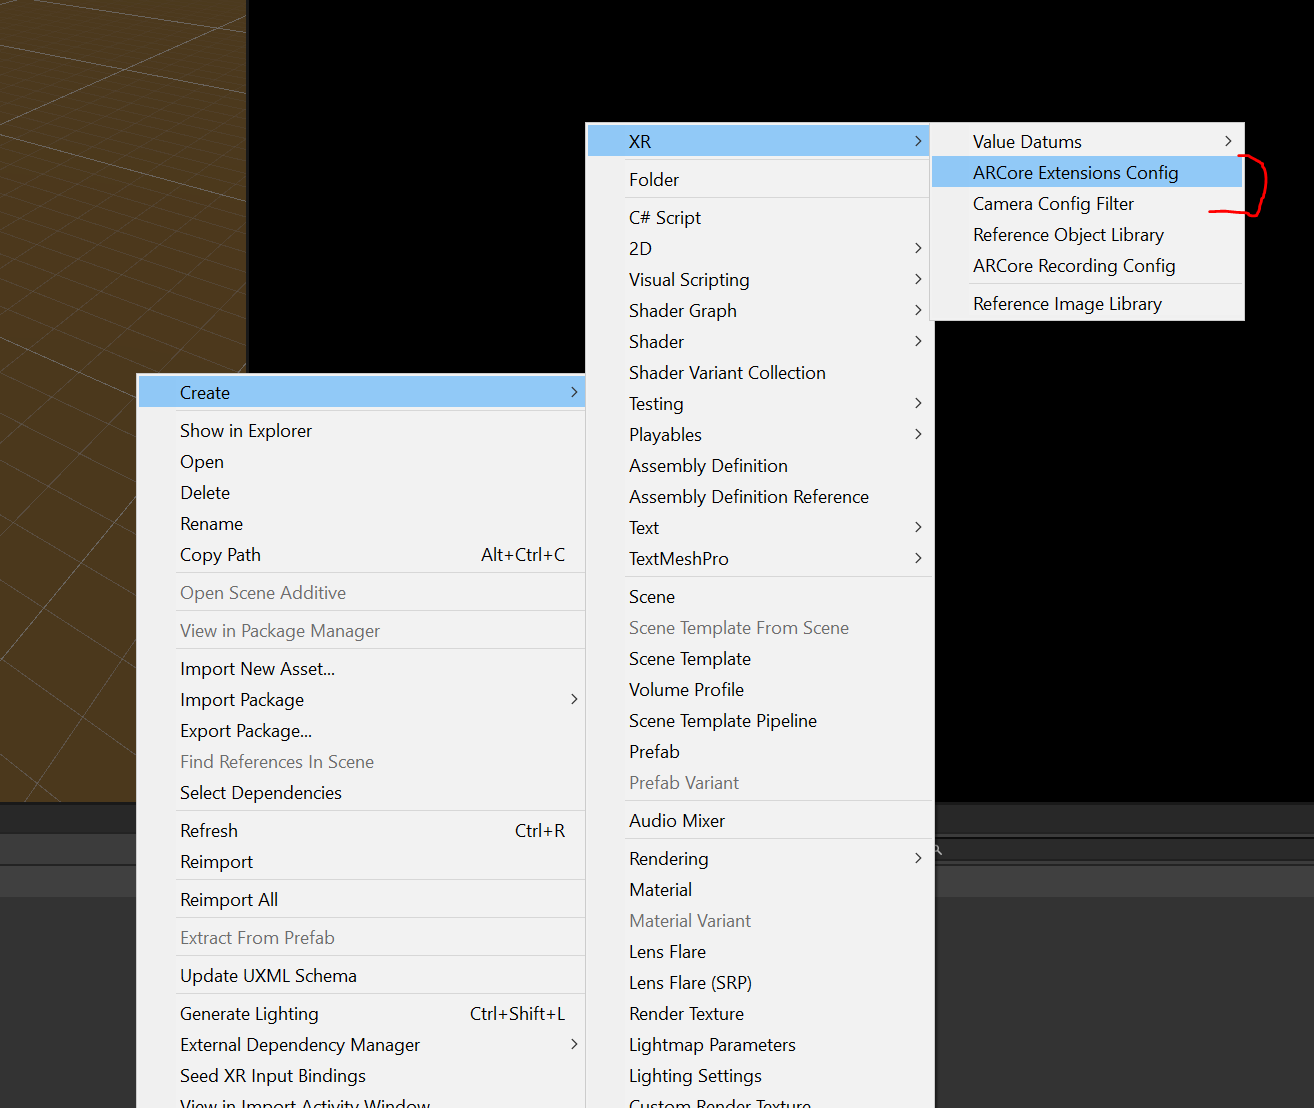
Go to the Settings folder.
-
Create ARCoreExtensionsConfig and CameraConfigFilter
-
Select the ARCoreExtensionConfig you just created. And set Cloud Anchors Mode to enabled.
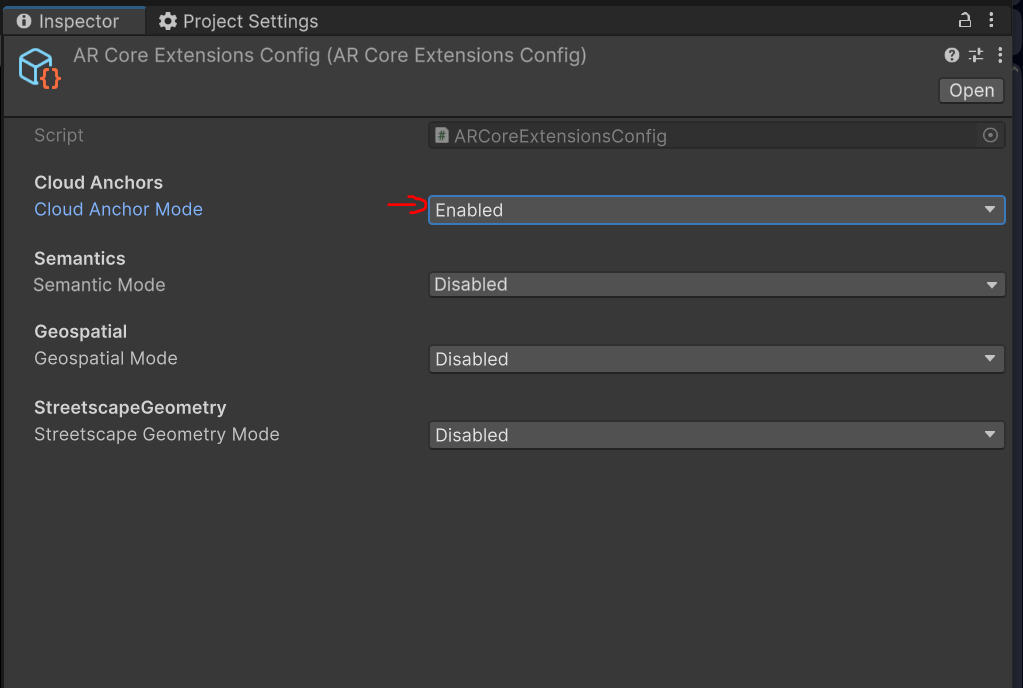
-
Select ARCoreExtension in the scene and set the two remaining fields.
Setting up scene
-
Open your AR scene (Main in the example project).
-
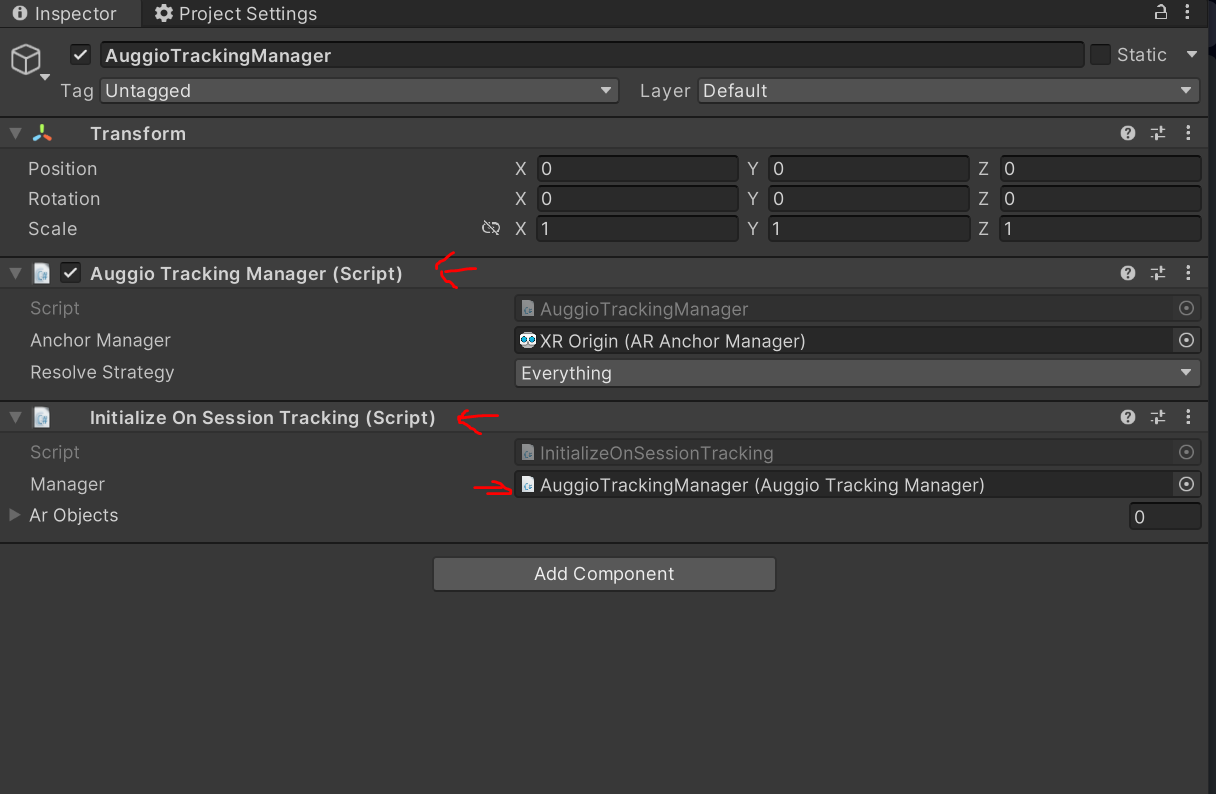
Create an empty GameObject in the scene root named AuggioTrackingManager.
-
Add AuggioTrackingManager script to the game object.
-
Add InitializeOnSessionTracking and set the reference to AuggioTrackingManager. Do this if you are not using custom initializing logic.
Congratulations, you’ve made it to the end! The next part of the guide awaits you here: 01 - Setting up augg.io in a project